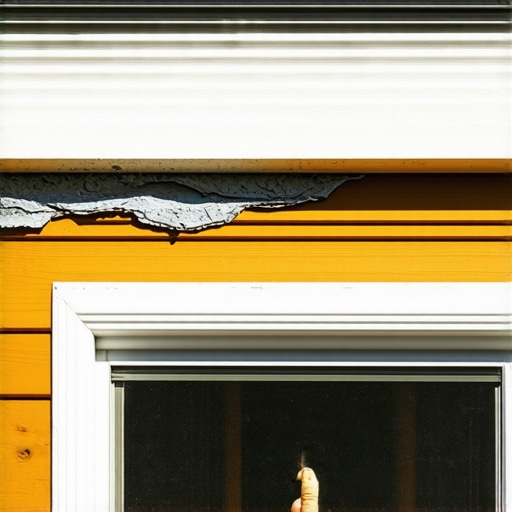
Water is a patient predator. It doesn’t need a wide-open door to ruin your home; it just needs a microscopic fracture in your exterior envelope. In my twenty-five years as a master glazier, I have seen more structural damage caused by a fifty-cent bead of failed sealant than by actual glass breakage. When we talk about window maintenance, most homeowners think about a bottle of window cleaner and a rag. But as a professional, my focus is on the head flashing—specifically the window cap—and the sealant that integrates it into your siding system.
The Reality of the Rotted Header
I remember a project in a suburb of Chicago where I was called in to assess what the owner thought was a minor leak. They had just hired a window cleaner who noticed some ‘soft spots’ on the interior trim. I pulled a vinyl window out of that house and the header was completely black with rot. It wasn’t a manufacturing defect. The previous installer relied on the nailing fin instead of proper flashing tape and had failed to maintain the caulk bead at the window cap. The water had been wicking behind the drip cap for five years, slowly digesting the structural framing of the house. This is why we don’t just ‘caulk and walk.’ We manage the physics of the wall.
“Installation is just as critical as the window performance itself. A high-performance window installed poorly will fail.” – AAMA Installation Masters Guide
The Anatomy of the Window Cap and Drip Edge
To understand why that bead of caulk is so critical, you have to understand the ‘Shingle Principle.’ In professional glazing, we assume that all exterior materials will eventually let water through. Our goal is to ensure that when it does get through, it is directed back out. The window cap, or head flashing, is an L-shaped piece of metal or rigid plastic that sits atop the window frame. Its primary job is to bridge the gap between the window and the siding, ensuring that water running down the wall is diverted over the face of the window rather than behind it. However, the interface between that cap and the siding is a high-stress transition zone. This is where the sealant comes into play. If the caulk fails, hydrostatic pressure and capillary action can actually suck water upward and over the back leg of the flashing, dumping it directly onto your rough opening. Once moisture hits that raw wood, the clock starts ticking on a very expensive window repair.
The Physics of Thermal Expansion and Sealant Failure
In colder climates like Minneapolis or Chicago, we deal with extreme thermal cycling. Your window frame and your siding have different coefficients of linear thermal expansion. A vinyl window frame expands and contracts significantly more than the wood framing it sits in. This creates a constant ‘tugging’ on the caulk bead. This is why I demand the use of high-performance sealants that meet ASTM C920 standards. If you use a cheap latex caulk from a big-box store, it will lose its elasticity within two seasons. When the temperature hits twenty below zero, that caulk becomes brittle. When the sun hits the window the next day, the frame expands, and the brittle caulk undergoes ‘cohesive failure’—it literally rips itself apart. We look for ‘adhesive failure’ as well, where the caulk remains intact but peels away from the substrate. If you see a gap the thickness of a credit card, you are already in the danger zone.
The Glazing Zoom: Sealant Chemistry
Not all tubes of goo are created equal. For a window cap, we often debate between neutral-cure silicones and polyurethane sealants. Acetoxy silicones—the ones that smell like vinegar—should never be used on metal window caps as they can promote corrosion. Neutral-cure silicones offer superior UV resistance and movement capability, but they aren’t paintable. Polyurethanes are incredibly tough and stick to almost anything, but they can break down under intense solar radiation over a decade. When you are performing a window repair, choosing the wrong chemistry can lead to a chemical reaction that prevents the new bead from ever properly bonding. This is why professional knowledge trumps a DIY approach every time.
“Sealant joints shall be designed to accommodate the expected movement of the window and the surrounding wall system.” – ASTM E2112 Standard Practice for Installation of Exterior Windows
Why You Might Need to Replace Windows Instead of Repairing
I often tell clients that if they catch a caulk failure early, it’s a twenty-minute fix. If they wait, it’s a five-thousand-dollar structural overhaul. When the window cap sealant fails, water enters the wall cavity and gets trapped. In a cold climate, this water undergoes freeze-thaw cycles, expanding as it turns to ice and prying the window frame away from the rough opening. If you notice your sash is difficult to operate, or if you see daylight through the corners of the frame, the damage may already be internal. At that point, you aren’t just looking for a window repair; you likely need to replace windows entirely to address the rot in the jack studs and king studs. We use a moisture meter to check the levels behind the drywall. If I see a reading over 20%, we are talking about a full-frame tear-out, not just a pocket replacement.
The Role of the Window Cleaner as an Inspector
While a window cleaner is primarily focused on the clarity of the glass and the cleanliness of the muntins, they are actually your first line of defense. A professional cleaner who spends time on a ladder has a birds-eye view of your window caps that you don’t get from the ground. I always tell my clients to ask their cleaner to look for cracked sealant or ‘tented’ caulk beads at the head of the window. If they see the metal cap has started to bow or if the weep holes are clogged with debris, that is a signal to call a glazier immediately. Clogged weep holes are a silent killer; they prevent the sill pan from draining, which forces water back into the house during a heavy wind-driven rain event.
How to Properly Inspect Your Window Caps
To do a proper inspection, you need to look at the ‘wet seal’—the point where the window frame meets the glass—and the ‘perimeter seal’—where the frame meets the house. Start at the top. The drip cap should be sloped outward. The bead of caulk should be thick, tooled smoothly into the joint, and show no signs of ‘alligatoring’ (tiny cracks that look like reptile skin). Check the shims. If the window was poorly shimmed, the frame may be sagging, which puts uneven pressure on the sealant. Finally, look at the mitered corners of the window itself. If the glazing bead is popping out, the entire window structure is under stress. Water management is a science of details. Don’t let a small gap in your caulk turn into a structural catastrophe. Keep your seals tight, your weep holes clear, and your headers dry.