The Mechanical Failure of the Casement Window: Why Your Crank Is Stripped
There is a specific kind of frustration that occurs when you attempt to crank a casement window shut against a biting February wind, only to feel that sickening slip of metal on metal. You turn the handle, but the operable sash refuses to budge that final quarter-inch. Most homeowners assume the window is dead. I once sat across from a homeowner who had just finished a presentation from a high-pressure salesman. This ‘Tin Man’ was trying to convince them that their stripped crank was a symptom of a structurally failed frame, suggesting a $20,000 triple-pane krypton-filled replacement package for the entire house. I had to step in and show them that the Rough Opening was perfectly square and the frame was solid; the issue was a simple $40 operator assembly that had been forced once too often. The ROI on a full replacement just to fix a crank would have been roughly 150 years. We fixed the gear, cleaned the tracks, and that window is still airtight today.
The Physics of the Stripped Gear: Beyond the Handle
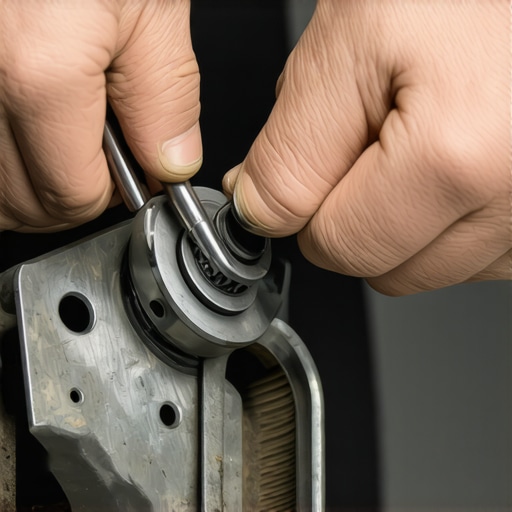
To understand the fix, you have to understand the anatomy of the failure. A casement window works through a worm-gear operator. When you turn the handle, you are rotating a worm gear that engages a larger gear known as the sector gear. These components are typically housed in a zinc-die-cast casing. The most common point of failure is not actually the gears themselves, but the splines on the spindle where the handle attaches. These splines are the small teeth that lock the handle to the operator. If the sash is stuck due to paint, debris, or a lack of lubrication, the torque applied to the handle exceeds the shear strength of the zinc teeth.
“Installation is just as critical as the window performance itself. A high-performance window installed poorly will fail.” – AAMA Installation Masters Guide
This principle applies to mechanical components as well; if the window is not shimmed correctly, the frame can bow, causing the hardware to bind and eventually strip.
Climate Context: Why This Matters in Cold Regions
In cold climates like Minneapolis or Chicago, a stripped crank is more than a nuisance; it is a thermal disaster. When a window cannot be fully cranked into its locking position, the weatherstripping is not compressed. This creates a direct path for air infiltration. In the glazing world, we focus heavily on the U-Factor, which measures the rate of heat loss. A high-performance window might have a U-Factor of 0.25, but if the sash is gapping by even a sixteenth of an inch because the crank is stripped, that rating effectively drops to zero. You are no longer managing heat; you are simply heating the outdoors. This is where condensation begins to form on the Glazing Bead and the interior wood, leading to rot. If you are in the North, you need that mechanical pull to ensure the Low-E coating on Surface #3 can actually do its job by reflecting heat back into the room rather than letting it escape through a mechanical gap.
The Installation Autopsy: Step-by-Step Replacement
Before you replace windows entirely, you must perform a mechanical autopsy. First, remove the handle and inspect the splines. If the teeth on the spindle are flat, the operator must be replaced. To do this, you must first remove the sill cover or the wooden trim that hides the operator housing. This often requires a stiff putty knife to pop the nails or the Glazing Bead if it is an older unit. Once the housing is exposed, you will likely find three or four screws holding the operator to the frame. Do not simply unscrew them. You must first disconnect the operator arm from the track on the bottom of the sash. This is often the trickiest part. You may need to open the window manually by pushing the sash out once the handle is removed. Look for a notch in the track that allows the slider to pop out. If the window is ‘paint-stuck,’ use a snap-off blade to carefully score the perimeter of the sash where it meets the frame. Do not force it, or you will crack the glass, turning a hardware repair into a full window repair project.
The Importance of Track Maintenance
Many homeowners call a window cleaner when they see dirt, but they rarely think about how that dirt affects the mechanics. Grime, dead insects, and dried-out factory grease create immense friction in the tracks. This friction is what causes the gear teeth to strip in the first place. Every time I perform an installation, I check the Sill Pan and the tracks. If there is a buildup of grit, the operator has to work twice as hard.
“Standard Practice for Installation of Exterior Windows requires that all moving parts be free of obstruction and properly lubricated to ensure long-term performance.” – ASTM E2112
When replacing the crank, you must also clean the stainless steel tracks with a vacuum and a solvent-based cleaner, then apply a dry silicone spray. Never use heavy grease, as it attracts more grit, eventually creating a grinding paste that will destroy your new operator gears in a few seasons.
The Role of Shims and Leveling
If you find that your cranks are stripping frequently on the same window, the problem isn’t the hardware; it is the Rough Opening or the Shim placement. If the window frame is not perfectly level and square, the sash will ‘drag’ on the Muntin or the side jambs. This creates a ‘hinge drag’ scenario. You can test this by looking for wear marks on the bottom of the sash or the sill. If the window is sagging, no amount of new cranks will fix the problem. You may need to remove the interior casing and adjust the shims to lift the frame slightly. This ensures the sash enters the frame without resistance, allowing the operator to glide the window shut with minimal torque. This is why water management is a science; if the Sill Pan is not level, the Weep Hole system might also fail, leading to internal rot that weakens the wood where the operator is screwed in, causing the screws to pull out and the gears to misalign.
Final Verdict: Repair or Replace?
While I am a proponent of repairing quality wood or fiberglass windows, there comes a point where you should replace windows. If the frame is vinyl and has significant ‘thermal smile’ (bowing due to heat expansion), or if the wood is soft and cannot hold a screw, a new operator is just a temporary bandage. However, for a high-quality unit, the trick to a long-lasting repair is ensuring that the operator is not the only thing holding the window shut. The locking levers should do the heavy lifting of compressing the weatherstripping, while the crank should only be used to move the sash into position. By understanding the mechanical limits of these zinc gears and maintaining the tracks, you can extend the life of your glazing by decades without falling for a high-pressure sales pitch. Always look for the NFRC label on new units if you do go the replacement route, but first, check your splines and your lubrication. A little silicone spray and a new $40 operator arm are often all that stand between you and a draft-free winter.