In the world of high-performance fenestration, glass is not merely a transparent barrier; it is a sophisticated, multi-layered component engineered to manage thermal transfer and solar radiation. As a master glazier with a quarter-century in the trenches, I have seen breathtaking custom-built units ruined by a single moment of negligence during the final cleanup. The presence of paint overspray on a pristine IGU (Insulated Glass Unit) is more than an eyesore; it is a contaminant that interferes with the optical clarity and, if handled incorrectly, can lead to permanent surface degradation. I recall sitting across from a high-pressure sales representative who was trying to convince a homeowner that their ‘miracle’ glass coating was impervious to scratching. I had to intervene and explain that even the most advanced titanium-dioxide coatings are susceptible to mechanical damage if a contractor treats the glazing like a common scrap of lumber. This is why understanding the physics of a brand new blade is essential for any window cleaner or technician engaged in window repair.
“Installation is just as critical as the window performance itself. A high-performance window installed poorly will fail.” – AAMA Installation Masters Guide
Before you even consider touching a blade to the glass, you must understand the substrate. Most modern windows in northern climates are designed with a specific focus on the U-Factor, which measures the rate of non-solar heat loss. This often involves Low-E (Low-Emissivity) coatings. If you are working on a triple-pane unit, you are likely dealing with a coating on Surface #2 or #3. However, some ‘hard-coat’ Low-E applications exist on Surface #1 (the exterior). Using a blade on these surfaces is a guaranteed way to necessitate a call to replace windows rather than simply cleaning them. A blade will strip the microscopic metallic layers right off the glass, leaving behind a permanent ‘ghosting’ effect that no amount of polishing can fix. We always identify the glass type first, checking the spacer for NFRC data or using a coating detector. In cold climates like Chicago or Minneapolis, where we prioritize keeping heat inside, Surface #3 is our usual focus, and fortunately, it is protected inside the hermetically sealed gap between panes.
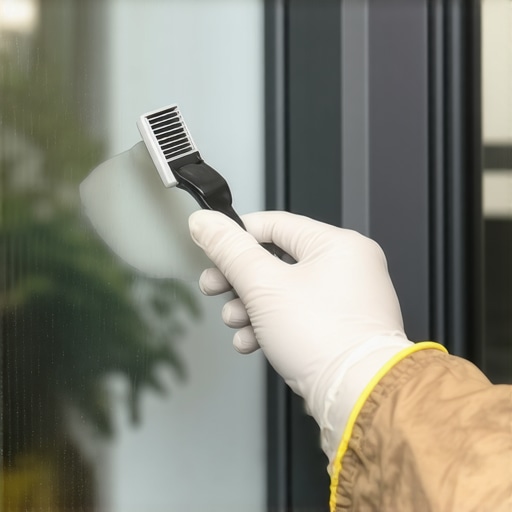
The secret to removing paint starts with the metallurgy of the tool. A brand new blade is non-negotiable. Why? Because at a microscopic level, a used blade has developed ‘burrs’ or ‘teeth’ from previous contact with rough surfaces. These burrs act like a saw rather than a plane. When you drag a dull or used blade across glass, you aren’t just lifting paint; you are trapping microscopic fabrication debris—often called ‘glass fines’—and dragging them across the surface. This creates ‘linear scratches’ that are only visible when the late afternoon sun hits the pane at a specific angle. To avoid this, we use a fresh, surgical-grade carbon steel or stainless steel blade for every single project. The edge must be perfectly straight and free of any nicks. We treat the blade as a precision instrument, much like a shim used to level a heavy timber frame in a rough opening.
Lubrication is the second pillar of the master glazier’s approach. Never, under any circumstances, perform a dry scrape. A dry scrape increases the friction coefficient to a point where the paint binder—whether it is an acrylic latex or a stubborn oil-based primer—is essentially ground into the glass pores. We use a concentrated solution of deionized water and a high-slip surfactant. This surfactant encapsulates the paint particles as they are lifted, preventing them from re-adhering or scratching the glass as they slide away. You want the blade to hydroplane across the glass surface. This is particularly vital near the glazing bead. The glazing bead is the strip of vinyl, wood, or aluminum that holds the glass in the sash. If your blade catches this bead, you compromise the seal, which can lead to moisture infiltration into the glazing pocket and eventually, premature seal failure.
“Standard Practice for Installation of Exterior Windows, Doors and Skylights (ASTM E2112) emphasizes that the integrity of the glazing surface and its surrounding seals must be maintained to ensure the designed thermal performance.” – ASTM Industry Standards
When you are executing the scrape, the angle of attack is critical. We maintain a strict 30-degree angle. Too steep, and you risk ‘chattering,’ where the blade jumps and creates small gouges. Too shallow, and you are simply sliding over the paint without lifting it. You must work in one direction only. Never scrub back and forth. Scrubbing traps debris under the blade edge. Instead, use a steady, overlapping stroke, lifting the blade at the end of each pass and wiping it clean with a lint-free microfiber cloth. This ensures that any grit or paint chips are removed before the next stroke. If you encounter a particularly thick glob of paint, do not apply downward pressure. Downward pressure can cause the glass to flex, potentially stressing the muntins or even cracking the pane if there is an underlying edge defect from the factory.
In the context of window repair, we often see glass that has been ‘burned’ by previous attempts to remove paint with abrasive pads. If the damage is already done, the only solution is often to replace windows entirely. However, if the overspray is fresh, the brand new blade method is the gold standard. We also pay close attention to the weep holes in the bottom of the frame. As we wash away the paint residue and lubrication, we must ensure that no debris clogs these critical drainage paths. A clogged weep hole in a rainy climate is a recipe for a rotted sill pan and a ruined rough opening. Water management is a science, and even a cleaning task must respect the ‘shingle principle’ of directing water down and away from the building envelope.
For those in coastal regions, the presence of salt spray combined with paint overspray creates an even more abrasive slurry. In these environments, we double the amount of lubrication and change blades even more frequently. The goal is always to preserve the sacrificial layer of the glass without compromising the structural integrity of the sash. Whether you are a professional window cleaner or a homeowner, the mantra remains: New blade, high lubrication, and total awareness of the glass coatings. Don’t let a simple paint job turn into a five-figure replacement project. Respect the glazing, understand the physics of the edge, and you will achieve a level of clarity that the ‘caulk-and-walk’ crews can only dream of.