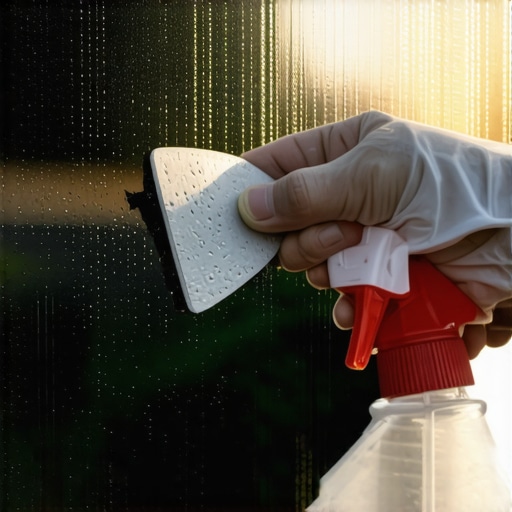
In twenty-five years of handling glass, from heavy-duty commercial curtain walls to delicate residential double-hungs, I have seen more glass ruined by well-intentioned homeowners than by actual storms. A window is a precision-engineered component. When you see a film of purple, bubbling plastic on your glass, you are not just looking at an eyesore; you are looking at a chemical bond that has likely fused with the surface of the glazing over years of UV exposure. Removing the film is the easy part. The real battle is the adhesive residue left behind. This sticky, gray ghost is the bane of every professional window cleaner and glazier alike. If you do not handle it with the technical precision of a surgeon, you will end up needing to replace windows entirely due to permanent scratches or glass etching.
“Installation and maintenance are just as critical as the window performance itself. A high-performance window that is neglected or improperly cleaned will fail to meet its service life expectations.” – AAMA Installation Masters Guide
I recall a specific homeowner in Houston who called me in a panic because their master bedroom windows were ‘sweating’ and turning a milky white. They were convinced the seals had failed and they needed an immediate window repair. I walked into the room with my hygrometer and a high-intensity inspection lamp. I did not find a seal failure. Instead, I found a cheap, aftermarket solar film that had been applied five years prior. The film was trapping moisture against the glass, and the humidity in the room was a staggering 65 percent. The ‘fog’ was actually localized condensation trapped within the degraded adhesive layer of the film. It was not a hardware failure; it was a chemistry problem. They did not need a new sash; they needed the adhesive removed properly to restore the thermal integrity of the glass surface.
The Chemistry of Glass and Adhesive Bonding
To understand how to remove this gunk, you have to understand what you are working with. Glass, while appearing smooth to the naked eye, is actually a porous material at the microscopic level. During the float glass process, the glass is formed over a bed of molten tin. This creates a ‘tin side’ and an ‘air side.’ When adhesive sits on that surface for years, especially in a Southern climate where the Solar Heat Gain Coefficient (SHGC) is high, the polymers in the adhesive undergo cross-linking. This means the molecules are literally weaving themselves together and into the microscopic pores of the glass. In places like Phoenix or Miami, where the sun beats down on Surface #2 of your glazing, that adhesive is baked into a resinous state. You cannot simply wipe this away with a common window cleaner. You need to break the chemical bond without scratching the glass surface.
The Tools of the Trade: Beyond the Kitchen Cabinet
Stop reaching for the steel wool. Just stop. As a master glazier, I cringe when I see someone using abrasive pads on a window. You might as well use a piece of concrete. To remove adhesive, you need a professional-grade 1-inch or 4-inch stainless steel scraper with fresh blades. A carbon steel blade will rust and create nicks that scratch. A stainless blade, used at a strict 15-degree angle, is the only way to mechanicaly shear the adhesive from the glass. But the blade is only half the secret. You need a surfactant that provides enough lubrication to prevent the blade from ‘chattering’ across the glass. A mixture of deionized water and a high-slip professional dish soap is standard, but for the heavy-duty stuff, you need a citrus-based solvent or an ammonia-heavy solution that can soften the polymers before the blade even touches them.
“Proper maintenance of the glazing surface is essential to ensure the longevity of the fenestration assembly and its thermal performance. Improper mechanical scraping can lead to permanent optical distortion.” – ASTM E2112 Standard Practice
Step-by-Step Restoration: The Glazier’s Method
First, protect your surroundings. This means checking the weep hole of the window frame to ensure it is clear. If you are saturating the window with solvent, it needs a place to go. If your sill pan is blocked, that chemical-laden water is going to sit on your rough opening and rot out your framing. I have seen many a rotted header because someone got over-zealous with cleaning fluids and the liquid bypassed the flashing tape and sat in the wall. Second, apply your softening agent. This is where patience replaces muscle. You need to let the solvent dwell on the adhesive for at least ten minutes. If it starts to dry, re-apply. You are waiting for the adhesive to swell and detach from the glazing bead. Once the adhesive is soft, use your scraper in one direction only. Never pull the blade backward. Each stroke should be a clean, forward motion. If you feel resistance, stop. Re-apply solvent. You are not trying to muscle the adhesive off; you are trying to slide it off.
Climate Context: Why Film Removal Matters in the South
In hot climates, the reason you likely had that film in the first place was to lower the SHGC. Solar Heat Gain is the enemy in the South. It is the measure of how much solar radiation is admitted through a window. While the film was a temporary fix, its degradation actually increases the heat absorption of the glass, which can lead to thermal stress cracks. If you find that after removing the film, your room is unbearably hot, do not just put more film on. This is the time to evaluate if you should replace windows with modern Low-E coatings on Surface #2. Modern coatings reflect the long-wave infrared radiation without the need for a sticky plastic film that will eventually fail and require another round of intense window repair. A thermally broken aluminum frame or a high-quality vinyl frame with a low SHGC rating is a permanent solution to the problem the film was trying to solve.
The Final Clean: Achieving Optical Clarity
Once the bulk of the adhesive is gone, you will still have a hazy residue. This is the microscopic remains. For this, a professional window cleaner will use a ‘clay bar’ technique, similar to what is used in automotive detailing, or a very fine cerium oxide polish if the glass has any light etching. Check the muntin and the sash for any leftover residue. If adhesive gets into the operable parts of the window, it can gum up the balances and make the window difficult to open. A window is an assembly of moving parts, and adhesive is sand in the gears. Clean the tracks, lubricate the shims if they are visible, and ensure the weatherstripping is not stuck to the newly cleaned glass. This is the difference between a ‘caulk-and-walk’ amateur job and a professional glazier’s restoration. You want the window to perform as if it just came off the factory floor, with no drag, no haze, and most importantly, no scratches.
{“@context”:”https://schema.org”,”@type”:”HowTo”,”name”:”How to Remove Window Film Adhesive Professionally”,”step”:[{“@type”:”HowToStep”,”text”:”Saturate the adhesive with a citrus-based solvent or ammonia solution and let it dwell for 10 minutes.”},{“@type”:”HowToStep”,”text”:”Use a professional stainless steel scraper at a 15-degree angle in forward-only motions.”},{“@type”:”HowToStep”,”text”:”Clean the remaining residue with a surfactant and a microfiber cloth, ensuring the weep holes remain clear.”}]}