The High Cost of a Sloppy Brush
I recently sat across from a homeowner who was being pitched a $20,000 full-frame replacement by a high-pressure salesman because their existing windows were covered in stubborn paint overspray. The salesman, a classic Tin Man, was claiming the paint had bonded to the glass at a molecular level and ruined the thermal integrity of the units. I had to step in and explain to the homeowner that while the window repair looked daunting, the ROI on a full replacement just to solve a cosmetic cleaning issue was nearly 150 years. The reality is that paint on glass is a nuisance, not a death sentence for your glazing, provided you understand the physics of the surface you are working on.
As a master glazier, I see this daily. A painter gets careless around the sash, or a DIY window repair project involves a bit too much enthusiasm and not enough masking tape. Before you even think about calling a company to replace windows, you need to understand what you are looking at. Modern windows are not just slabs of silica. They are complex assemblies. If you are in the South, you likely have a Low-E coating on Surface #2 to combat high Solar Heat Gain. If you are in the North, your windows are designed to trap heat, often with coatings on Surface #3. If you take a scraper to the wrong surface or use the wrong window cleaner, you aren’t just removing paint; you are stripping the microscopic metallic layers that keep your energy bills manageable.
“Installation is just as critical as the window performance itself. A high-performance window installed poorly will fail, and improper maintenance can be just as destructive as a bad install.” AAMA Installation Masters Guide
The Physics of the Glass Surface
Glass feels smooth to the touch, but under a microscope, it has peaks and valleys. When paint dries, it hooks into these microscopic irregularities. To remove it safely, we have to break that bond without creating new ones in the form of scratches. This is where the “caulk-and-walk” crowd fails. They grab a dry blade and start hacking away. That is a recipe for permanent damage. You must use a lubricant. A dedicated window cleaner or even a simple mixture of dish soap and water acts as a surfactant, reducing friction and allowing the blade to glide over the glass while lifting the paint. If the window is an operable unit, ensure you have checked the weep hole for blockages first, as the liquid you use for cleaning needs a clear path to exit the frame.
The Glazier’s Toolkit for Paint Removal
You need a professional-grade scraper, ideally a 1-inch or 4-inch wide retractable model. The blade must be stainless steel or high-carbon steel. Never use a dull blade. If you hear a rasping sound, stop. That is the sound of you destroying the glazing bead or scratching the glass. You want a silent, smooth glide. You also need a high-quality window cleaner that does not contain ammonia if you are working near wood sashes, as ammonia can degrade the finish on the wood over time. For those in coastal regions, remember that salt spray can mix with paint overspray, creating an abrasive paste. You must rinse the glass thoroughly before the scraper ever touches the surface.
“The integrity of the building envelope depends on the proper treatment of the fenestration units. Surface damage can lead to premature thermal stress fractures.” ASTM E2112 Standard Practice
Step-by-Step Removal Process
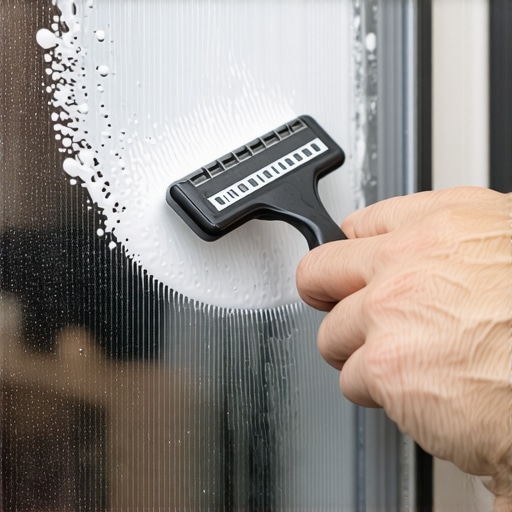
First, identify if you are dealing with latex or oil-based paint. Latex is softer and more pliable, while oil-based paint becomes brittle. For latex, a heavy saturation of soapy water usually softens the bond enough to lift it in large sheets. For oil-based paint, you may need a slightly more aggressive surfactant. Always start by lubricating the glass. Apply your window cleaner liberally. Hold the razor at a 45-degree angle. This is the critical angle for glass safety. Too steep, and you dig into the glass; too shallow, and you just slide over the paint without lifting it. Start from the center and move toward the sash. Be extremely careful as you approach the glazing bead. If you nick the bead, you create a point of entry for water, which can lead to rot in the rough opening or the sill pan over time.
The Low-E Complication
This is where technical knowledge is non-negotiable. Most modern windows have the Low-E coating on the inside of the double-pane unit (Surface #2 or #3), protected by the argon gas fill. However, some older or specialized high-performance windows have a “hard coat” Low-E on Surface #4 (the interior side of the room). If you use a razor blade on Surface #4, you will ruin the window. Before you scrape, use a lighter or a specialized Low-E detector. If you see a different color in the flame reflection, you have a coating. If that coating is on the surface you are trying to clean, put the razor away. You will need to use chemical softeners specifically approved by the NFRC for coated glass.
When Cleaning Turns into Window Repair
Sometimes, in the process of removing paint, you discover why the paint was there in the first place. Perhaps a previous owner was trying to hide a failing joint in the sash or a gap in the muntin. If you find that the wood underneath the paint is soft or that the glazing bead is cracked and brittle, you are looking at a window repair situation. This is especially common in climates like Chicago or Minneapolis where the extreme temperature swings cause the frame to expand and contract. Vinyl expands significantly more than fiberglass, which can lead to seal failure if the unit was not shimmed correctly during the initial installation. If you notice fogging between the panes after you’ve cleaned the glass, the seal is blown, and no amount of cleaning will fix the loss of U-Factor performance. At that point, it is time to discuss how to replace windows effectively.
The Role of the Sill Pan and Flashing
If you are cleaning a window that has been heavily oversprayed during a full exterior repaint, pay close attention to the bottom of the frame. Painters often accidentally seal the weep hole shut with paint. The weep hole is the lifeblood of the window’s water management system. It allows water that gets past the sash to drain out onto the sill pan and then out of the building. If you don’t clear these holes while you are cleaning the glass, you are setting the stage for rot in the wall cavity. I have seen entire headers and jack studs rot out because a simple cleaning job didn’t include checking the drainage path. This is why I have no patience for installers or cleaners who don’t understand the shingle principle of water shedding.
Final Professional Polish
Once the paint is removed, do a final pass with a clean microfiber cloth and a professional window cleaner. Check the perimeter of the glass where it meets the frame. Any leftover residue will attract dust and pollen, leading to a grimy appearance within weeks. If the window is part of a large operable group, check the hardware. A little silicone spray on the tracks will ensure the window functions as well as it looks. Remember, a window is a technical component of your home’s thermal envelope. Treat it with the precision it requires, and it will keep you comfortable for decades. If the glass is truly damaged or the frame is warped beyond the tolerances of the rough opening, then and only then should you look into the cost to replace windows.