The Ghost in the Glass: Why Your New Windows Look Dirty
You have just invested thousands of dollars in high-performance fenestration. The rough opening was flashed perfectly, the shims are level, and the glazing bead is seated tight. But there is a problem. That factory-applied energy rating sticker has been removed, yet a ghostly, stubborn rectangular residue remains. As a master glazier with 25 years in the field, I have seen homeowners take a razor blade to this residue and permanently scratch their tempered glass or, worse, strip the pyrolytic coating off a Surface #1 Low-E unit. A window is a managed hole in your thermal envelope, and maintaining it starts with understanding the chemistry of what is on the glass. I once walked into a custom build where the homeowner was in a panic because their new windows were ‘sweating’ in perfect 4-by-6 inch rectangles. I pulled out my hygrometer to check the interior dew point, but the humidity was a stable 35 percent. The issue was not the seal; it was the leftover adhesive from the manufacturer decals. These residues are hydrophilic, meaning they attract moisture from the air, creating the illusion of a seal failure. It was not the windows; it was a failure of the final cleaning process. To understand how to fix this, we have to look at the molecular level of glass and adhesive interaction.
“Installation is just as critical as the window performance itself. A high-performance window installed poorly will fail.” AAMA Installation Masters Guide
The Science of Solar Heat Gain and Adhesive Polymerization
In hot, southern climates where the Solar Heat Gain Coefficient or SHGC is the most critical metric on your NFRC label, the sun is your greatest enemy during the construction phase. When a window sits in a south-facing wall before the HVAC is commissioned, the glass temperature can soar. This radiant heat causes the acrylic polymers in the decal adhesive to undergo a process called cross-linking. The glue does not just sit on the glass; it begins to bond with the microscopic peaks and valleys of the glass surface. If you are in a region like Phoenix or Miami, you want your Low-E coating on Surface #2 to reflect that infrared radiation back outside, but the decal is on Surface #1, the exterior. This means the adhesive is taking the full brunt of the UV spectrum. This is why a simple window cleaner often fails. You are not just fighting dirt; you are fighting a polymerized chemical bond. Many homeowners think they need to replace windows when they see this stubborn etching, but usually, a technical approach to window repair and cleaning can save the sash. The physics of the glass matters here. Most residential windows are float glass, which has a ‘tin side’ and an ‘air side’ from the manufacturing process. Adhesives react differently to each, and using the wrong solvent can lead to permanent hazing.
The Technical Trick: Thermal Disruption and Molecular Solvents
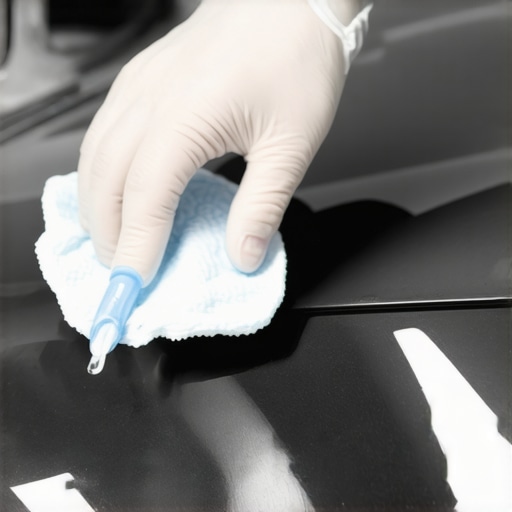
Forget the ‘as seen on TV’ scrapers. The professional’s trick involves three stages: thermal agitation, chemical suspension, and microfiber extraction. First, we use a heat gun on a low setting to soften the cross-linked polymers. You are aiming to reach the glass transition temperature of the adhesive without creating a thermal shock that could crack the lite. Once the residue is tacky, we do not use Windex. We use a high-purity mineral spirit or a citrus-based solvent with a d-Limonene concentration of at least 70 percent. This breaks the van der Waals forces holding the glue to the silica. When you apply the solvent, you must ensure it does not touch the EPDM gaskets or the glazing bead, as it can cause the rubber to swell and fail. After the chemical has suspended the adhesive, you use a clean microfiber cloth. Do not rub in circles. Rub in a single direction to pull the residue away from the glass. This prevents the microscopic grit from acting as an abrasive. If the residue is on a window with an exterior Low-E coating, you must be even more careful. Some coatings are ‘hard coats’ applied while the glass is still molten, while others are ‘soft coats’ applied via sputter deposition. A razor blade on a soft coat is an immediate death sentence for that sash.
“The cleaning of architectural glass is a critical maintenance task that, if performed incorrectly, can result in permanent damage to the glass surface or the window’s structural integrity.” ASTM E2112 Standard Practice
When Cleaning Reveals a Deeper Issue
Sometimes, what looks like residue is actually a symptom of a larger installation failure. If you are cleaning your windows and notice that the moisture is actually between the panes of glass, no window cleaner in the world will save you. This indicates a failure of the desiccant-filled spacer or a breach in the primary polyisobutylene seal. In such cases, you must decide whether to attempt a window repair by replacing just the Insulated Glass Unit or to replace windows entirely. If your frames are vinyl and have begun to warp due to poor rough opening tolerances or lack of proper shimming, a glass replacement is a temporary bandage. High-quality fiberglass or thermally broken aluminum frames offer much better stability, ensuring the sash remains operable and the seals stay intact for decades. Remember, a window is a system. The glass, the sash, the muntins, and the weep holes all must work in unison. If the weep holes are clogged with cleaning runoff or decal remnants, water will back up into the sill pan and eventually rot your subfloor. This is why the ‘caulk-and-walk’ method of installation is so dangerous. True water management requires a technical understanding of the shingle principle and the physics of wind-driven rain.
The Final Polish: Protecting the Investment
Once the residue is gone, the final step is a neutralized wash. Use a mixture of deionized water and a small amount of pH-neutral soap. This removes the oily film left by the solvents. In high-exposure areas, some professionals apply a hydrophobic nanocoating that mimics the Lotus effect, causing water and dirt to bead off. This is particularly useful for fixed units in high-reach areas where regular maintenance is difficult. By taking a scientific approach to something as simple as decal removal, you protect the integrity of the glass and the performance of the entire building envelope. Do not let a ten-cent sticker ruin a thousand-dollar window. Treat the glass with the respect its engineering deserves.