The Anatomy of a Failed Screen and the Five Dollar Solution
Most homeowners view a torn window screen as a minor cosmetic blemish, a trivial annoyance that allows a few mosquitoes into the kitchen. As a glazier who has spent nearly three decades inspecting the building envelope, I see it differently. A screen is the first line of defense for your operable sash. When that mesh fails, the integrity of your ventilation strategy collapses. I have seen people spend thousands of dollars to replace windows when all they really needed was a better understanding of tension, friction, and a simple tool that costs less than a deli sandwich: the spline roller.
A homeowner called me in a panic because their new windows were ‘sweating.’ I walked in with my hygrometer and showed them the humidity was 60%. It wasn’t the windows; it was their lifestyle. They had stopped opening their windows because the screens were shredded, trapping stagnant, moisture laden air inside. This condensation was dripping down the glazing bead and pooling on the wooden sills, threatening to rot the very frame they had just paid a fortune for. This is the reality of window maintenance. If you cannot operate your windows because the screens are in disrepair, you are effectively turning your home into a terrarium. Proper window repair starts with the basics, and the basic tool for screen management is the spline roller.
“Installation is just as critical as the window performance itself. A high-performance window installed poorly will fail.” – AAMA Installation Masters Guide
The Physics of the Spline Roller
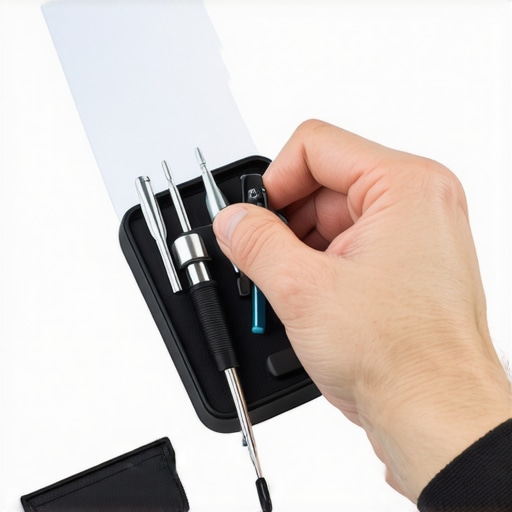
To understand why this tool is essential, we must look at the Rough Opening and the mechanics of the window frame. The screen is held in place by a flexible vinyl or rubber cord known as the spline. This cord is jammed into a narrow channel in the aluminum or vinyl screen frame. The spline roller features two distinct wheels: a concave wheel and a convex wheel. The convex wheel is designed to lead the mesh into the channel, while the concave wheel seats the spline firmly over the mesh. Without this tool, you are left using a flathead screwdriver, which is the fastest way to puncture your new fiberglass mesh and gouge the sash.
In northern climates like Chicago or Minneapolis, where the U-Factor is the primary metric of success, we focus heavily on the thermal break and the air seal. However, during the shoulder seasons, the ability to use your windows for passive cooling is vital. A properly tensioned screen allows for maximum airflow while maintaining a barrier. When you use a high quality window cleaner, you should also be inspecting the tension of your screens. If the mesh is sagging, it is likely that the spline has hardened due to UV exposure and lost its grip. Replacing the spline is a ten minute job if you have the right roller.
Technical Zoom: Mesh Density and Airflow
When we talk about window repair, we must discuss the material science of the mesh itself. Standard fiberglass mesh is typically an 18×16 weave. This means there are 18 strands per inch in one direction and 16 in the other. If you live in an area with tiny gnats, you might opt for a 20×20 mesh. However, as the density increases, the Visible Transmittance (VT) and the airflow decrease. A master glazier knows that every choice is a trade off between protection and performance. The spline roller allows you to apply the exact amount of lateral tension required to keep a 20×20 mesh flat without warping the thin aluminum frame. If you pull too hard, the frame will ‘hourglass,’ bowing inward and leaving gaps at the muntin or the side jambs.
“The air leakage rate of a window is a key component of its overall energy rating, and maintenance of all components, including screens and weatherstripping, is required for long-term performance.” – NFRC Performance Standards
I often tell my clients that the best way to avoid the need to replace windows prematurely is to manage the weep hole system. Your screens act as a filter. If they are torn, larger debris like maple seeds and leaf fragments enter the screen track and eventually clog the weep holes located at the bottom of the frame. When those holes clog, water cannot exit the sill pan. In a heavy rainstorm, that water will back up over the interior leg of the frame and into your drywall. A $5 tool that helps you maintain your screens is actually a tool that prevents thousands of dollars in water damage.
The Glazier’s Guide to Spline Selection
Do not assume all spline is created equal. Spline is measured in thousandths of an inch, ranging from .125 to .190. If you use a spline that is too thick, you will struggle to seat it even with the best roller, potentially cracking the glazing bead on some integrated screen systems. If it is too thin, the screen will blow out during the first high wind event. When I am on a job site, I carry a variety of diameters. For a standard residential vinyl window, a .140 or .160 spline is usually the sweet spot. The spline roller’s ball-bearing construction ensures that the pressure is even, preventing the ‘bunching’ effect that occurs with cheaper, plastic tools. The handle should be made of hardwood or heavy duty resin to allow for the significant downward force needed to compress the serrated vinyl cord into the channel.
In the south, where Solar Heat Gain Coefficient (SHGC) is the enemy, we often use solar screens. These are much thicker than standard mesh, designed to block up to 90 percent of the sun’s heat before it even hits the glass. Installing these requires a heavy duty spline roller and a steady hand. You are essentially working with a different climate logic here. In the North, we want that heat in the winter (higher SHGC on surface three), but in the South, we reflect it (Low-E on surface two). Regardless of the glass coating, a solar screen is a mechanical barrier that requires precise installation to avoid looking like a wrinkled mess on the front of a beautiful home.
Why Maintenance Beats Replacement
There is a trend in the industry to replace windows the moment a seal fails or a crank breaks. The ‘Tin Men’ of the world will tell you that repair is impossible. They are wrong. Most window repair tasks, from replacing a sash balance to re-screening a frame, are well within the reach of a homeowner with the right mindset. The flashing tape and the shim placement might be the domain of the professional, but the screen is your territory. By mastering the use of the spline roller, you take ownership of your home’s micro-climate. You ensure that the air entering your home is filtered and that your window’s drainage system remains clear. It is about the ‘Shingle Principle’—ensuring that everything, from the screen to the sill pan, is designed to shed water and debris away from the structure.
How to Repair a Window Screen with a Spline Roller
- Remove the old spline using a small screwdriver or an awl. Be careful not to bend the aluminum frame.
- Lay the new mesh over the frame, ensuring at least one inch of overhang on all sides.
- Use the convex end of your spline roller to pre-roll the mesh into the channel. This creates a ‘trough’ for the spline.
- Place the spline at a corner and use the concave end of the roller to push it into the channel. Do not stretch the spline; let the roller do the work.
- Work your way around the frame, keeping the mesh flat but not overly tight.
- Trim the excess mesh with a sharp utility knife, cutting on the outside of the spline to avoid slicing the new screen.
In conclusion, the $5 screen tool is more than just a piece of hardware; it is a symbol of proactive home maintenance. It allows you to engage with the mechanical systems of your house. Whether you are a professional window cleaner looking to add value to your service or a homeowner tired of the buzz of flies, the spline roller is your primary instrument. Respect the Rough Opening, understand your Sash, and never underestimate the power of a simple, well-designed tool to keep your home comfortable and dry.