The Glass Class: Understanding Surface Integrity and Repair Physics
In my twenty-five years as a glazier, I have seen homeowners terrified by a single hairline scratch on a panoramic window. Usually, a high-pressure salesman is standing right next to them, claiming that the structural integrity of the sash is compromised and they need to replace windows throughout the entire floor. I remember sitting across from one of these ‘Tin Men’ in a suburban living room last year. He was trying to convince a couple that a minor abrasive mark from a rogue window cleaner required a full frame tear-out. I had to step in and explain that the ROI on a three thousand dollar replacement for a surface-level cosmetic defect was effectively non-existent. The reality is that for about four dollars in materials and a little technical patience, most minor glass scratches can be mitigated without ever touching the glazing bead.
“Installation is just as critical as the window performance itself. A high-performance window installed poorly will fail.” – AAMA Installation Masters Guide
The Science of the Scratch: Why Depth Matters
Before you grab a buffer, you must understand the molecular nature of the substrate. Most residential windows are comprised of soda-lime glass. Whether it is annealed or tempered, the surface tension is what provides its clarity and strength. When a window cleaner uses a degraded squeegee or a dry blade, they can introduce ‘scratches’ that are actually microscopic fractures. If the scratch is deep enough to catch a fingernail, you are no longer looking at a polishing job; you are looking at a potential stress crack. In a North or Cold climate, like Chicago or Minneapolis, these deep scratches are magnets for thermal stress. As the interior heat hits the glass and the exterior temperature drops, the expansion and contraction cycles focus on that defect. This is why managing U-Factor and surface temperature is critical. If you have a Low-E coating on Surface #1 (the exterior), polishing is often impossible because you will buff right through the metallic oxides, leaving a ‘ghost’ or a permanent smudge in the thermal barrier.
The $4 Solution: Cerium Oxide and the Felt Bob
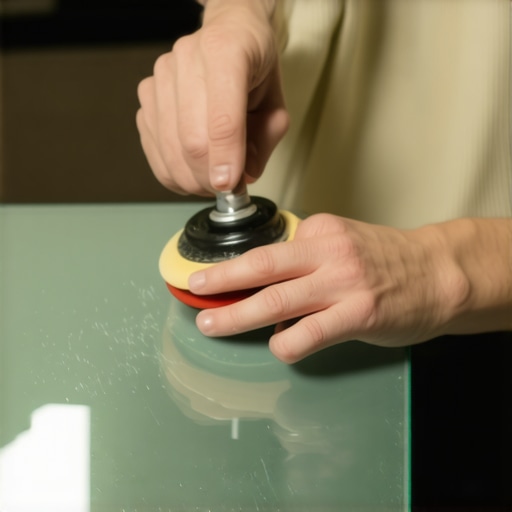
The secret to professional window repair isn’t a miracle chemical; it is Cerium Oxide. This rare earth mineral, when suspended in water, creates a slurry that chemically reacts with the silica in the glass. You don’t need a heavy-duty industrial grinder. A simple four-dollar felt polishing bob attached to a standard variable-speed drill is the tool of choice. The physics here is about friction and heat. You are essentially performing a microscopic resurfacing of the glass. You must maintain a constant speed to avoid creating a ‘lens effect.’ If you stay in one spot too long, you will create a concave dip in the glass that distorts the view. This is why we ‘glaze zoom’ into the technical specifics: the glass must stay below 120 degrees Fahrenheit during the process. Any hotter, and you risk a localized thermal fracture, especially in tempered units where the internal tension is high.
“The fenestration system must be viewed as a holistic assembly where glass clarity and frame stability work in tandem.” – NFRC Performance Standards
Climate Logic: When to Repair and When to Replace
In Southern or Hot climates, the logic shifts. Your primary enemy is Solar Heat Gain Coefficient (SHGC). Many modern windows in the South have their Low-E coatings on Surface #2 to reflect infrared radiation before it even enters the home. If you are attempting a window repair on the interior side of a dual-pane unit in Phoenix, you are generally safe to polish. However, if the scratch is on the exterior, you must verify if there is a ‘hard coat’ pyrolytic layer. Polishing a hard-coat will ruin the window’s ability to block heat, effectively turning your high-performance glazing into a heat-sink. This is where the ‘caulk-and-walk’ installers fail; they don’t check the coating positions before they start buffing. They might fix the scratch but destroy the energy efficiency of the home in the process.
The Execution: Step-by-Step Restoration
First, clean the glass thoroughly to ensure no grit remains. Any leftover sand or dust will act as a secondary abrasive, creating more scratches as you work. Apply the Cerium Oxide slurry to the felt bob. Start the drill at a low RPM to prevent slinging the compound across the sash and into the weep holes. Use a steady, overlapping circular motion. You should feel a slight ‘drag’ as the chemical reaction takes place. Periodically stop and wipe the area with a microfiber cloth to inspect your progress. If the glass feels hot to the touch, stop and let it cool. We are not just cleaning; we are performing a controlled abrasion. Once the scratch is gone, a final pass with a high-quality window cleaner will reveal if you have successfully maintained the optical clarity of the pane. This method saves the homeowner thousands and keeps perfectly functional glass out of the landfill.