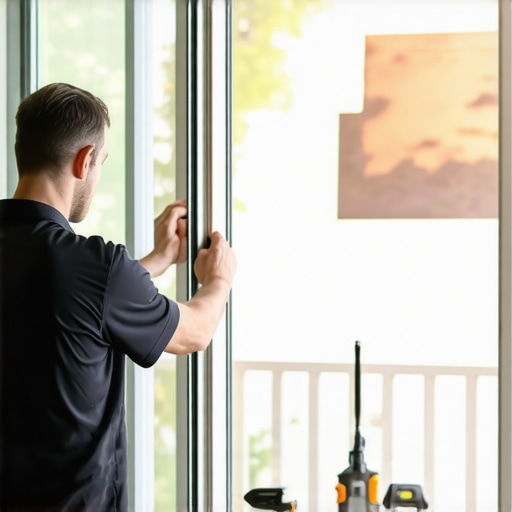
The Invisible Gap: Why Your Sliding Glass Door is a Thermal Liability
In twenty-five years of glazing, I have seen more energy wasted through a single sliding glass door than through an entire attic of under-insulated rafters. It starts as a faint whistle on a Tuesday night in January. By February, you are feeling a literal river of cold air pouring across your floorboards. Most homeowners assume they need to replace windows or the entire door assembly at a cost of thousands, but often the culprit is a failure of the pile or fin seal. A sliding glass door is essentially a giant hole in your thermal envelope, and it relies entirely on a few millimeters of polypropylene to keep the outside world where it belongs. When that seal fails, your HVAC system is no longer heating a home; it is heating the entire neighborhood.
A homeowner called me in a panic because their new windows were ‘sweating.’ I walked in with my hygrometer and showed them the humidity was 60%. It wasn’t the windows; it was their lifestyle and the fact that their sliding door’s interlocker was so loose it was drawing in cold, dry air that collided with their humid interior air right at the glass surface. This condensation crisis is a classic example of why the integrity of your weatherstripping is paramount. If you do not manage the dew point at the glass interface, you are inviting mold and structural rot into your rough opening. Understanding the mechanics of a sliding door seal is the first step in a successful window repair project.
The Anatomy of the Seal: Pile, Fin, and Compression
Sliding doors do not use the same compression seals you find on a casement or awning window. Because the sash must bypass the fixed panel, we use friction-based seals. The most common is the pile weatherstripping, which looks like a dense row of brush bristles. In high-quality applications, this pile includes a central plastic ‘fin’ that provides a secondary barrier against air infiltration. Over time, UV radiation and the simple mechanical friction of opening and closing the door flatten these fibers. Once the pile is crushed, it loses its ability to create a baffle against air pressure. This is where we see a spike in the CFM (Cubic Feet per Minute) of air leakage.
“Installation is just as critical as the window performance itself. A high-performance window installed poorly will fail.” – AAMA Installation Masters Guide
When you are assessing the door, look closely at the interlocker. This is the vertical section where the back of the operable sash meets the fixed panel. It is the most common failure point. If you can see daylight through the interlocker, your weatherstripping has reached the end of its service life. This isn’t just about comfort; it is about the physics of your home. In cold climates like Chicago or Minneapolis, the U-Factor of your door is severely compromised when air bypasses the glazing unit. You want to maintain a low U-Factor to ensure that heat stays inside, and that requires a tight, functional seal at every transition point.
The Master Glazier’s Guide to Replacement
Before you begin, you must identify the specific profile of your weatherstripping. There is no ‘universal’ size. You need to measure the width of the backing (the T-slot) and the height of the pile. If you buy a pile that is too tall, the door will be nearly impossible to slide; too short, and you might as well have not bothered. Use a digital caliper for this. We are looking for tolerances within a thirty-second of an inch. Once you have the replacement material, typically a silicone-treated pile to resist moisture, the real work begins.
Step 1: Removing the Operable Sash
You cannot effectively replace the weatherstripping with the door in the frame. You must remove the operable panel. This usually involves backing off the roller adjustment screws at the bottom of the door. Once the rollers are retracted, lift the sash into the head of the frame and swing the bottom out. This is a two-person job. A standard double-pane tempered glass sliding door can weigh upwards of 150 pounds. Be careful not to damage the sill pan or the delicate aluminum tracks. If the track is filthy, now is the time to act as a window cleaner. Grit in the track is the number one killer of rollers and seals alike.
Step 2: Extracting the Dead Seal
Look for a small staple or a crimp at the end of the T-slot. This was put there at the factory to keep the weatherstripping from sliding out. Remove it with a pair of needle-nose pliers. The old pile should slide out of the channel. If it is stuck, it is likely due to years of accumulated dirt and paint. Do not force it. Use a small amount of silicone-based lubricant to help it along. Once the channel is empty, run a stiff nylon brush through it to clear out any remaining debris. This ensures the new seal sits perfectly flat.
Step 3: Threading the New Barrier
Slide the new pile weatherstripping into the T-slot. It should move with some resistance but should not require extreme force. Once it is in place, trim it with about an eighth of an inch of ‘long’ material at each end. This allows for thermal expansion and contraction. Unlike vinyl frames which expand significantly, the pile itself is relatively stable, but the aluminum or fiberglass channel it sits in will move with the seasons. Crimp the ends of the channel slightly to lock the new seal in place, preventing it from ‘walking’ up the frame over time.
Thermal Logic: Why Surface Coatings Matter
While you have the door out, take a moment to look at the glass itself. In northern climates, we prioritize the U-Factor. You want the Low-E coating on Surface #3 (the interior-facing side of the outboard pane or the exterior-facing side of the inboard pane) to reflect heat back into the room. If you find that even with new weatherstripping your door feels cold, it may be that the gas fill (Argon or Krypton) has leaked out of the Insulated Glass Unit (IGU). A failed seal in the IGU is different from failed weatherstripping; it means the thermal barrier of the glass itself is gone. If you see fogging between the panes, no amount of weatherstripping will save you; you will need to replace windows or at least the glass units.
“The NFRC provides a reliable way to determine if a product will perform as advertised in its specific climate zone.” – NFRC Performance Standards
The NFRC label is your best friend here. It tells you the U-Factor, the Solar Heat Gain Coefficient (SHGC), and the Visible Transmittance. In a cold climate, you want that U-Factor as low as possible, ideally below 0.30 for a sliding door. The weatherstripping’s job is to ensure that the door’s actual performance matches these laboratory-tested numbers. Without a tight seal, a high-performance door is nothing more than a very expensive, transparent wall that leaks like a sieve.
Final Adjustments and Maintenance
Once the sash is back in the frame, you must re-adjust the rollers. The goal is to have the door sit perfectly square in the rough opening. If the door is tilted even slightly, the weatherstripping at the top and bottom will not engage correctly, leaving a triangular gap for air to bypass. Use a level on the side of the door and adjust the rollers until the gap between the door and the jamb is uniform from top to bottom. This ensures that the pile is compressed evenly across its entire length.
Don’t forget the weep holes. These are the small outlets at the bottom of the exterior frame that allow water to exit the track. If these are clogged, water will back up into the track, soak your new weatherstripping, and eventually rot out your subfloor. Use a small wire or a can of compressed air to make sure they are clear. A functioning drainage system is just as important as the air seal. In the world of glazing, water management is a science, and the sill pan is your last line of defense.
Maintenance is simple: keep the tracks clean. Use a vacuum with a crevice tool once a month. Avoid heavy oils or greases which attract dirt and turn into an abrasive paste that grinds down your seals. A dry silicone spray is all you need for the tracks. If you treat your sliding door with the same respect you give your HVAC system, it will keep your home comfortable for decades. But remember, if the frame itself is warped or the wood is soft, it might be time to stop patching and finally replace windows to ensure your home remains the sanctuary it was meant to be.