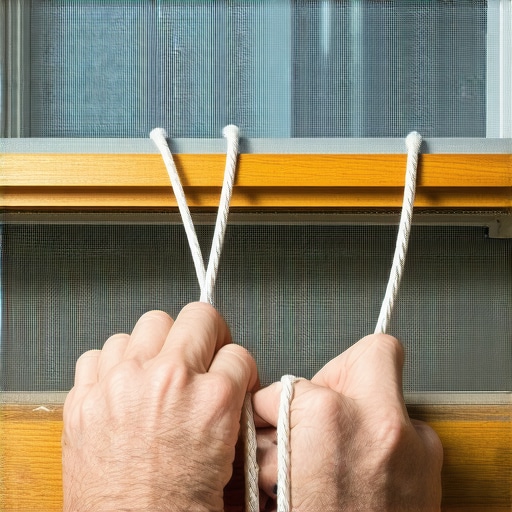
The Master Glazier’s Perspective: Why the Sash Cord is the Heartbeat of the Window
In my twenty five years of hanging glass and squaring frames, I have seen the same story play out in a thousand historic homes. I once pulled a stop bead off a window in a 1920s brick bungalow and found the weight pocket filled with wet, moldy insulation that had been stuffed in there by a previous owner trying to stop a draft. The header was beginning to show signs of early stage rot because the previous installer relied on the nailing fin of a cheap insert window instead of maintaining the integrity of the original rough opening. This is the hallmark of a ‘caulk and walk’ contractor. They see a broken cord and tell you it is time to replace windows entirely. I see a broken cord and I see a mechanical system that has lasted a century and simply needs a tune up. A traditional sash window is a marvel of balance and physics. It relies on a counterweight system hidden within the wall to allow for effortless operation. When that cord frays, it is not just an inconvenience. It is a sign that the friction in your pulley system is increasing, which eventually leads to a broken cord and a sash that becomes a guillotine. Repairing these windows is a precision task that requires an understanding of the shim, the meeting rail, and the air barrier. Let us get into the technical reality of restoring these historic beauties.
“Installation is just as critical as the window performance itself. A high-performance window installed poorly will fail.” AAMA Installation Masters Guide
Anatomy of a Weighted System: Beyond the Surface
To perform a proper window repair on a double hung sash, you must first understand the components. We are dealing with the sash, which is the moveable frame holding the glass. The glass is held in place by the glazing bead or putty. The sash travels vertically along the jamb, held in place by the stop bead on the interior and the parting bead between the upper and lower sashes. The weight of the glass and wood is offset by a cast iron or lead weight hanging inside a hidden pocket. This weight is connected to the sash via the sash cord, which runs over a pulley. If you live in a cold climate like Chicago or Minneapolis, the condition of these cords is vital for your home’s thermal envelope. A frayed cord often prevents the sash from closing fully at the meeting rail. When that gap exists, your U-Factor, which measures the rate of heat loss, skyrockets. You are no longer managing the dew point within the glass unit. You are essentially living with a hole in your wall. A window cleaner might notice the fraying first when they try to tilt or move the sash for access. Do not ignore their warning. A snapped cord means the weight drops to the bottom of the pocket, and the sash becomes a dead weight that can crack the glass or injure a hand.
The Technical Protocol for Cord Replacement
Before you begin, you need the right materials. Do not buy cheap clothesline from a big box store. You need #8 braided cotton sash cord with a reinforced synthetic core. This prevents the stretching that occurs with pure cotton while maintaining the traditional look. You will also need a sharp chisel, a pry bar, a hammer, and a ‘mouse’, which is a small lead weight on a string used to fish the new cord through the pulley. Start by removing the stop bead. This is the vertical trim on the interior that keeps the lower sash in place. Use your chisel to carefully break the paint seal. If you are sloppy here, you will mar the wood. Once the stop bead is removed, the lower sash can be pulled forward. You will see the cord attached to the side of the sash, usually knotted into a specialized groove called a ‘sash pocket’. Carefully cut the old cord while holding the sash, then set the sash aside on a padded surface. Now, locate the access panel in the jamb. This is a small rectangular piece of wood held in by a single screw. Remove it to reveal the weight. This is where the autopsy of your window performance happens. Check for debris or old insulation that might be interfering with the weight’s travel.
“Standard practice for installation of exterior windows requires specific attention to the air barrier continuity.” ASTM E2112
The Physics of the Pully and the Weight
With the weight exposed, remove the old cord from the weight’s eyelet. Now, take your ‘mouse’ and drop it over the top of the pulley. Gravity will pull it down into the weight pocket where you can grab it through the access panel. Tie your new sash cord to the mouse string and pull it back up and over the pulley. At this point, I like to inspect the pulley itself. If the pulley is seized with paint or rust, it will act like a saw on your new cord. Use a drop of light machine oil on the axle. This reduces the coefficient of friction and ensures a smooth glide. Tie the new cord to the weight using a secure knot, such as a bowline or a figure eight. Pull the cord taut and cut it to the appropriate length. The math here is critical. If the cord is too long, the weight will hit the bottom of the pocket before the window is fully closed. If it is too short, the weight will hit the pulley before the window reaches the sill. I always calculate the length so that when the sash is sitting on the sill, the weight is suspended about two inches above the floor of the pocket.
Climate Impact and Thermal Efficiency
In northern regions, the primary enemy is heat loss and the resulting condensation. When we perform this window repair, we are also looking to restore the seal at the meeting rail. A traditional sash window is designed so that when the sash is locked, the two rails are pulled together, creating a mechanical seal. If your cords are unevenly tensioned, the sash will sit crooked, leaving a wedge shaped gap that invites cold air. This air carries moisture, which hits the cold glass and turns into condensation. Over time, this water runs down to the sill, where it rots the wood from the inside out. By replacing the cord and ensuring the weights are properly balanced, you allow the lock to function as intended. This improves the overall U-Factor of the opening. While some salesmen will push triple pane units with argon fills, a well maintained historic sash with a high quality storm window can achieve very competitive thermal performance without the massive cost of a full replacement. We call this protecting the building’s thermal bridge.
Final Assembly and Maintenance
Once the cords are tied into the sash pockets, gently place the lower sash back into the frame. Test the movement. It should feel almost weightless. Reinstall the parting bead and the stop bead. If the parting bead is damaged, replace it. It is a critical component that prevents air infiltration between the upper and lower sashes. Once the window is back together, it is a good time to call a professional window cleaner to remove any oils or debris from the glass. Maintenance is the key to longevity. Every year, you should inspect the sash for any signs of paint failure or wood rot. Check the weep hole if your storm windows have them, as a blocked weep hole will trap water against the sill. Remember, a window is not a static object. It is an operable piece of machinery that requires periodic calibration. By mastering the art of the sash cord, you are preserving the history of your home and ensuring its efficiency for another century.