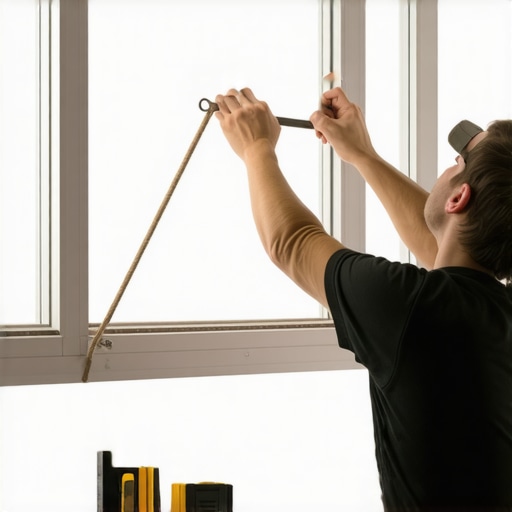
The Anatomy of a Gravity-Fed System: Why Modern Windows Often Fail Where Wood Endures
In my twenty-five years of standing on ladders and squinting at glazing beads, I have seen the window industry move from craftsmanship to planned obsolescence. Many homeowners are told that once a sash cord snaps, the window is a relic of the past, a thermal sieve that must be torn out and replaced with a multi-chambered vinyl extrusion. I disagree. A well-maintained double-hung wood window with a functioning weight-and-pulley system can outlast any modern insert if you understand the physics of the rough opening. I once sat across from a high-pressure salesman who was trying to convince a family in a 1920s Tudor that their windows were structurally compromised because the cords had frayed. He was pitching a $40,000 replacement package with a return on investment that would take over a century to realize. I had to step in and explain that for the cost of a few lengths of #8 spot cord and some high-quality window cleaner, they could restore the thermal integrity of their home without losing the architectural soul of the building.
“Installation and maintenance are just as critical as the window performance itself. A high-performance window installed poorly will fail, but a classic window maintained correctly remains a functional asset.” – AAMA Installation Masters Guide
In northern climates where the dew point is a constant battle against the interior glass surface, maintaining the operability of your wood sashes is vital for moisture management. If a window cannot open, you cannot vent the humid air that leads to mold growth on the muntins. Replacing a sash cord is not merely a cosmetic fix; it is a restoration of a mechanical system designed to balance gravity against human effort. To perform this repair, you must look past the paint and understand the internal cavity where the cast iron weights reside.
Step 1: Surgical Extraction of the Stop Bead
The biggest mistake a novice makes is grabbing a pry bar and yanking. This is how you splinter a century of old-growth Douglas fir. To replace the cord, you must first remove the stop bead, the vertical strip of wood that keeps the lower sash in place. Take a sharp utility knife and score the paint line where the bead meets the jamb. This prevents the paint from peeling off in large, unsightly sheets. Use a stiff putty knife to gently create a gap, then use a small pry bar over a wide-blade putty knife to distribute the pressure. If you do not protect the wood, you will leave indentations that no amount of wood filler can truly hide. Once the stops are removed, the lower sash is operable only by the remaining cord. Support it carefully; a falling sash is a guillotine for your fingers.
Step 2: Accessing the Weight Pocket
Behind the jamb lies the weight pocket. This is a hollow space where the counterweights travel up and down as you move the sash. Most historic windows have an access panel or a “pocket cover” held in by a single screw or simply wedged in place by decades of paint. Locate this panel near the bottom of the track. If the previous installer was a “caulk-and-walk” amateur, they might have painted this shut. Use your utility knife to find the seam. Once open, you will find the cast iron weight resting at the bottom of the cavity, still attached to the ghost of the old cord. Remove the weight and clear out any debris or old insulation that might interfere with its travel. This is a good time to check for rot at the sill, as moisture often migrates into these pockets if the exterior flashing is compromised.
Step 3: Routing the New Sash Cord
Do not use cheap nylon clothesline. It stretches under the constant tension of the weight, and eventually, your sash won’t stay open. You need a #8 or #10 braided cotton sash cord with a synthetic core for strength. This provides the friction needed for the pulley while maintaining the tensile strength required for daily use. Feed the cord over the pulley at the top of the jamb. A trick of the trade is to use a “mouse”—a small piece of lead or a heavy nut tied to a string—to help gravity pull the cord down through the dark cavity to the access pocket. Once the cord appears at the bottom, pull it through and tie it to the weight using a secure figure-eight knot. Ensure the knot is tight; you do not want to be fishing this weight out of the bottom of the wall again in six months.
Step 4: Balancing the Sash and Setting the Length
This is where the physics of the window repair becomes precise. Pull the cord until the weight is suspended just an inch or two from the top of the pulley. With the weight at its highest point, the sash should be at its lowest point (resting on the sill). Cut the cord, leaving enough slack to tie a knot into the side of the sash. Most sashes have a bored-out hole and a groove (the sash cord regain) on the side. Tie a knot and seat it into the hole, securing it with a small clout nail or staple if necessary. It is critical that the weight never hits the bottom of the pocket before the sash is fully closed. If the cord is too long, the weight will rest on the floor of the pocket, and the sash will feel heavy or refuse to stay shut, compromising your U-factor and allowing cold air to infiltrate the rough opening.
Step 5: Reinstallation and Pulley Lubrication
Before you button everything back up, inspect the pulley itself. If it squeaks or drags, the friction will eventually fray your new cord. A drop of light machine oil on the axle is all it takes. Replace the pocket cover and then carefully reposition the sash. When you reinstall the stop beads, do not hammer the nails in fully until you have tested the travel of the sash. It should slide smoothly without binding. If it feels too tight, the stop beads are pinching the sash; if too loose, you will have air infiltration. This balance is what separates a master glazier from a handyman. Once satisfied, set the nails and use a high-quality window cleaner to remove the fingerprints from the glass. You have now extended the life of a superior architectural element for less than the cost of a single service call.
“Standard Practice for Installation of Exterior Windows emphasizes that the water resistive barrier must be integrated with the window frame to prevent moisture intrusion into the wall cavity.” – ASTM E2112
The Real ROI: Comfort and Durability
When you replace windows with modern units, you are often trading a repairable system for a disposable one. A broken cord is a minor mechanical failure, not a death sentence for the window. By mastering these five steps, you maintain the structural integrity of your home’s envelope. In cold climates, a properly corded and weighted sash, combined with a high-quality storm window, can achieve thermal performance that rivals modern double-pane glass without the risk of seal failure. The next time a salesman tells you that your wood windows are obsolete, remember that gravity never fails, but a vinyl weld eventually will. Focus on the mechanics, respect the wood, and your windows will continue to manage the light and heat of your home for another century.