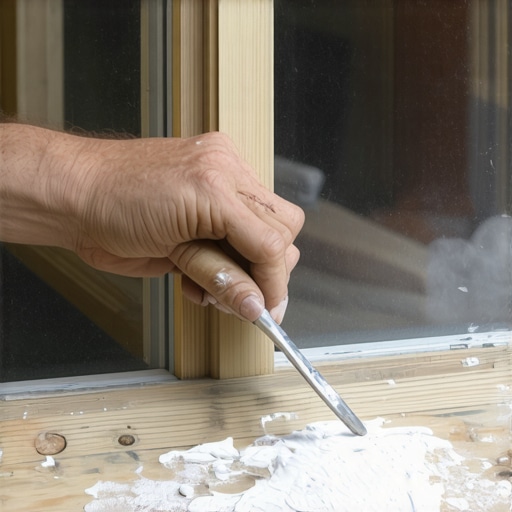
The Reality of the Rattling Sash
You hear it every time the wind kicks up from the north. That rhythmic clatter of glass against wood is not just a nuisance: it is the sound of energy dollars escaping your home. As a glazier with over two decades in the field, I have seen homeowners rushed into a decision to replace windows entirely when the structural bones of their original wood frames are actually superior to the hollow-core vinyl junk being sold today. Old-growth heartwood is a biological marvel of density and rot resistance, but it relies on a sacrificial barrier: the glazing putty. When that putty dries, cracks, and falls away, the system fails. This is where the real window repair begins.
The Rot Autopsy: A Cautionary Tale
I pulled a wood sash out of a Victorian home in Chicago last October, and the bottom rail was so saturated with moisture it crumbled like a wet biscuit in my hands. Why? The previous homeowner had tried a quick fix with cheap silicone caulk instead of traditional glazing compound. They trapped water against the wood. The moisture couldn’t escape, the dew point shifted inside the frame, and the wood fiber literally dissolved. That mistake turned a simple maintenance task into a structural reconstruction. Proper window repair is about moisture management, not just plugging holes. If you do not understand how a sill pan or a weep hole functions, you should not be touching a putty knife.
“Installation is just as critical as the window performance itself. A high-performance window installed poorly will fail.” AAMA Installation Masters Guide
Climate Logic: Why Wood Matters in the Cold
In northern climates like Minneapolis or New England, the enemy is conductive heat loss. Wood has an incredible natural R-value. Unlike cheap aluminum or thin-walled vinyl, wood does not act as a thermal bridge as easily. When we talk about window repair on these units, we are aiming to lower the U-Factor. By re-glazing and adding a high-quality storm window, you can often achieve thermal performance that rivals modern double-pane units without the 150-year ROI of a full replacement. In these cold zones, the U-Factor is king. You want to keep that glass temperature above the point where interior humidity condenses, preventing the very rot I described earlier.
The Anatomy of the Sash
Before you pick up a tool, you must understand the components. The Rough Opening is the hole in your wall. The sash is the operable part of the window that holds the glass. Within that sash, you have the muntins (the bars dividing the glass) and the glazing bead or putty line. If you are dealing with a double-hung window, you also have the complexity of the weight and pulley system hidden in the pocket. Do not cut those cords unless you are prepared to balance the sash manually later.
The Master’s Process: Step-by-Step Re-glazing
1. Sash Removal and Assessment
Start by removing the sash from the frame. If it is a double-hung, you will need to remove the stop beads. Label them. I have seen too many apprentices mix up left and right stops, leading to a window that binds. Once the sash is on your bench, inspect the rough opening for signs of water infiltration. Look for the flashing tape or the lack thereof. If the building paper is not lapped correctly, no amount of putty will save the wood.
2. Stripping the Old Compound
Use a heat gun to soften the old, rock-hard putty. Be surgical. If you overheat the glass, it will crack from thermal shock. I prefer using a glazing knife with a stiff blade. You must get down to the bare wood of the rabbet (the groove the glass sits in). If you leave old oils or dust, the new compound will not bond. This is where the window cleaner comes in later: for now, keep the glass clear of debris.
3. The Secret of the Prime
Never apply putty to raw wood. The dry wood will suck the linseed oil right out of the putty, causing it to fail prematurely. Apply a coat of boiled linseed oil or an oil-based primer to the rabbet. This seals the wood and ensures the putty stays flexible for decades. This is a technical requirement often skipped by the “caulk-and-walk” crowd.
4. Back-Bedding: The Structural Seal
Roll out a thin rope of glazing compound and press it into the rabbet before you drop the glass back in. This is called back-bedding. When you press the glass down, it creates a seamless (in the sense of a continuous) airtight seal between the glass and the wood. If you skip this, air will leak behind the glass, causing condensation and rot.
5. Setting the Glazing Points
Use a point driver to install glazing points every six inches. These small metal triangles are what actually hold the glass in place. The putty is merely the weatherproofing. If the glass can rattle, the points are not deep enough or there are not enough of them.
6. Tooling the Putty
Take a golf-ball-sized amount of putty and work it in your hands until it is warm and pliable. Press it firmly against the glass and the sash edge. Use your glazing knife in one smooth motion to create a clean, angled bead. The line should be just below the sightline of the muntins on the other side. This is the mark of a pro. A jagged putty line is the sign of an amateur.
“Standard Practice for Installation of Exterior Windows requires specific attention to the interface between the window and the water-resistive barrier.” ASTM E2112
The Physics of Drying and Painting
Linseed oil putty does not “dry” in the traditional sense: it oxidizes. Depending on the humidity and temperature, it can take anywhere from seven to fourteen days to form a “skin” hard enough to paint. If you paint too early, the oil will bubble under the surface. If you wait too long, the putty will crack. Use a high-quality oil-based paint and “lap” the paint about 1/16th of an inch onto the glass. This creates a final weather seal that prevents water from getting behind the putty. Once the paint is cured, a professional window cleaner can be used to remove the oils and smudges from the glass, but avoid ammonia-based cleaners on fresh paint.
The Math of Comfort vs. The Myth of Savings
Salespeople will tell you that you must replace windows to save 40% on your energy bill. As a glazier, I call that a fantasy. Most heat loss in a home happens through the attic and the rough opening gaps, not the glass itself. By re-glazing and properly using shims and flashing tape to seal the frame to the house, you address 90% of the comfort issues for 10% of the cost of new units. A well-maintained wood window can last 100 years. A vinyl replacement has a lifespan of 15 to 20 years before the seals on the Insulated Glass Units (IGUs) fail and they become foggy trash.
Conclusion: The Glazier’s Creed
Windows are the eyes of the building, but they are also the most complex part of the thermal envelope. Re-glazing is a lost art that respects the craftsmanship of the past while utilizing the physics of the present. Take the time to back-bed your glass. Don’t skimp on the primer. Wait for the skin to form. If you treat the wood with the respect it deserves, it will keep your home dry and warm for another century. Don’t be the person who relies on a tube of caulk to fix a structural problem. Do it right, or don’t do it at all. “