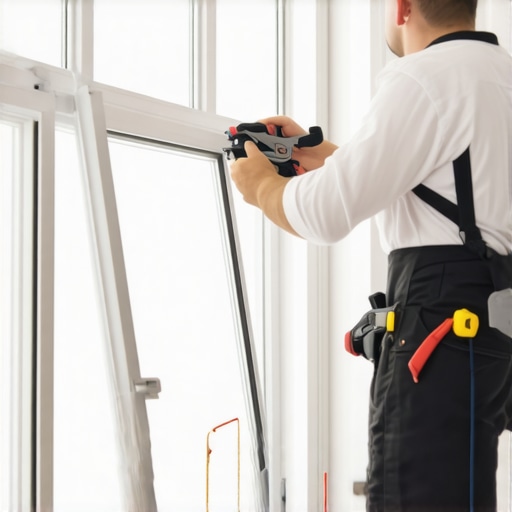
The Sound of Failure: When the Weight Drops
That sudden, heavy thud inside your wall isn’t a ghost; it is the sound of a gravity-fed system failing. When a sash cord snaps, your window ceases to be a functional tool for ventilation and becomes a heavy, dangerous guillotine. In my twenty-five years of glazing, I have seen homeowners try to prop these open with sticks, books, and even wine bottles, but the reality is that a broken cord is a mechanical failure that compromises the entire thermal envelope of your home.
I remember pulling a weighted sash out of a 1912 Victorian in Portland. As soon as I removed the interior stop, I realized the issue went far beyond a frayed rope. The previous installer had attempted to ‘fix’ a draft by stuffing fiberglass insulation into the weight pocket, which had trapped moisture against the rough opening. I pulled out a handful of black, rotted wood that used to be the structural header. This is why we don’t ‘caulk-and-walk.’ A window is a complex system of water management and air pressure, and when one component like a sash cord fails, it often reveals years of neglected maintenance.
The Anatomy of the Weight-and-Pulley System
To understand the fix, you must understand the physics. Traditional double-hung windows operate on a counter-balance system. Inside the wall, hidden by the casing, are cast-iron or lead weights. These are connected to the sash via a cotton or synthetic cord that runs over a pulley. When you lift the bottom sash, the weight drops, neutralizing the force of gravity. If the cord snaps, the sash falls. It is that simple, and that frustrating.
“Installation is just as critical as the window performance itself. A high-performance window installed poorly will fail.” AAMA Installation Masters Guide
In cold northern climates, a broken cord does more than stop the window from opening. It prevents the meeting rail from sealing tightly. In cities like Chicago or Boston, that gap becomes a highway for heat loss. When the sash cannot be pulled tight against the head jamb or the sill, your U-Factor (the rate of heat transfer) sky-rockets. You aren’t just losing air; you are losing the battle against the dew point. If the interior glass surface temperature drops low enough because of those drafts, you get condensation, which leads to mold on your muntins and sash rails.
The Mechanical Autopsy: Accessing the Pocket
The first step in any window repair is the teardown. You must remove the interior stops carefully. If you are a window cleaner by trade, you know that old paint is the enemy here. Use a sharp utility knife to score the paint line between the stop and the casing to prevent splintering the wood. Once the stops are off, the sash can be swung out of the frame. This is the moment where you inspect the glazing bead and the condition of the wood.
Most historic windows have an ‘access pocket’ located in the side jamb. This is a small, removable piece of wood held in by a single screw or simply by the pressure of the surrounding frame. Removing this plate allows you to reach into the dark, mysterious cavity of the wall to retrieve the fallen weight. If there is no access pocket, you are looking at a much larger job that involves removing the entire interior casing.
Thermal Logic: Why Repair Beats Replacement
Many salesmen will tell you that a broken cord is a sign you need to replace windows entirely with modern vinyl units. I disagree. A well-maintained wood sash with a high-quality storm window can often match the energy performance of a mid-grade double-pane unit, without the 150-year ROI. In northern climates, the wood itself acts as a natural thermal break. Unlike cheap aluminum, wood doesn’t readily conduct cold from the exterior to the interior.
The key to efficiency in these old systems is the air seal. When re-roping, I always recommend installing bronze weatherstripping along the tracks. This creates a physical barrier that stops the air infiltration that typically plagues old homes. We focus on the U-Factor, but air leakage is the real silent killer of comfort. If your window is leaky, it doesn’t matter if you have the best Low-E coating in the world; you are still heating the neighborhood.
“Water penetration is the leading cause of premature building envelope failure. Proper flashing and integration with the weather-resistive barrier are essential for long-term durability.” ASTM E2112 Standard Practice
Step-by-Step Restoration Protocol
1. **Secure the Sash**: Carefully remove the sash and set it on a flat work surface. This is a great time for a window cleaner to deep-clean the glass and check for cracked putty.
2. **Extract the Weight**: Open the pocket door and pull out the iron weight. Remove the old, frayed cord and discard it. Use a vacuum to clear out any debris or ‘nesting’ material that might have accumulated in the pocket over the decades.
3. **The Mouse and the String**: Professional glaziers use a ‘mouse’—a small lead weight on a thin string. Drop the mouse over the pulley and let it fall down to the access pocket. Tie your new #8 spot cord to the string and pull it back up and over the pulley.
4. **The Knot**: Use a simple figure-eight knot to secure the cord to the weight. It is crucial that the knot is seated deeply in the weight so it doesn’t rub against the sides of the pocket, which causes friction and eventual snapping.
5. **Balancing the Load**: This is the technical part. You must cut the cord to the exact length so that when the sash is fully closed, the weight is hanging just a few inches above the bottom of the pocket. If the cord is too long, the weight will hit the bottom and the sash won’t stay up. If it is too short, the weight will hit the pulley and prevent the window from closing.
The Final Seal and Calibration
Once the cords are replaced, you must ensure the sash moves freely within the rough opening. This often requires using a shim to adjust the side jambs if the house has settled. A window that binds will eventually fray the cord again. I always apply a thin layer of paraffin wax to the tracks. It’s an old-school trick that makes the sash glide like it is on ice.
Do not settle for a ‘caulk-and-walk’ solution. If your glazier doesn’t talk about sill pans or the shingle principle of water shedding, they aren’t doing it right. Every hole we make or repair in a wall is a potential leak. By restoring the sash cord and properly sealing the stops, you are preserving the structural integrity of your home and ensuring that your thermal envelope remains intact for another fifty years. Don’t buy the hype of the ‘maintenance-free’ window; buy into the science of proper repair.