The Reality of Window Maintenance and Hardware Failure
In the twenty-five years I have spent hanging off the sides of mid-rise buildings and meticulously restoring historic wood sashes, I have learned one universal truth: a window is a mechanical system, not a static object. When that system fails, it usually starts with a screw. You might be attempting a simple window repair or trying to replace windows that have reached their thermal expiration date, only to find that the hardware is locked in a death grip of oxidation and paint. This is where the novice installer reaches for the drill and makes a mess, but a master glazier reaches for a rubber band. This simple elastomer tool is often the only thing standing between a successful repair and a ruined sash.
The Narrative: A Lesson in Humidity and Hardware
A homeowner once called me in a panic because their new double-hung units were ‘sweating’ so profusely that water was pooling on the sill. I walked in with my hygrometer and found the interior humidity at a staggering 62 percent while the outside air was a biting ten degrees. It was not a window failure; it was a lifestyle issue. However, the constant moisture had already begun to wreak havoc on the operable hardware. When I attempted to adjust the sash balance to ensure the weatherstripping was seating properly, I encountered a Phillips head screw that had been rounded out by a previous ‘caulk-and-walk’ contractor who used too much torque. The screw was effectively fused to the pivot shoe. This is a classic scenario where the rubber band method is the difference between a five-minute fix and an afternoon of drilling out high-tensile steel.
“Installation is just as critical as the window performance itself. A high-performance window installed poorly will fail.” AAMA Installation Masters Guide
The Physics of the Stripped Screw: Why They Fail
Before we discuss the fix, you must understand the failure. In cold northern climates, we deal with the ‘Dew Point’ constantly. When warm interior air hits a cold glass surface, condensation forms. If your windows lack a warm-edge spacer or have a high U-Factor, that moisture migrates to the hardware. Over time, this leads to galvanic corrosion, especially if you have stainless steel screws in an aluminum frame or zinc-plated fasteners in a damp wood sash. The screw head becomes brittle, and the moment you apply torque with a standard driver, the metal shears, leaving you with a smooth, rounded crater where the drive recess used to be. This is further exacerbated by the use of the wrong window cleaner. Ammonia-based cleaners can actually accelerate the degradation of certain hardware finishes, leading to premature binding of the threads.
The Rubber Band Method: Step-by-Step Glazing Zooming
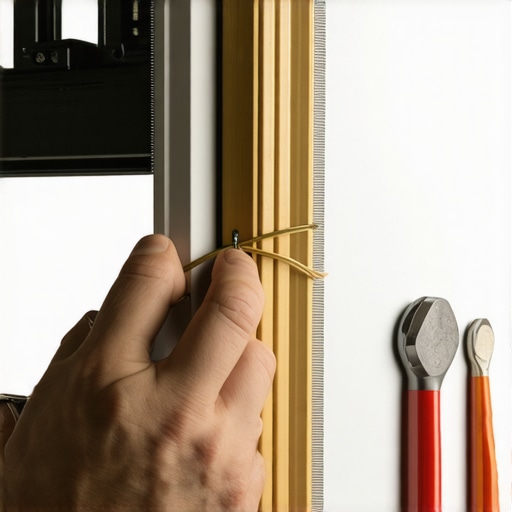
The rubber band method works on the principle of increasing the coefficient of friction and filling the void left by the ‘cam-out’ effect. When a screwdriver bit spins inside a screw head, it removes the sharp angles required for torque transfer. An wide, flat rubber band acts as a sacrificial friction interface. Place the band flat over the stripped screw head. Insert your screwdriver (use a manual driver, never a power impact for this) and press down with significant axial pressure. The rubber is forced into the remaining crevices of the drive recess, gripping the sides of the screwdriver bit and the screw simultaneously. As you turn, the elastomer prevents the bit from slipping, allowing the torque to be distributed across the remaining surface area of the screw head. This is particularly effective on the small screws found in a glazing bead or a sash lock.
Repair or Replace: Decoding the Thermal Logic
When you are faced with multiple stripped screws and failing hardware, you have to ask if the window is worth saving. In our northern climate, heat loss is the primary enemy. We look for a low U-Factor (the lower the better) and high-performance Low-E coatings. If you are working on a single-pane window with a storm attachment, the ROI on a full frame tear-out might be twenty years. However, the comfort factor of a triple-pane unit with Argon gas fill is immediate. The Low-E coating should be on Surface 3 to reflect long-wave infrared radiation back into the room. If the rough opening is still square and the sill pan is intact, a pocket replacement might be viable, but if I see rot in the header, we are doing a full-frame replacement with proper flashing tape and a drip cap. Water management is a science, not an afterthought.
“Standard practice for installation of exterior windows requires a continuous path for moisture to exit the building envelope without contacting structural members.” ASTM E2112
Maintaining the Operable Sash
To avoid the stripped screw nightmare, maintenance is key. Every six months, an operable window should be cleaned and lubricated. Use a non-ammoniated window cleaner on the glass and a dry silicone spray on the tracks. Never use WD-40 or oil-based lubricants, as they attract dust and debris which eventually turn into a grinding paste, wearing down the shim and the sash. Check the weep holes in the bottom of the frame; if these are clogged, water will back up into the track, saturate the screw holes, and lead to the rot and corrosion I mentioned earlier. If you find a screw that is starting to show signs of wear, replace it immediately with a high-quality stainless steel fastener before it becomes a permanent part of the frame.
The Science of the Sill: Why Details Matter
A window is only as good as its weakest point, which is usually the interface between the frame and the rough opening. When I perform an installation autopsy, I often find that the previous installer skipped the backer rod and sealant or failed to integrate the flashing tape with the house wrap. This allows air infiltration, which brings in moisture. That moisture settles on the hardware, leading to the very stripped screws we are trying to remove. Whether you are a homeowner or a technician, remember that every component of the fenestration assembly—from the muntin to the glazing bead—must work in harmony to manage the environment. Don’t be the guy who relies on a bead of caulk to hide a poor fit. Do the math, check your tolerances, and keep a rubber band in your tool vest.