The Invisible Barrier: Why Your Glass Looks Failed When It Is Just Filthy
As a master glazier with over two decades in the field, I have seen it all, from shattered curtain walls to the most stubborn solar films imaginable. Homeowners often mistake a bubbling, purpled window film for a blown seal or a permanent defect in the glass itself. They see the distortion and assume the window repair bill will be astronomical. However, more often than not, the issue is an aftermarket polyester layer that has simply reached the end of its chemical lifespan. When you look at a window, you should be seeing the highest possible Visible Transmittance (VT), not a hazy mess of degraded adhesive. The process of restoring that clarity requires more than just a bucket of soapy water; it requires an understanding of the molecular bond between the polymer and the glass surface.
“Installation is just as critical as the window performance itself. A high-performance window installed poorly will fail.” – AAMA Installation Masters Guide
A homeowner called me in a panic because their new windows were ‘sweating.’ I walked in with my hygrometer and showed them the humidity was 60 percent. It was not the windows; it was their lifestyle choices combined with a thick, poorly applied privacy film that was trapping moisture against the glazing bead. This film was preventing the glass from reaching the ambient room temperature, effectively shifting the dew point to the interior surface. I had to explain that by removing this film, we could allow the Low-E coating on Surface 3 to do its job, reflecting heat back into the room while preventing that unsightly condensation. We spent the afternoon stripping the film, and the ‘sweating’ disappeared almost instantly.
The Science of Adhesion and Thermal Stress
To understand how to remove film, you must understand the two primary types of adhesives used in the industry: pressure-sensitive adhesives (PSA) and dry-bond or water-activated adhesives. PSA films are common in DIY kits and remain slightly tacky over time, whereas dry-bond films form a rigid, chemical link with the glass. In Northern climates where U-Factor is the primary concern, these films are often added to older single-pane units to mimic the performance of a modern IGU (Insulated Glass Unit). The problem arises when the sun’s infrared radiation bakes these adhesives for years. This leads to a process called cross-linking, where the adhesive becomes more attached to the glass than to the polyester film itself. This is why the film often peels away in tiny, frustrating shards, leaving a thick, grey residue behind.
When you prepare to remove this film, you must consider the type of glass. Annealed glass, common in older sashes, is much more susceptible to thermal stress than tempered glass. If you apply too much concentrated heat with a high-wattage heat gun to a single spot, you risk a stress crack that will force you to replace windows entirely. The goal is to agitate the polymer chains of the adhesive just enough to soften the bond without hitting the critical temperature threshold of the glass pane.
The Technical Protocol for Residue-Free Extraction
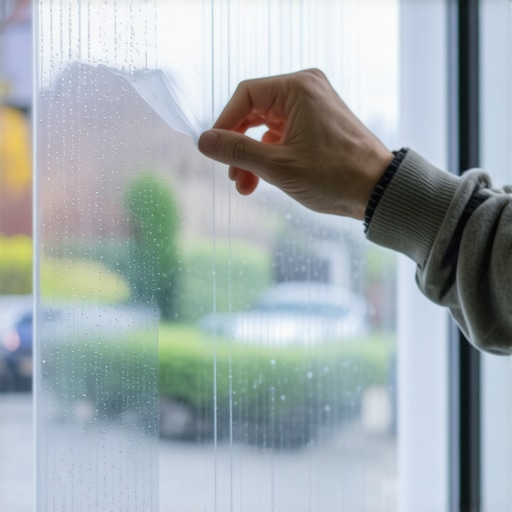
The easiest and most effective way to remove window film is the ‘Steam and Scrape’ method. Unlike chemical solvents which can drip into the weep holes and damage the internal spacers or the secondary seal of an IGU, steam provides a controlled, moist heat that penetrates the polyester layer. You start at the top of the sash and work your way down. By keeping the steamer head approximately two inches from the surface, you allow the heat to migrate through the film to the adhesive layer. Once the corner is lifted, you pull the film at a 45-degree angle. This specific angle is vital because it maximizes the shear force on the adhesive, encouraging it to stay with the film rather than the glass.
If the film is so degraded that it won’t pull in a single sheet, you must pivot to the ‘Soap and Scrub’ technique. This involves a solution of distilled water and a few drops of a non-lanolin dish soap. You must avoid soaps with heavy perfumes or lotions, as these will only add to the residue. Saturate the surface and cover it with a thin plastic drop cloth or trash bag. This creates a localized greenhouse effect, softening the adhesive over the course of an hour. When you peel back the plastic, the adhesive should have the consistency of soft gelatin, making it much easier for a professional-grade window cleaner to manage.
“The selection of a cleaning agent should be based on its ability to remove the specific contaminant without causing damage to the glass or the surrounding frame materials.” – NFRC Performance Guidelines
The Tool Kit: Beyond the Scraper
A master glazier never reaches for a standard hardware store scraper. You need a 4-inch or 6-inch stainless steel blade. Carbon steel blades rust quickly and can develop microscopic burrs that will etch the glass surface permanently. When you are scraping, the blade must be brand new. I tell my apprentices that a blade is cheaper than a new piece of glass. You must maintain a low angle, roughly 15 degrees, and keep the glass wet at all times. Scraping dry glass is the fastest way to create permanent scratches that no window cleaner can buff out. Pay close attention to the muntins and the glazing bead; adhesive tends to pool in these areas, and if left behind, it will attract dust and allergens, creating a black line around the perimeter of your view.
Addressing the Sticky Residue: The Final Polish
Once the bulk of the film is gone, you are often left with a tacky film. This is where most people fail, resorting to harsh chemicals that can damage the finish on a vinyl or wood sash. Instead, use a 70 percent Isopropyl alcohol solution. The alcohol acts as a solvent for the remaining adhesive polymers but evaporates quickly enough that it does not soak into the rough opening or the shims behind the frame. Use a microfiber cloth, as paper towels will simply shred against the tacky residue. Work in small circular motions, starting from the perimeter and moving toward the center to ensure you aren’t just pushing the glue into the corners.
In some cases, especially in older homes with wood sashes, the removal of the film might reveal that the glazing putty has dried out and cracked. This is a common window repair need that is often hidden by dark films. As the film is removed, the structural integrity of the glass-to-sash bond is revealed. If you see daylight between the glass and the wood, it is time to re-glaze. This is also the perfect time to inspect the sill pan and ensure that any moisture that might have been trapped by the film hasn’t caused rot in the header or the rough opening.
The Efficiency Myth of DIY Films
While many people install these films to save on energy costs, the actual ROI is often negligible compared to the benefits of a modern window. A high-quality Low-E coating is atomized onto the glass during the manufacturing process, providing a permanent solution for Solar Heat Gain Coefficient (SHGC) management. Aftermarket films, while cheaper upfront, are a temporary fix. In a cold Northern climate, a triple-pane window with an Argon gas fill will always outperform a single-pane window with a stick-on film. If you find yourself repeatedly cleaning and replacing films, it may be a sign that the thermal performance of your current units is simply inadequate for your environment. Removing the film is the first step in assessing whether you can continue with window repair or if it is finally time to invest in new, high-performance fenestration.
Conclusion: Clarity Through Precision
Window maintenance is an exacting science. Removing old film is not just about aesthetics; it is about restoring the functional parameters of the glass. By using controlled heat, the correct blade materials, and a systematic approach to residue removal, you protect the investment you have made in your home. Remember that the glass is part of a larger system. Whether you are dealing with an operable casement or a large fixed picture window, the way you treat the glass surface impacts the longevity of the entire unit. Keep your blades sharp, your glass wet, and never underestimate the power of a little steam to undo years of sun-baked neglect. After the residue is gone, you will likely find that your windows don’t just look better; the entire room feels more vibrant as the full spectrum of natural light is finally allowed back into your living space.{“@context”:”https://schema.org”,”@type”:”HowTo”,”name”:”How to Remove Window Film Without Residue”,”step”:[{“@type”:”HowToStep”,”text”:”Apply steam to the top corner of the film to soften the adhesive.”},{“@type”:”HowToStep”,”text”:”Slowly peel the film at a 45-degree angle, maintaining constant steam pressure.”},{“@type”:”HowToStep”,”text”:”Spray a soapy water solution on any remaining adhesive and cover with plastic for 60 minutes.”},{“@type”:”HowToStep”,”text”:”Use a new stainless steel razor blade at a 15-degree angle to scrape the softened residue while wet.”},{“@type”:”HowToStep”,”text”:”Wipe the glass with Isopropyl alcohol and a microfiber cloth to remove the final tacky layer.”}]}