The Anatomy of a Breach: Why a Broken Window is a Structural Emergency
When a window shatters, most homeowners see a mess. As a glazier with over 25 years in the field, I see a failure in the building envelope. A window is not merely a piece of transparent material; it is a sophisticated thermal barrier designed to manage the delicate balance between interior comfort and exterior chaos. Whether it was a stray baseball or a thermal stress crack caused by uneven expansion in the glass, a broken pane represents a total collapse of your home’s pressure boundary. If you are in a cold climate like Chicago or Minneapolis, that hole in the glass is not just letting in air; it is inviting a catastrophic shift in your dew point. I remember a specific case that illustrates this perfectly. A homeowner called me in a panic because their new windows were ‘sweating’ and eventually one cracked right down the middle during a cold snap. I walked in with my hygrometer and showed them the humidity was 60 percent. It wasn’t the windows; it was their lifestyle choices combined with a lack of ventilation. That moisture was hitting the cold surface of the glass, condensing, and in the case of the crack, the thermal stress of the temperature differential between the protected edge of the glass and the center of the pane was too much to bear. When the glass fails, you have a limited window of time to prevent secondary damage to your sills, your drywall, and your structural headers.
“Installation is just as critical as the window performance itself. A high-performance window installed poorly will fail.” AAMA Installation Masters Guide
Step 1: Assessing the Damage and Immediate Safety
Before you reach for the duct tape, you must understand what you are looking at. Is it a single pane of float glass, or an Insulated Glass Unit (IGU)? If it is a modern IGU, you have two or three layers of glass separated by a spacer bar. If only the outer pane is broken, your thermal envelope is compromised but not destroyed. If both are gone, you have a direct conduit for moisture. First, put on cut-resistant gloves. Do not use standard gardening gloves; glass shards can slice through thin leather easily. Use a shop vac to clear the area, but do not vibrate the frame excessively. If you have an operable sash, you might be tempted to open it to clean the area. Don’t. You risk the remaining shards falling out of the glazing bead and causing injury. Your goal is to stabilize the situation until you can call for a professional window repair or a full replace windows consultation. If the frame is damaged, especially if it is a vinyl frame that has cracked at the welded corner, a simple glass replacement will not suffice. Vinyl has a high coefficient of thermal expansion, and once those corners lose structural integrity, the window will never sit square in the rough opening again.
Step 2: Clearing the Glazing Bead and Preparing the Surface
To secure the window properly, you need a clean surface. For older wood windows, this means carefully removing the wooden stops or the glazing putty. For modern vinyl or fiberglass, you are looking at the glazing bead, the plastic strip that snaps into the frame to hold the glass in place. If the glass is still partially held in by the glazing bead, use a putty knife to gently pry the bead away from the glass. This is technical work. If you slip, you gouge the frame, and that is a permanent aesthetic failure. Once the loose shards are removed, you must address the perimeter. If you are dealing with a North/Cold climate, the U-Factor of your temporary fix is essentially zero, so you need to create an airtight seal. Any air leakage will carry moisture, which will condense on the backside of your temporary patch and run down into the sill pan. If that water reaches the rough opening without a proper path to the exterior, you are looking at rot in the jack studs and king studs within weeks.
“The air leakage of a window assembly shall be determined in accordance with ASTM E283. Poor temporary seals can lead to localized pressure drops that draw moisture into the wall cavity.” NFRC Performance Standards
Step 3: The Plywood Sandwich vs. The Plastic Barrier
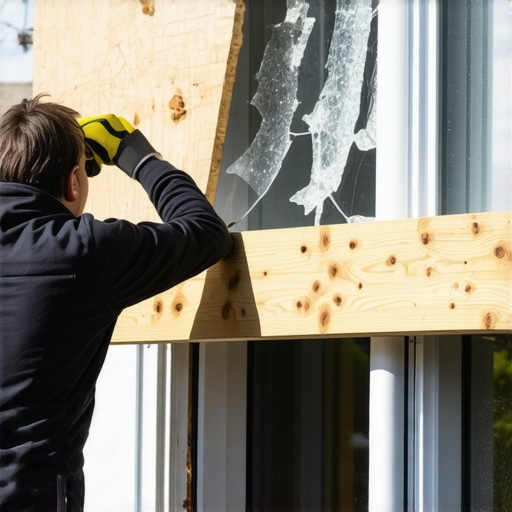
If the breach is large, you need structural rigidity. A trash bag and some packing tape are the hallmarks of a ‘caulk-and-walk’ mentality. Instead, use the Plywood Sandwich method. Cut two pieces of half-inch plywood one inch larger than the opening on all sides. Place one on the exterior and one on the interior. Use bolts with washers to pull them together, sandwiching the frame. This does not require you to screw into the window frame itself, which is critical if you plan on a window repair rather than a total replacement. For smaller cracks, or if you only have one pane broken in an IGU, use high-mil polyethylene plastic. Do not just tape the plastic over the hole. You need to create a dead air space. Use double-sided flashing tape around the perimeter of the sash. Apply the plastic, ensuring it is taut. This mimics the function of a gas fill, like argon, by trapping a layer of non-moving air. It won’t have the same Low-E properties of reflecting long-wave infrared radiation, but it will stop the convection loop that pulls heat out of your room.
Step 4: Moisture Management and the Shingle Principle
Even a temporary fix must respect the Shingle Principle: always lap the upper layer over the lower layer so water flows down and away. If you are taping a plastic sheet over a broken window, the top piece of tape should be tucked under the top lip of the window frame or covered by a drip cap. The side pieces of tape should go over the top piece, and the bottom piece should go over the sides. This ensures that any rain hitting the window flows over the tape rather than behind it. This is why a professional window cleaner will often be the first to notice a failure in the weep holes of a frame. If the weep holes are clogged, the water that bypasses the primary seals has nowhere to go but into your house. When you secure a broken window, ensure you are not blocking the weep holes at the bottom of the frame. You want any water that gets behind your patch to be able to exit to the exterior. This is the difference between a temporary patch and a long-term mold problem.
Step 5: Evaluating the Long-Term Solution
Once the window is secure, you need to decide: repair or replace? If your windows are twenty years old and the seals are failing across multiple units (look for fogging between the panes), a repair is a bandage on a gunshot wound. The desiccant in the spacer bar is likely saturated, and the seal has reached its fatigue limit. If you decide to replace windows, look for high-performance metrics. In cold climates, the U-Factor is your primary concern. You want a lower number, typically below 0.27 for Energy Star certification in Northern zones. This is achieved through triple-pane glass and Low-E coatings on Surface 3 to reflect heat back into the house. However, if you are simply doing a window repair on a relatively new unit, ensure the glazier uses a high-quality spacer, like a warm-edge spacer made of stainless steel or structural foam, rather than the old-fashioned conductive aluminum spacers. The spacer is the most common point of failure for the thermal envelope. Every shim used in the re-installation must be composite, not wood, to prevent moisture wicking. A master glazier knows that the rough opening is never perfectly square, and the way the window is shimmed determines whether the sash will operate smoothly for decades or bind and crack within the first year of seasonal expansion and contraction.