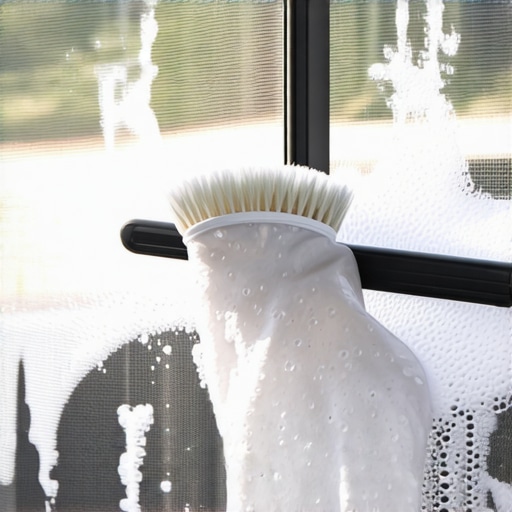
The Glazier’s Guide to Maintenance: No-Removal Screen Cleaning
As a master glazier, I have spent decades analyzing how homeowners interact with their windows. I have watched people throw their backs out trying to wrench a stuck metal screen frame from an old double-hung unit, or completely bend the spline on a tension-sprung fiberglass screen. Sometimes, the safest, most efficient way to handle maintenance is to leave the screen exactly where it is: locked inside the window frame. This guide details how to clean your screens safely without removing them, preserving the structural integrity of your sashes while restoring maximum airflow.
The Narrative Matrix: A Lesson in Broken Tension Springs
A homeowner in Chicago once called me out for what they thought was a major window repair job. They described their relatively new double-hung windows as ‘completely broken and impossible to lock.’ When I arrived with my toolkit, I inspected the frames. The sashes were fine, but the homeowner had attempted to yank the window screens out for their spring cleaning. In the process, they warped the aluminum screen frames, tore the glazing bead on the perimeter, and bent the leaf springs. When they forced the screens back into the tracks, the bent metal obstructed the sash from closing fully, preventing the cam locks from engaging. I had to reconstruct the screen frames right there on their porch. If they had simply cleaned the screens in place, they would have saved hundreds of dollars in unnecessary window repair costs.
The Physics of Screen Obstruction and Climate Logic
Whether you live in a cold northern climate where you want to maximize solar heat gain during winter, or in a humid southern climate where breeze-driven ventilation is key, a dirty screen is a major barrier. Over time, screen mesh acts as a physical filter. It collects pollen, wind-blown dust, road grime, and spider webs. This creates a dense barrier that restricts airflow and reduces visible transmittance. In humid regions, wet grime trapped in the mesh reacts with the glass surface, leading to hard water stains that require professional window cleaner solutions to etch away. By maintaining clean screens, you protect your glass and improve the indoor air quality of your home.
“Dirt and debris allowed to accumulate on window screens and sills can lead to premature degradation of the window’s drainage pathways, potentially causing water infiltration into the rough opening.” – AAMA Installation Masters Guide
Blueprint: The Maintenance Autopsy (In-Place Screen Restoration)
To clean your window screens without removing them, you must understand the principle of gravity and water management. Windows are designed with a built-in drainage system. The bottom of the frame contains a sill pan and tiny weep holes designed to let water escape to the exterior. If you use too much water or pressure while the screen is installed, you risk overwhelming this drainage system and forcing water past the sill into your drywall. Here is the step-by-step technical method to clean your screens safely while they remain in the frame.
Step 1: Prep the Interior and Seal the Sash
Before you touch the screen, you must protect the interior of your home. Close the operable sash behind the screen as tightly as possible and lock it. This creates a physical barrier so that no dust, water, or cleaning solution can penetrate the interior living space. If you are cleaning a screen on an upper story from the inside by sliding the sash up, lay a thick, dry towel across the window sill to catch any drips or dislodged dust.
Step 2: Vacuum with a Soft Brush Attachment
Never use a bare vacuum hose on screen mesh; the suction can stretch the fiberglass or aluminum threads, creating permanent sags. Use a high-quality vacuum cleaner equipped with a soft dusting brush. Gently run the brush in vertical, overlapping strokes across the screen. This removes loose dust, cobwebs, and pet dander without putting outward pressure on the mesh or spline.
Step 3: The Electrostatic Microfiber Wipe Down
For screens with moderate dirt, a dry approach is safest. Use a clean, dry microfiber cloth or a specialized screen-cleaning mitt. These materials carry a natural electrostatic charge that pulls fine dust out of the tiny screen openings rather than pushing it through to the other side. Wipe from top to bottom, applying light pressure.
Step 4: The Low-Moisture Spray and Wipe (For Stubborn Grime)
If your screens have sticky pollen or environmental grease, dry wiping won’t cut it. Mix a mild solution of warm water and a few drops of gentle dish soap in a spray bottle. Lightly mist the screen from the exterior if accessible, or apply the solution directly to a microfiber cloth if working from the inside. Do not use pressure washers or high-pressure hose nozzles.
“High-pressure water application on installed windows can exceed the design pressure of the fenestration assembly, forcing moisture past the weatherstripping and into the building envelope.” – ASTM E2112 Standard Practice
Gently wipe the damp cloth over the mesh. Follow up immediately with a clean, dry towel to absorb the moisture. This prevents dirty water from running down and clogging the weep holes in the window frame.
When It’s Time to Repair or Replace Windows
While cleaning solves aesthetic and airflow issues, sometimes a screen inspection reveals deeper problems. If you notice that the screen mesh is brittle, tearing away from the spline, or if the frame itself is badly warped, cleaning will not restore performance. In these cases, a screen rebuild or professional window repair is necessary. If your windows are old single-pane units that constantly draft, sweat, or fog up, simple maintenance won’t solve the core thermal efficiency issues. That is when you need to consult with a specialist to replace windows with high-performance double or triple-pane units optimized for your local climate.
The Dangers of ‘Caulk-and-Walk’ Solutions
If you discover drafts around your window frames while cleaning, avoid the temptation to just grab a tube of cheap caulk and seal everything shut. Blocking the weep holes or caulking over flashing tape will trap moisture inside the wall cavity, leading to wood rot in the rough opening. Proper water management requires that water has a clear, unimpeded path to drain out of the window assembly.
Summary of Best Practices
Keep your cleaning methods gentle. Regular vacuuming with a soft brush once a season will prevent heavy dirt buildup, meaning you will rarely need to use wet cleaning methods. This simple maintenance routine keeps your views clear, your air fresh, and protects your window frames from moisture-related wear.