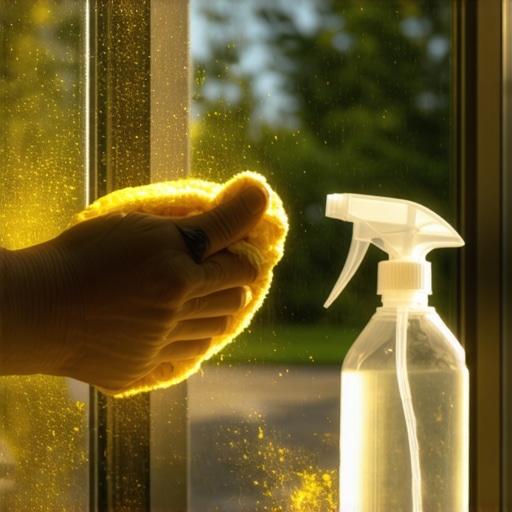
The Microscopic Siege of Your Window Panes
As a master glazier with twenty-five years on the job, I have seen every imaginable substance caked onto a sash. From sea salt in coastal builds to industrial soot in urban centers, nothing creates a more persistent headache for a homeowner than the yellow tide of spring. Pollen is not just dust. At a microscopic level, pollen grains are complex organic structures, often featuring hooks or sticky protein coatings designed to adhere to surfaces. When these particles land on your glass, they do not just sit there; they bond. This bond is strengthened by morning dew and baked into the glass by the sun, especially on high-performance windows with Low-E coatings on Surface #2. If you are dealing with a South-facing exposure in a hot climate, that solar heat gain (SHGC) is not just heating your living room; it is chemically fusing organic matter to your glazing bead.
A homeowner recently called me in a panic because their new windows were ‘sweating’ and looked permanently cloudy. I walked in with my hygrometer and a high-powered flashlight and showed them the humidity was 60% inside, but the cloudiness was actually an accumulation of pine pollen that had been improperly cleaned. They had been using a high-pressure hose, which did nothing but force water and organic particulates into the weep holes, clogging the internal drainage system of the frame. It was not a product failure; it was a maintenance failure. This is why understanding the chemistry of a window cleaner is as vital as the window repair itself.
The Best Homemade Solution for Cleaning Pollen
Most commercial cleaners rely on ammonia or heavy alcohols. While these provide a quick flash-off, they can be devastating to the structural components of a window. Ammonia can degrade the glazing bead, dry out the EPDM gaskets that hold your insulated glass unit (IGU) in place, and even tarnish the finish on a thermally broken aluminum frame. For a solution that is safe for the glass, the spacers, and the finish, we look to the glazier’s toolkit: The Acetic Acid Solution.
The Master Glazier Mix
To combat pollen, you need a surfactant to lift the organic protein and an acid to break the bond. Mix the following in a clean spray bottle:
- 1 part distilled white vinegar (5% acidity)
- 1 part distilled water (Tap water contains minerals like calcium that cause streaking)
- 2 drops of concentrated, pH-neutral dish soap
The vinegar acts as a mild solvent for the pollen proteins without affecting the integrity of the glass surface. The soap acts as a surfactant, reducing the surface tension of the water so it can penetrate the microscopic hooks of the pollen grains. This is far superior to any ‘blue’ store-bought liquid when you are dealing with heavy biological loads. When you apply this, do not do it in direct sunlight. If the glass temperature is too high, the solution will evaporate before the chemical reaction can take place, leaving a film of soap and pollen residue behind.
“Installation is just as critical as the window performance itself. A high-performance window installed poorly will fail.” — AAMA Installation Masters Guide
The Physics of Visible Transmittance (VT)
In the world of fenestration, we talk a lot about the NFRC label. One of the most overlooked numbers on that sticker is Visible Transmittance (VT). This is a value between 0 and 1 that indicates how much light is coming through the glass. A thick layer of pollen can drop your VT by 10 to 15 percent. This does not just make the room darker; it affects the aesthetic quality of the light, shifting it toward a sickly yellow spectrum. By using a proper window cleaner, you are restoring the optical clarity that you paid for when you decided to replace windows in your home.
For those in hotter climates like Texas or Arizona, the goal is often a low SHGC to keep the heat out. If you have Low-E coatings designed to reflect long-wave infrared radiation, you must be extremely careful. While most Low-E coatings are protected inside the IGU (on Surface #2 or #3), some modern high-performance windows have a hard-coat Low-E on Surface #4 (the interior side). Using abrasive cleaners or rough paper towels on these surfaces can microscopically scratch the coating, leading to a permanent haze that no amount of cleaning will fix.
Beyond the Glass: Cleaning the Weep Holes and Sashes
A window is a managed hole in your wall. Its job is to keep water out while allowing for thermal expansion. Every operable window, whether it is a single-hung, double-hung, or casement, has a drainage system. Look at the exterior bottom of your window frame. You will see small slots called weep holes. During a heavy pollen season, these holes become a bottleneck. Pollen mixes with rain, creating a thick sludge that can plug these vents. When the weep holes are blocked, water backs up into the sill pan. From there, it has nowhere to go but into your rough opening, leading to wood rot and mold inside your walls.
“The fenestration interface must be designed to allow for the drainage of incidental water to the exterior.” — ASTM E2112 Standard Practice
When you are cleaning your windows, take a soft brush or a can of compressed air and ensure those weep holes are clear. If you see water standing in your tracks long after a rainstorm, your drainage system is failing. This is a critical point where window repair becomes necessary before the damage spreads to the subfloor. A simple homemade solution for the glass is useless if the frame is holding water against your house’s structure.
Mechanical Action: Squeegees vs. Microfiber
The ‘caulk-and-walk’ installers will tell you a paper towel is fine. They are wrong. Paper towels are made of wood fibers which, at a microscopic level, are abrasive. They also create a static charge on the glass. This static charge acts like a magnet for new pollen particles. Within hours of cleaning with a dry paper towel, you will see a fresh layer of yellow dust clinging to the pane. The professional approach involves a high-quality squeegee with a sharp rubber blade. The squeegee removes the solution and the suspended pollen entirely, leaving no static charge and no residue. If you must use a cloth, only use a clean, lint-free microfiber towel that has been washed without fabric softener. Fabric softeners leave a waxy residue that causes the very streaks you are trying to avoid.
When to Replace Windows Instead of Cleaning
There comes a point where no amount of vinegar and distilled water can save a window. If you see fogging or ‘calcium’ deposits between the two panes of glass, the seal of your IGU has failed. The desiccant inside the spacer bar is saturated, and the argon gas has leaked out, replaced by moist, pollen-laden air. At this stage, the window’s U-factor has plummeted, and its thermal performance is compromised. You are effectively living with a single-pane window. In this scenario, you should look into window repair options to replace the glass unit, or if the frames are also degraded, it may be time to replace windows entirely with modern, thermally broken units that offer better resistance to the elements.
Proper window maintenance is a science. By understanding the interaction between organic matter like pollen and the technical specifications of your glazing, you can protect your investment and ensure your home remains a high-performance envelope. Keep your weep holes clear, your surfactants balanced, and your squeegee blades sharp.
{“@context”: “https://schema.org”, “@type”: “HowTo”, “name”: “How to Clean Pollen Off Windows Like a Pro”, “step”: [{“@type”: “HowToStep”, “text”: “Mix 1 part white vinegar with 1 part distilled water and 2 drops of dish soap.”}, {“@type”: “HowToStep”, “text”: “Apply the solution to the glass using a soft microfiber wand, avoiding direct sunlight.”}, {“@type”: “HowToStep”, “text”: “Use a professional-grade squeegee to remove the solution in a single, continuous motion.”}, {“@type”: “HowToStep”, “text”: “Clear the weep holes in the bottom of the window frame using a soft brush or compressed air.”}], “totalTime”: “PT30M”}