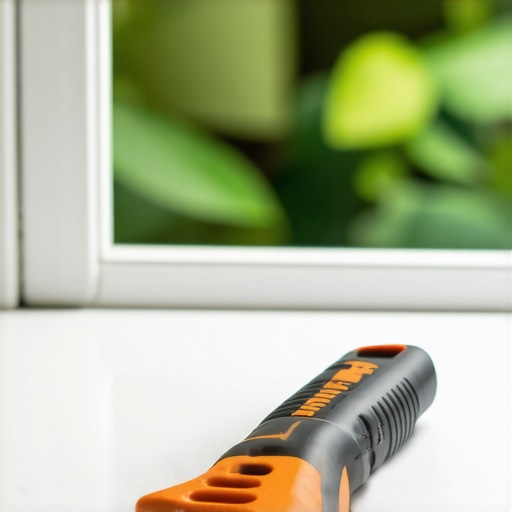
The Precision of the Glazier: Why Small Tools Solve Big Problems
In the world of high-end fenestration, we often talk about thousand-dollar thermal cameras and laser levels that cost more than a used truck. But after twenty-five years of pulling apart failed units and diagnosing water intrusion, I have realized that the most critical tool in my kit is a simple $3 utility knife. It is not about the cost of the steel; it is about the precision of the cut. Whether you are preparing to replace windows or trying to extend the life of an existing window repair, the ability to reach the substrate and remove every molecule of failed sealant is what separates a master from a ‘caulk-and-walk’ amateur. Most people think a window is a static object. It is not. It is a living, breathing mechanical assembly that expands and contracts with every sunrise. If your sealant cannot handle that movement, your rough opening is going to rot.
The Condensation Crisis: A Master Glazier’s Narrative
A few winters back, a homeowner in a frigid northern suburb called me in a total panic. They had spent forty thousand dollars on new high-performance units the year prior, and now the glass was ‘sweating’ so much that water was pooling on the wood sills. They were convinced the seals had failed or the gas fill had leaked out. I walked in with my hygrometer and a fresh blade in my utility knife. I showed them the humidity was hovering at 58 percent while it was five degrees outside. It was not the windows; it was the fact that they had a humidifier running in the basement and heavy drapes blocking the airflow. I used my utility knife to gently probe the glazing bead and the perimeter seal to show them that the installation was still watertight, but their lifestyle was creating a dew point disaster on the interior surface. It was a classic case of understanding the physics of the thermal envelope versus blaming the hardware.
The Architecture of a Seal: Why the Utility Knife is Your Scalpel
When you are performing a window repair, you cannot just layer new caulk over old. That is the fastest way to invite mold into your walls. Silicone does not stick to silicone. Polyurethane does not stick to dirt. The $3 utility knife is the only tool that allows you to perform a ‘surgical’ removal of the old bead. You need to get down to the virgin material of the frame and the siding. I tell my apprentices that if they see even a shimmer of old residue, they are not ready for the new bead. This level of cleanliness is vital because of the expansion and contraction cycles. A typical vinyl frame can expand significantly over a ten-foot span. If your bond is weak because you were too lazy to use a knife, that bond will ‘zipper’ open the first time the temperature drops below freezing.
“Installation is just as critical as the window performance itself. A high-performance window installed poorly will fail.” – AAMA Installation Masters Guide
The Shingle Principle and Water Management
Window installation and maintenance must follow the Shingle Principle. This means every layer of the assembly must shed water to the layer below it and eventually to the exterior. When I perform an installation autopsy on a leaking unit, I usually find that the installer relied on a massive glob of caulk rather than proper flashing. They ignored the rough opening tolerances and failed to install a sill pan. A sill pan is a secondary line of defense that catches any water that gets past the primary seal and directs it back out through weep holes. If you are a window cleaner, you have likely seen these little holes at the bottom of the frame. Never, under any circumstances, should you paint or caulk them shut. They are the lungs of the window. Without them, the frame will fill with water like a bathtub, eventually rotting out the subfloor.
Climate Logic: The Physics of Cold Weather Performance
In cold northern climates, the enemy is heat loss and the dreaded dew point. We look at the U-Factor, which measures the rate of heat transfer. The lower the U-Factor, the better the window is at keeping the heat inside your home. This is achieved through Low-E coatings, typically placed on Surface #3 (the indoor-facing side of the inner pane) to reflect long-wave infrared radiation back into the room. We also use warm-edge spacers between the panes of glass. Older windows used aluminum spacers, which acted as a thermal bridge, conducting the cold from the outside straight to the edge of the glass, causing condensation. Modern spacers use composite materials to break that bridge. When you are looking to replace windows in the North, you are buying a thermal barrier, not just a view.
“The primary purpose of a window sealant is to prevent the intrusion of water and air into the wall cavity, maintaining the integrity of the building envelope.” – ASTM E2112 Standard Practice
The Anatomy of the Sash and Frame
To understand why a window repair fails, you have to understand the components. The sash is the operable part of the window that holds the glass. It sits within the frame. Between the glass and the sash is the glazing bead, a small strip of vinyl or wood that holds the glass in place. Over time, the seal between the glass and the sash can fail, leading to ‘foggy windows’ or ‘blown seals.’ This happens when the desiccant inside the spacer becomes saturated and can no longer absorb moisture. At this point, no amount of caulking or cleaning will help; you are looking at an IGU (Insulated Glass Unit) replacement. When you are working on these units, the utility knife is used to carefully pop the glazing beads without snapping the brittle plastic tabs that hold them in place.
Don’t Buy the Hype: The Reality of ROI
I often see sales reps promising that new windows will pay for themselves in three years through energy savings. That is total nonsense. If you have old single-pane wood windows with storms, jumping to triple-pane krypton-filled units is a massive upgrade in comfort, but the financial ROI might take twenty years. You replace windows for three reasons: comfort, operability, and rot prevention. If your current frames are sound but the seals are drafty, a precision window repair involving the removal of old sealant and the application of a high-quality non-sacrificial backer rod and a tooled bead of silicone can do wonders. You use the utility knife to create a clean ‘V’ groove, insert the backer rod to prevent three-sided adhesion, and then apply the sealant. This allows the caulk to stretch like a rubber band instead of tearing.
The Professional Method for Sealant Application
To do this right, you need to master the ‘pull’ technique. Most amateurs ‘push’ the caulk gun, which creates a messy, uneven bead. A pro pulls the gun at a consistent 45-degree angle. But before that gun even touches the house, the utility knife has already done the heavy lifting. You must shim the window properly within the rough opening to ensure it is plumb, level, and square. If the window is racked, the sash will not sit correctly in the weatherstripping, and you will have air bypass regardless of how much caulk you use. The knife is also used to trim any excess flashing tape that might be visible after the trim is installed. Every cut must be intentional. Every seal must be continuous. This is the difference between a dry house and a structural nightmare. If you see window cleaner streaks on the inside of the glass, that is a nuisance. If you see water stains on the drywall below the muntins, that is a crisis. Start with the right tool, understand the physics of your climate, and never trust a bead of caulk that was applied over a dirty surface. The $3 utility knife is your best friend in the fight against the elements.