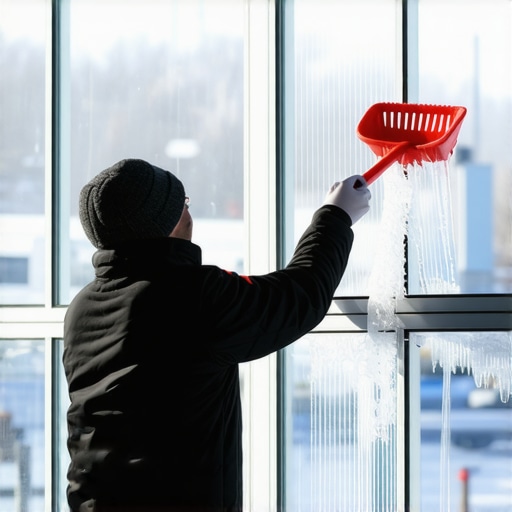
In my twenty-five years as a glazier, I have seen more glass ruined by a two-dollar metal putty knife than by decades of actual weathering. When the thermometer drops to minus twenty and the wind is howling across the plains, your windows become the front line in a thermal war. Ice buildup on the glass is not just a nuisance; it is a symptom of humidity levels, thermal bridging, and the specific U-factor of your glazing unit. Most homeowners reach for the first tool they find in the garage to clear the frost, but without understanding the Mohs scale of hardness, you are one slip away from needing a full window repair or an expensive glass replacement. Using a plastic shovel or scraper is the only professional-grade method for rapid ice removal that protects the integrity of the sash and the delicate Low-E coatings that keep your home habitable.
The Condensation Crisis: A Master Glazier’s Perspective
A homeowner once called me in a panic because their brand-new, high-performance windows were ‘sweating’ and eventually freezing solid on the interior side of the glass. I walked into the home with my hygrometer and a thermal imaging camera. Within five minutes, I showed them that the relative humidity in the house was nearly 65 percent while it was zero degrees outside. It was not a failure of the windows; it was their lifestyle choices and a lack of proper ventilation. The ice was forming because the warm, moist air inside the house was hitting the cold surface of the glass and reaching the dew point instantly. When that happens, the water vapor transitions directly into frost. If you try to hack at that frost with a metal blade, you will inevitably catch the edge of the glazing bead or, worse, create micro-scratches in the glass that will trap dirt and compromise the clarity of the pane forever. I told them what I tell every client: managing ice is about managing physics, not just brute force.
“Condensation and subsequent icing are often not a result of a defective window, but rather an indication of excessive interior humidity levels relative to the exterior temperature.” – AAMA/WDMA/CSA 101/I.S.2/A440 Performance Standard
The Physics of the Plastic Shovel: Why Polycarbonate Wins
To understand why we use plastic, we have to look at the science of materials. Standard residential glass is typically a soda-lime composition with a hardness of about 5.5 to 6.5 on the Mohs scale. A steel blade or a metal shovel edge often contains carbon or alloys that can approach that same hardness, especially if the blade is nicked or dirty. A plastic shovel, typically made of high-density polyethylene (HDPE) or polycarbonate, sits much lower on the scale. This means the plastic will deform or wear down before it can ever penetrate the surface of the glass. When you use a plastic shovel for rapid ice removal, you are utilizing a tool that is hard enough to fracture the crystalline structure of the ice but soft enough to glide over the glass surface. This is critical when you consider that many modern windows have a hard-coat Low-E on surface #4 (the interior surface) to meet strict energy codes. If you scratch that coating, you have effectively ruined the thermal performance of the unit, and there is no window cleaner in the world that can buff it out.
Anatomy of the Window: Protecting the Critical Components
Before you start scraping, you must identify the components you are working around. The Rough Opening is the structural frame that holds the window, but what you are interacting with is the Sash and the Glazing Bead. The glazing bead is the strip of plastic, wood, or metal that holds the glass in place within the frame. If you hit this with a metal shovel, you will gouge it, creating a path for water to enter the Sill Pan area. Once water bypasses the primary seals, it relies on Weep Holes to exit. If those holes are frozen shut and you have damaged the beads, you are inviting rot into your wall assembly. A plastic shovel allows you to clear the ice near the edges without the risk of slicing through the gaskets or the Flashing Tape that might be exposed during a heavy ice event. When you approach the bottom of the window, you must be particularly careful not to force ice into the Operable tracks, as this can bend the hardware or snap the Shim points that keep the window level and square.
“Proper installation and maintenance of the fenestration system are paramount to preventing moisture intrusion and ensuring the long-term durability of the building envelope.” – ASTM E2112 Standard Practice for Installation of Exterior Windows
Step-by-Step Rapid Ice Removal Technique
First, evaluate the type of ice. If it is clear ‘black ice,’ it is bonded tightly to the glass. If it is white ‘hoar frost,’ it is brittle and easy to remove. Start by using a plastic shovel with a flat, straight edge. Do not use a pointed garden shovel. Hold the tool at a 30-degree angle to the glass. This angle is specific; too steep and you risk ‘chattering’ which can cause stress fractures in cold, brittle glass; too shallow and you just slide over the top of the ice. Start from the center of the pane and work toward the Muntins or the edges. This ensures that any pressure you apply is distributed across the strongest part of the glass. Never strike the glass. Instead, use a steady, firm pushing motion. If the ice is stubborn, do not use boiling water. The thermal shock can cause the glass to explode instantly due to the rapid expansion of the molecules. Instead, use a solution of isopropyl alcohol and water, which lowers the freezing point and weakens the bond between the ice and the glass, allowing the plastic shovel to do its job with minimal effort.
When to Stop Scraping and Start a Window Repair
If you find that ice is forming between the panes of a double or triple-glazed unit, stop scraping. This is a sign of a catastrophic seal failure. When the Argon or other noble gas fill escapes, it is replaced by moist air. This moisture then freezes inside the unit where you cannot reach it. In this scenario, no amount of scraping will help. You are looking at a window repair that involves replacing the Insulated Glass Unit (IGU). Similarly, if you see ice forming around the perimeter of the frame on the drywall, your Flashing Tape or Sill Pan may have failed, or the installer skipped the critical step of insulating the gap between the Rough Opening and the window frame. This is a common failure in ‘caulk-and-walk’ installations where the installer relied on a thin bead of sealant rather than proper backer rod and high-grade foam. In these cases, it is time to replace windows with units that are properly specified for your climate zone, focusing on a lower U-factor to keep the interior glass temperature above the dew point.
Maintaining Your Windows Post-Ice
Once the ice is cleared, you must act as your own window cleaner to remove the residue. Road salt, minerals from the ice, and pollutants can become concentrated in the meltwater. If left on the glass, these can etch the surface over time. Use a microfiber cloth and a pH-neutral cleaner. Check the Weep Holes to ensure they are clear of debris. If they are blocked, the next time the ice melts, the water will back up into your home, potentially damaging your flooring and substructure. Proper window maintenance is not just about aesthetics; it is about protecting the multi-thousand dollar investment you have made in your home’s envelope. By using the correct tools and understanding the glazing science, you ensure that your windows last for their full thirty-year life cycle instead of failing during the first decade of service.