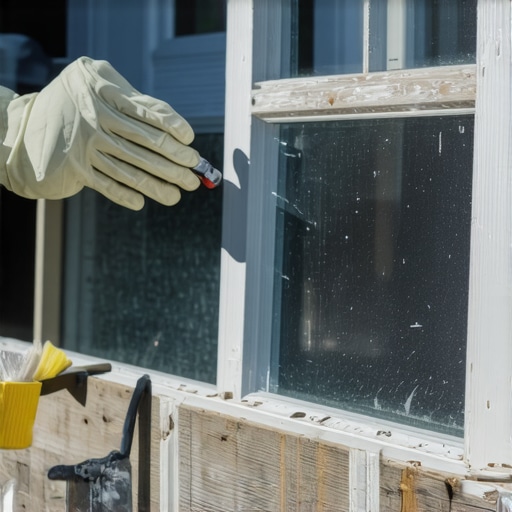
The Frustrating Reality of the Foggy View
When a homeowner notices a fogged window or a jagged crack across their view, the immediate instinct is often to reach for a window cleaner or a roll of duct tape. However, as someone who has spent over twenty-five years navigating the technical complexities of the building envelope, I can tell you that a window is never just a piece of glass. It is a sophisticated thermal barrier. A homeowner called me in a panic because their new windows were ‘sweating.’ I walked in with my hygrometer and showed them the humidity was 60 percent. It was not the windows; it was their lifestyle: the three-gallon humidifier running in the nursery and the lack of attic ventilation. This serves as a critical lesson for anyone looking at window repair: you must understand the physics of the sash before you attempt to replace windows yourself.
The Anatomy of the Sash: More Than Meets the Eye
Before you can even think about the physical act of glass replacement, you must understand the assembly. In the trade, we do not just say ‘frame.’ We talk about the sash, which is the operable part of the window that holds the glass. Within that sash, the glass is held in place by a glazing bead or a bed of glazing putty. If you are dealing with a modern Insulated Glass Unit, or IGU, you are not just looking at one pane. You are looking at a hermetically sealed sandwich of glass separated by a spacer bar and filled with an inert gas like Argon. The moment you see moisture between those panes, the seal has failed. The desiccant inside the spacer has reached its saturation point and can no longer absorb the moisture that has migrated through the primary and secondary seals. This is the ‘Dew Point’ crossing into your line of sight. When you decide to replace a single pane in a modern window, you are actually replacing the entire IGU. You cannot simply ‘clean’ the inside of a double-pane window because the factory seal is gone.
“Installation is just as critical as the window performance itself. A high-performance window installed poorly will fail.” AAMA Installation Masters Guide
The Physics of the North: Why U-Factor Governs the Glass
Since we are discussing the replacement of a pane in a climate where heat retention is the primary goal, we must talk about the U-Factor. In colder regions like Minneapolis or Chicago, the U-Factor is the king of metrics. It measures the rate of non-solar heat loss. The lower the U-Factor, the better the window is at keeping the heat you paid for inside the structure. This is achieved through the application of a Low-E, or low-emissivity, coating. This is a microscopically thin, virtually invisible layer of silver or other low-emissive materials deposited on the glass surface. In a cold climate, we want that coating on Surface number 3: the outward-facing surface of the inner pane. This position allows the coating to reflect long-wave infrared radiation (heat from your furnace or fireplace) back into the room while still admitting visible light. If you install a replacement IGU with the coating on the wrong surface, you are fighting against the physics of your own home.
Step 1: The Precision Measurement of the Rough Opening
To replace a single pane, or rather the IGU, you must measure with a tolerance of 1/16th of an inch. A master glazier never rounds up. You must remove the glazing bead (the plastic or wood strip holding the glass in) to see the actual edge of the glass. Measure the width and the height of the glass itself, then measure the total thickness of the unit. Most modern residential units are 5/8 inch, 3/4 inch, or 7/8 inch thick. If you buy a 3/4 inch IGU for a 5/8 inch pocket, the glazing bead will never snap back into place, and you will be left with a structural failure. While you have the beads off, inspect the setting blocks. These are small rubber or plastic spacers that the glass sits on. They are vital for preventing the glass from touching the frame, which would cause thermal stress cracks or allow water to sit against the seal.
Step 2: The Art of the Extraction
Removing the broken glass is where most amateurs fail and end up with a trip to the emergency room. You need a non-marring pry bar and a glazing shovel. If the window was set with a glazing tape (a high-tack butyl or acrylic tape), you will need to carefully cut the bond using a thin-bladed putty knife. Do not force the sash. If the sash is wood, you might be dealing with old-fashioned glazing points: small metal triangles driven into the wood to hold the glass. These must be removed with pliers before the glass can be lifted out. Once the old glass is out, the ‘Rough Opening’ of the sash must be cleaned of all old sealant. Any remaining debris will create a high spot that can cause the new glass to crack under the pressure of the glazing bead.
“The window installation shall be designed to provide a continuous water-resistive barrier and a continuous air barrier.” ASTM E2112 Standard Practice
Step 3: Setting the New Unit for Success
Before placing the new glass, you must ensure your sill pan is clear of debris. In some cases, a small bead of neutral-cure silicone is necessary on the interior leg of the sash. Place your setting blocks at the quarter points to distribute the weight of the glass evenly. If the window is an operable casement or an awning window, proper shimming is critical to keep the sash square. If the glass is not ‘toe-and-heeled’ correctly (a technique of shimming the glass diagonally to support the weight of the sash), the window will eventually sag and refuse to lock. This is the difference between a window cleaner doing a quick fix and a professional restoration. Once the glass is seated, replace the glazing bead. It should snap into place with firm pressure. If you are using old-fashioned putty, it must be smoothed with a single, continuous stroke of the knife to create a ‘shed’ for water to run off.
Thermal Stress and the Danger of Tinting
I often see homeowners try to fix a hot room by applying after-market window film to their new double-pane windows. This is a recipe for disaster. Adding a film can change the solar heat gain coefficient (SHGC) so drastically that the air space between the panes overheats. This creates immense pressure on the seals and can cause the glass to shatter due to thermal stress. If you are replacing a pane because of heat issues, you should have ordered a unit with a lower SHGC and a Low-E coating on Surface number 2. The glass itself should do the work, not a stick-on film that will peel and bubble within five years.
The Myth of the Quick Fix
The marketing for replacement windows often suggests that you will save 40 percent on your energy bills. This is a distortion of the truth. While new windows will certainly improve comfort by reducing air infiltration and radiant heat transfer, the Return on Investment (ROI) based purely on energy savings can take decades. The real reason to replace windows or a single pane is the integrity of the building envelope. A leaking window leads to rotted headers and black mold. Water management is a science of gravity and surface tension. Every component, from the drip cap at the top to the weep holes at the bottom, must work in harmony. If you replace a pane but forget to clear the weep holes in the bottom of the vinyl frame, you are essentially building a small aquarium inside your wall. Eventually, that water will find a way into your subfloor.
When to Give Up and Call a Pro
If you find that the sash itself is warped or if the wood is soft enough to poke a screwdriver through, replacing the pane is like putting a band-aid on a broken leg. At that point, you are looking at a full-frame replacement. A pocket replacement (insert window) might work if the frame is square and solid, but if you want to ensure the longevity of the repair, you must address the flashing. Most ‘caulk-and-walk’ installers will just slap some sealant around the trim and call it a day. A professional will ensure that the flashing tape is integrated with the house wrap in a shingle-fashion, ensuring that any water that gets behind the siding is directed out and away from the rough opening. Do not be seduced by the cheapest quote; be seduced by the installer who talks about the physics of water and the chemistry of the sealant they use. Precision in the glazing bead, the shim, and the sash is the only thing standing between a dry home and a rot-filled nightmare.