The Anatomy of a Failing Weighted System
In the world of high-performance glazing and automated window systems, there is still a deep respect for the mechanical simplicity of the weighted double-hung window. However, simplicity does not mean immunity to physics. I remember a specific project on a 1920s colonial where I pulled a vinyl insert out of a house and found the original header was completely black with rot because the previous installer relied on the nailing fin instead of proper flashing tape. They had also cut the original sash cords and stuffed fiberglass insulation into the weight pockets, which acted like a sponge for condensation. This is the reality of many window repair jobs: correcting the ‘quick fix’ of a predecessor who didn’t understand how a wall breathes.
When you are dealing with a window that won’t stay up or feels like it weighs eighty pounds, you are likely looking at a snapped sash cord. This cord is the lifeline of the operable sash, connecting it to a cast-iron weight hidden within the wall cavity. While many homeowners think they need to replace windows entirely when a cord snaps, a master glazier knows that a well-maintained wood sash with a functioning weight system can outperform cheap modern replacements in terms of longevity and character. The key is understanding the physics of the balance and the tolerances of the rough opening.
“Installation is just as critical as the window performance itself. A high-performance window installed poorly will fail.” – AAMA Installation Masters Guide
The Climate Logic of the Weighted Window
In northern climates where heat loss is the primary enemy, the weight pocket is often a source of significant air infiltration. When we talk about the U-Factor of a window, we are measuring the rate of non-solar heat flow. A hollow weight pocket allows cold air to circulate directly against the interior casing. As you perform a window repair on these units, you must consider the dew point. If warm interior air hits the cold pocket, you get internal condensation. This is why we don’t just replace the cord; we inspect the sash for structural integrity and ensure the parting beads and stop beads are tight enough to minimize drafts without binding the sash. We are managing the thermal bridge between the outdoors and the conditioned space.
Phase 1: Accessing the Weight Pocket
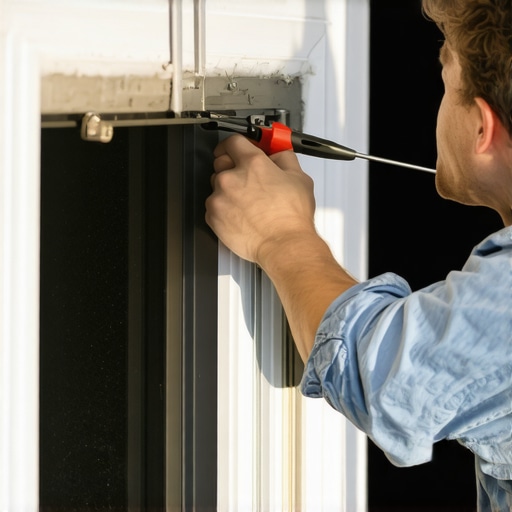
To begin, you do not need a truck full of power tools. You need a stiff putty knife, a pry bar, a hammer, and a steady hand. Start by removing the interior stop bead. This is the vertical strip of wood that holds the lower sash in place. If the window has been painted shut by a careless window cleaner or previous owner, use a utility knife to score the paint line. Do not pry until the paint is broken, or you will splinter the wood. This is where ‘caulk-and-walk’ installers fail; they force the wood and ruin the muntin profiles.
Once the stop beads are removed, gently swing the lower sash inward. You will see the sash cord (or what is left of it) disappearing into a groove on the side of the sash. Most sashes use a simple knot or a metal ‘clamshell’ to secure the cord. Disconnect the cord and set the sash aside. If you are working on the upper sash, you must also remove the parting bead, which is the narrow strip of wood sitting in a channel between the two sashes.
Phase 2: The Physics of the Pulley and Weight
Locate the access panel (the ‘pocket cover’) at the bottom of the side jamb. This is usually held in by a single screw or is simply wedged in place. Once opened, you will find the cast-iron weight. Reach in and remove the old cord. Examine the pulley at the top of the frame. If the pulley is seized or squeaks, use a dry graphite lubricant. Avoid oils or greases that attract dust, which will eventually create a grinding paste that destroys the pulley axle. This attention to detail separates a technician from a handyman.
“Standard Practice for Installation of Exterior Windows requires a level of precision that accounts for both water shedding and structural integrity.” – ASTM E2112
Now, measure your new cord. I recommend using a #8 or #10 spot-shotted cotton sash cord with a synthetic core. Pure cotton stretches too much over time, leading to a sash that won’t close fully, while pure nylon is too slippery for the pulley. Drop a ‘mouse’ (a small lead weight on a string) over the pulley and down into the pocket. Tie the new sash cord to the mouse and pull it through. This is the part where patience is a virtue. If the rough opening is tight, the weight might snag on the framing.
Phase 3: Balancing the Load
Attach the weight to the cord using a bowline knot or a figure-eight. Both are secure and won’t slip under the constant tension of the cast iron. The length of the cord is critical. With the weight resting on the bottom of the pocket, the sash should be able to reach the top of the frame without the weight hitting the pulley. If the cord is too short, the weight will bang against the pulley, causing damage. If it is too long, the sash won’t stay open at the top. It is a game of inches and gravitational equilibrium.
Before you reassemble, check the glazing bead. If the putty is cracked, this is the time to repair it. A loose pane of glass will vibrate, causing noise and air leakage. If you see signs of water ingress, inspect the sill pan. In older homes, the sill is often sloped to shed water, but over decades of house settling, that slope can disappear. We must ensure the ‘shingle principle’ is maintained: every layer of the window must overlap the one below it so that gravity pulls water away from the interior.
The Final Fit and Shim Logic
As you replace the sash into the tracks, ensure the parting beads are seated deeply into their grooves. If the sash feels tight, do not sand the wood immediately. Check if the frame has bowed. Sometimes, a shim behind the jamb has slipped, causing the frame to pinch the sash. A master glazier uses a level to check for plumb and square before blaming the sash itself. Once the sash is moving smoothly, reattach the stop beads. Use small finish nails and a nail set to keep the appearance clean.
Properly maintained, these windows can last another hundred years. While a salesman might tell you that you must replace windows to save on energy, the reality is that a restored wood window with a quality storm window on the exterior often has a better ROI and a lower U-factor than a cheap replacement. You are preserving the architectural soul of the building while ensuring mechanical functionality. This isn’t just window repair; it is building science in its most fundamental form.