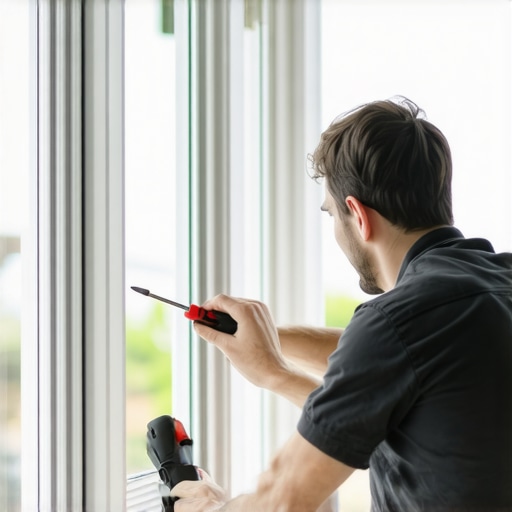
The Mechanics of Casement Failure: More Than Just a Broken Bar
When a casement window stay fails, you are not just dealing with a minor annoyance; you are looking at a compromise in the structural integrity of the window assembly. As a glazier with over 25 years in the field, I have seen how a simple mechanical failure can lead to catastrophic air infiltration and water damage. The window stay is the unsung hero of the casement frame. It manages the sash’s center of gravity as it pivots on the hinges, ensuring that the wind load is distributed evenly across the frame. If the stay is bent, seized, or snapped, the sash becomes a sail, putting immense pressure on the remaining hardware and the rough opening itself.
A homeowner called me in a panic because their new windows were ‘sweating.’ I walked in with my hygrometer and showed them the humidity was 60 percent. It wasn’t the windows; it was their lifestyle. However, the result of that high internal humidity was more than just fogged glass. The moisture had migrated into the hardware tracks, causing the window stay to undergo accelerated galvanic corrosion. The salt from their humidifiers and the constant condensation had seized the friction sliders, and when they tried to force the window shut, the stay snapped. This is why window repair is never just about swapping parts; it is about understanding the environment in which the window lives.
The Anatomy of a Casement Stay
To perform a proper window repair, you must understand the components. The stay, or the friction hinge, consists of the track, the slider, and the arm. In high-performance glazing, these are typically made of 304 or 316-grade stainless steel to resist oxidation. The stay is what allows you to hold the sash open at a specific angle. When you replace windows of the casement variety, you are often upgrading to hardware that has a higher shear strength. The stay is screwed into the sash and the frame. If those screws are not seated into a reinforced part of the profile, the hardware will eventually pull out, a common issue in low-quality vinyl frames that lack internal steel or aluminum stiffeners.
“Installation is just as critical as the window performance itself. A high-performance window installed poorly will fail.” – AAMA Installation Masters Guide
This AAMA standard applies to the hardware just as much as the flashing tape. If the stay is not aligned within a tolerance of 1/16th of an inch, the sash will not seat properly against the weatherstripping. This leads to a rise in the U-Factor, as the thermal break is bypassed by incoming cold air. In cold climates like Chicago or Minneapolis, this air infiltration does more than just raise the heating bill; it moves the dew point to the interior surface of the frame, leading to ice damming on the window sill.
The Thermal Logic of Casement Hardware
In Northern climates, the enemy is heat loss. A casement window is superior to a double-hung window in this regard because the sash is pressed against the frame by the locking mechanism and the stay. This creates a compression seal. When you are looking to replace windows, the casement style is often recommended for its low Air Leakage (AL) rating. According to the National Fenestration Rating Council (NFRC):
“Air leakage ratings for windows typically range between 0.1 and 0.3. The lower the number, the better the window is at keeping outside air out.” – NFRC Performance Standards
. A broken stay prevents this compression from occurring. It allows the sash to sag, creating a gap at the top of the frame where warm, moist air can escape, leading to the condensation crisis I mentioned earlier. This is where a professional window cleaner often becomes the first line of defense; they are the ones who notice the early signs of hardware fatigue or the build-up of mineral deposits that impede the stay’s movement.
Step-by-Step Replacement of a Broken Window Stay
Before you begin, you must ensure you have the correct replacement part. Not all stays are created equal. You must measure the length of the track and the length of the long and short arms. Even a quarter-inch difference will prevent the sash from closing or opening to its full 90-degree cleaning position. Start by supporting the sash. Never attempt a window repair on a casement frame without a second set of hands or a vacuum cup to hold the glass. If the stay is the only thing holding the sash and it fails completely, the sash can fall, leading to a dangerous glass breakage scenario.
First, remove the screws from the sash-side of the stay. These are often located under the glazing bead or along the bottom rail. Use a manual screwdriver rather than an impact driver to avoid stripping the threads in the vinyl or wood. If you find that the screws are spinning, the structural substrate is likely compromised. In this case, you may need to use a larger gauge screw or a specialized epoxy filler to restore the screw’s bite. Once the sash side is free, move to the frame side. Remove the screws from the track. This is where you will likely find the most debris. A window cleaner might have missed this area, as it is only visible when the window is fully extended.
Before installing the new stay, clean the rough opening area and the track channel. Use a silicone-based lubricant, never a petroleum-based one, as petroleum can degrade the vinyl or the weatherstripping over time. Align the new track and pre-drill your holes if you are using a different hardware brand. Ensure the stay is perfectly parallel to the frame. If it is canted even slightly, the friction will be uneven, and the new stay will fail within a few seasons. Once the track is secured, attach the arm to the sash. This requires precise alignment. Close the window slowly to check the reveal. The reveal is the gap between the sash and the frame; it should be uniform all the way around. If the sash is hitting the frame at the bottom, you need to adjust the shim of the stay to lift the sash.
Why Precision Matters in Window Repair
The physics of a window are delicate. We think of glass as a solid, but in the context of a house, it is a dynamic membrane. The Low-E coating on Surface number 3 of your double-pane glass is designed to reflect long-wave infrared radiation back into the room. If your broken stay allows the window to sit slightly open, the cold air rushing in cools that glass surface below the dew point, rendering your expensive Low-E coating useless against the resulting frost. Furthermore, the muntins and the glazing bead can be stressed by a misaligned sash. A sash that doesn’t close squarely puts torque on the insulated glass unit (IGU), which can lead to a premature seal failure. When the seal fails, the argon gas escapes and is replaced by moisture-laden air, leading to the dreaded ‘cloudy window’ syndrome.
When to Repair vs. When to Replace Windows
Many homeowners ask if it is worth it to perform a window repair or if they should just replace windows entirely. If the frame is wood and shows signs of rot around the stay’s mounting points, or if it is a low-grade vinyl that has become brittle due to UV exposure, replacement is the only logical path. However, if the frame is fiberglass or thermally broken aluminum and the issue is strictly mechanical, a hardware replacement is a cost-effective way to extend the life of the unit. Remember, the ROI on new windows is often measured in decades, not years. Your first priority should be maintaining the air-tightness of the current envelope. A well-maintained 10-year-old window with a functioning stay and fresh weatherstripping will often outperform a poorly installed brand-new window. Every weep hole must be clear, every stay must be lubricated, and every sash must be square. This is the glazier’s creed. Managing a hole in the wall is a game of millimeters, and the window stay is the primary tool for winning that game.
{“@context”:”https://schema.org/”,”@type”:”HowTo”,”name”:”How to Replace a Broken Window Stay on a Casement Frame”,”description”:”A technical guide by a master glazier on replacing window stays to restore structural integrity and thermal performance.”,”step”:[{“@type”:”HowToStep”,”text”:”Support the sash and remove the screws from the sash-side of the broken stay.”,”name”:”Remove Sash Fasteners”},{“@type”:”HowToStep”,”text”:”Unscrew the track from the frame and clean the channel of all debris and old lubricant.”,”name”:”Detach Frame Track”},{“@type”:”HowToStep”,”text”:”Align the new stay track and secure it with stainless steel screws, ensuring it is perfectly parallel.”,”name”:”Install New Track”},{“@type”:”HowToStep”,”text”:”Connect the stay arm to the sash and adjust the height to ensure a uniform reveal.”,”name”:”Connect and Adjust”}],”totalTime”:”PT45M”,”supply”:[“Replacement casement stay”,”Stainless steel screws”,”Silicone lubricant”],”tool”:[“Manual screwdriver”,”Vacuum cup”,”Hygrometer”]}