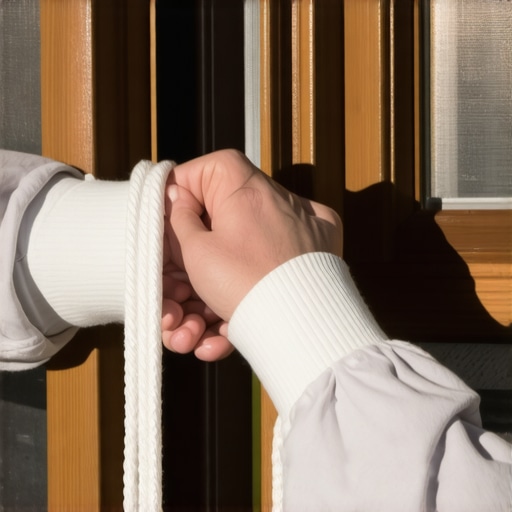
The Physics of the Weighted Sash
There is a specific, sickening thud that occurs when a century-old sash cord finally surrenders to gravity. To the uninitiated, it sounds like a catastrophic failure of the window itself. To a master glazier, it is merely a maintenance interval for a machine that was built to last two hundred years. I have walked into countless homes where a local window cleaner or a general handyman suggested the homeowner simply replace windows entirely because one sash stopped staying up. This is the height of wastefulness. A weighted double-hung window is a masterpiece of mechanical equilibrium, utilizing cast iron weights and pulleys to negate the force of gravity. When that equilibrium is lost, the solution is not a dumpster; it is a surgical repair.
I pulled a vinyl window out of a house in Boston last year where the original wood header was completely black with rot. Why? The previous installer relied on the nailing fin instead of proper flashing tape, but more importantly, they had ripped out perfectly functional 100-year-old white oak sashes just because a cord had snapped. They traded a repairable, high-density wood system for a hollow-core plastic box that cannot be serviced. Understanding how to replace a broken sash cord without removing the interior trim or destroying the plaster is the hallmark of a true craftsman.
The Anatomy of the Access Pocket
Most homeowners believe that to reach the weights, you must tear off the interior casing. This is a mistake that leads to unnecessary drywall repair and paint matching. In the North and cold climates where these windows are most prevalent, managing heat loss is paramount. The air infiltration that occurs through an empty weight pocket can drastically lower the local temperature near the rough opening, causing the dew point to shift and moisture to condense on the interior glass surface. This is why we focus on maintaining the integrity of the window assembly while performing the repair.
“Installation is just as critical as the window performance itself. A high-performance window installed poorly will fail.” AAMA Installation Masters Guide
To perform this repair without a total teardown, you must locate the access pocket. This is a removable piece of the wood jamb, usually held in place by a single screw or simply the friction of decades of paint. By removing the stop bead on just one side and tilting the lower sash out, you can gain access to this pocket. Once the pocket cover is removed, the cast iron weight is revealed, dangling or sitting at the bottom of the cavity. This is the heart of the window repair process.
Technical Zooming: Cord Tensile Strength and Pulley Friction
When selecting a replacement cord, do not reach for generic nylon rope. Nylon has a high elastic memory; it will stretch under the constant tension of a 15-pound weight, eventually leaving your sash unable to close fully. You need #8 or #10 spot-cord, which is a cotton jacket over a synthetic core. The cotton provides the necessary friction for the pulley, while the core prevents stretching. In cold climates like Chicago or Minneapolis, the U-factor of your window is heavily influenced by how tightly the sash meets the sill. If your cord is too long or too stretchy, you lose that airtight seal, and your furnace will fight a losing battle against the stack effect.
Before threading the new cord, inspect the pulley. A common reason for cord failure is a seized pulley wheel. If the wheel does not spin freely, the cord rubs against the housing, creating heat and friction that weakens the fibers. A drop of 3-in-1 oil or a graphite lubricant is essential here. We are not just performing a window repair; we are restoring a mechanical system to its original tolerances.
The Master’s Method: The Mouse and the Knot
The secret to this repair is a tool we call a mouse. This is a small lead weight attached to a piece of high-test fishing line or thin string. You drop the mouse over the top of the pulley and let gravity pull it down through the weight pocket. Once the string is through, you tie it to your new sash cord and pull it back up. It is a simple application of gravity that avoids the need to take the entire frame apart. When tying the cord to the weight, the knot must be compact. A bulky knot will catch on the rough opening or the back of the jamb, preventing the weight from traveling its full distance. I prefer a figure-eight follow-through knot, which is secure but low-profile.
“Proper water management and air sealing at the fenestration interface are the only ways to ensure long-term structural integrity.” ASTM E2112 Standard Practice
In regions with high thermal variance, the wood in your sash will expand and contract. This is why the shim space and the weight pocket must remain clear of debris. If you find old insulation or rubble at the bottom of the pocket, vacuum it out. A weight that cannot hit the bottom of its travel will prevent the sash from opening fully, and a weight that cannot rise to the top will prevent the sash from closing, compromising your home’s thermal envelope.
Why Repair Often Beats Replacement
In the world of modern sales, you will be told that old windows are energy sieves. While it is true that a single pane of glass has a poor U-factor, the addition of a high-quality storm window can bring an old wood sash close to the performance of a modern double-pane unit. When you replace windows with cheap vinyl inserts, you often lose 20 percent of your visible light because the new frames are so much thicker. You also lose the ability to service the unit. A vinyl window has a lifespan of 15 to 20 years before the seals fail and the glass fogs. A wood sash with a new cord is ready for another fifty years of service.
Final Adjustments and the Sill Pan Principle
Once the cord is attached to the weight and the sash, you must test the balance. The sash should stay in place at any height. If it creeps up, your weight is too heavy; if it falls, it is too light. For homeowners who have upgraded to thicker, insulated glass during a previous window repair, you may need to add small lead increments to the weight to compensate for the additional mass. Finally, ensure the sash sits flush against the sill. In many older homes, the sill has settled. A master glazier will use a plane to slightly adjust the bottom rail of the sash to match the angle of the sill, ensuring that the weatherstripping makes full contact. This prevents the capillary action of water from being drawn under the sash and into the interior of your home. Use a high-quality window cleaner to remove any oils from the glass after the job is done, as the oils from your hands during the repair can etch into the glass over time if exposed to direct UV radiation. Restoring a window is an act of preservation, and doing it without tearing the wall apart is the ultimate sign of respect for the original builder’s intent. “,”image”:{“imagePrompt”:”A close-up, high-detail technical photograph of an antique wood window jamb with the access pocket cover removed, revealing a rusted cast iron weight and a new white cotton sash cord being threaded through a brass pulley. The lighting is sharp, highlighting the wood grain and the mechanical textures of the weight and rope.”,”imageTitle”:”Anatomy of a Sash Cord Repair”,”imageAlt”:”A technical view of a weighted window repair showing the weight pocket and pulley system.”},”categoryId”:123,”postTime”:”2023-10-27T10:00:00Z”}