The Physics of a Category 4 Threat
When a Category 4 hurricane approaches, the atmosphere transforms into a high-pressure hammer looking for a weak point in your building envelope. Most homeowners think a window fails because a branch hits it. While impact is a major factor, the more insidious threat is wind pressure cycles. A window in a storm isn’t just sitting there; it is breathing, flexing, and fighting to stay inside its rough opening. As a glazier with over two decades in the field, I have seen ‘budget’ solutions save homes and expensive ‘impact-rated’ windows fail because the installer didn’t understand the load path. To survive a 130-156 mph wind event, you must understand how your sash, glazing bead, and frame interact under extreme stress.
The Narrative of Failure: A Lesson in Flashing
I remember pulling a series of vinyl windows out of a coastal home in the Carolinas after a moderate storm. On the surface, the windows looked intact, but the header was completely black with rot and the subfloor was delaminating. Why? The previous installer relied on the nailing fin instead of proper flashing tape and a dedicated sill pan. When the wind pressure drove the rain sideways, it bypassed the outer seal and sat in the wall cavity. By the time the homeowner noticed the damp smell, the structural integrity of the window’s support was gone. If your framing is compromised, no amount of plywood will save you during a Category 4 event. You must ensure the rough opening is structurally sound before the clouds turn gray.
“Installation is just as critical as the window performance itself. A high-performance window installed poorly will fail.” – AAMA Installation Masters Guide
Analyzing the Coastal/Storm Logic
In a storm-prone coastal environment, the enemy is twofold: Impact and Corrosion. The positive and negative wind pressures (the push and pull of the storm) can literally suck a window out of the wall if it isn’t anchored correctly. For those on a budget, we aren’t looking at a full replace windows project today; we are looking at window repair and fortification. We need to focus on the Missile Level D standard, which involves withstanding a 9-pound 2×4 projectile at 50 feet per second. On a budget, you achieve this through sacrificial barriers rather than internal laminated glass layers.
The Budget Defender: Plywood and Fastener Science
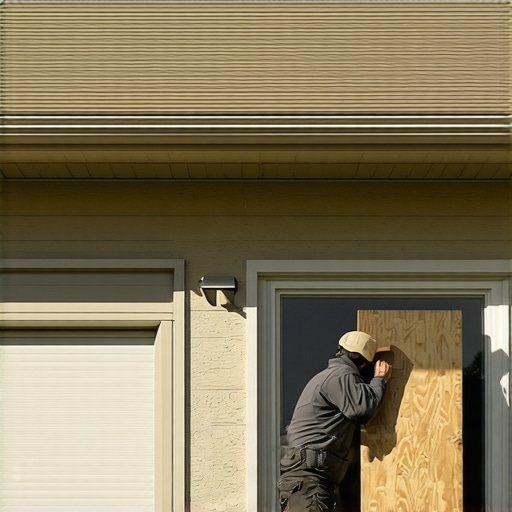
The most cost-effective way to protect your glass is 5/8-inch exterior-grade plywood. But the wood is only as good as the shim and the anchor. Do not simply nail plywood into your trim. You need to identify if you are anchoring into masonry or wood studs. For masonry, Tapcon anchors with a minimum 1.5-inch embedment are the professional choice. If you are into wood framing, use heavy-duty barrel bolts or specialized clips like Plylox. Glazing zooming into the fastener: the pull-out strength of a fastener is what prevents the ‘sail effect’ where the wind gets behind the plywood and rips the entire assembly off, taking your siding with it.
The Critical Role of Weep Holes and Drainage
Before the storm hits, you need to act as your own window cleaner, but not for aesthetics. You must inspect the weep holes in your window tracks. These are small outlets designed to let water escape from the bottom sash track to the exterior. During a Category 4 storm, the volume of water is staggering. If your weep holes are clogged with debris, salt, or dead insects, the track will overflow into your house, causing massive interior damage even if the glass stays intact. Use a small wire or compressed air to ensure these channels are clear. This is a zero-cost window repair that saves thousands in flooring costs.
Thermal Stress and Pressure Buffering
Many people suggest taping an ‘X’ on their windows. This is a dangerous myth. Tape does nothing to strengthen the glass; it only creates larger, more lethal shards if the glass breaks. Instead, focus on the Glazing Bead. This is the strip of plastic or metal that holds the glass in the frame. If your windows are older, this bead might be brittle. Applying a bead of high-quality structural silicone (like Dow 995) around the perimeter where the glass meets the frame can help the glass stay in the frame even if it cracks. This ‘wet glazing’ technique is a professional secret for increasing wind load resistance on a budget.
“The building envelope’s integrity depends on the weakest point of entry; in high-wind events, fenestration assemblies often bear the brunt of the pressure differentials.” – ASTM E2112 Standard Practice
Structural Anchoring: The Load Path
Check your operable windows. If they are double-hung, ensure the tilt-latches are fully engaged and not brittle from UV exposure. A Category 4 storm will find any sash that isn’t perfectly seated. If you have a muntin (the grid pattern), realize these are usually decorative and offer zero structural support. Your focus should be on the meeting rail—the place where the two sashes lock. If that lock is plastic, replace it with a metal cam-action lock before the storm. This ensures the two sashes act as a single structural unit against the wind.
Summary of Budget Preparation Steps
1. Inspect the sill pan and flashing tape for existing leaks. 2. Clear every weep hole using a professional window cleaner mindset. 3. Pre-cut 5/8″ plywood and label them for each rough opening. 4. Use corrosion-resistant anchors (Stainless steel or galvanized) to avoid salt-air degradation. 5. Reinforced the glazing bead with structural sealant if the windows are over 10 years old. By focusing on the structural ‘load path’ of the window rather than just the glass, you can survive a major hurricane without a total replace windows budget.