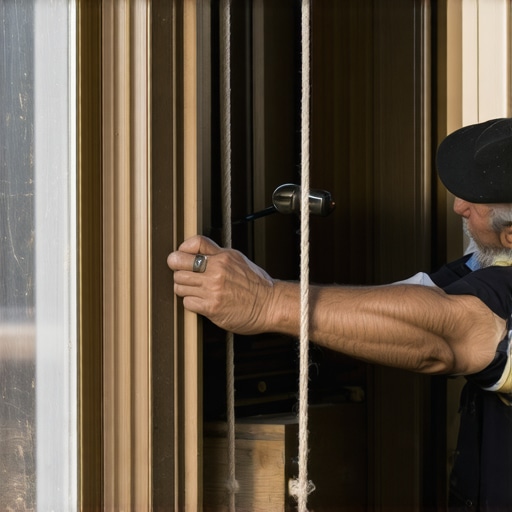
The Ghost in the Window: Understanding the Anatomy of the Weight Pocket
For twenty-five years, I have walked into historic homes where the primary complaint is a mysterious thudding sound every time the wind kicks up or a sash is moved. Most homeowners assume the only way to fix a detached or loose sash weight is to tear off the interior casing, effectively destroying the plaster and the paint. I am here to tell you that such a destructive approach is the hallmark of a ‘caulk-and-walk’ amateur. A master glazier knows that the rough opening of a 19th-century window was designed with maintenance in mind, even if that maintenance path has been painted shut over the last century.
I pulled a wood window out of a Victorian in the North End once, and the header was completely black with rot. Why? The previous installer had tried to ‘modernize’ the window by cutting the sash cords and stuffing the pockets with fiberglass insulation without addressing the moisture migration from the exterior. They relied on a simple nailing fin on a replacement unit instead of proper flashing tape and a dedicated sill pan. This creates a thermal bridge and a moisture trap that ruins structural integrity. Before we talk about anchoring those weights, understand that we are dealing with a delicate balance of physics and material science.
“Installation is just as critical as the window performance itself. A high-performance window installed poorly will fail to meet its energy and structural ratings.” – AAMA Installation Masters Guide
The Physics of the Counterweight System
In a traditional double-hung window, the sash is balanced by cast iron or lead weights hidden within a cavity in the wall. These weights are connected to the sash via a sash cord or chain that runs over a pulley. If the cord snaps or the anchor point on the sash fails, the weight drops to the bottom of the pocket. In cold climates like Minneapolis or Chicago, these weight pockets act as direct conduits for heat loss. The U-Factor of a single-pane wood window is already dismal, but an open, uninsulated weight pocket effectively turns your window into a chimney for your expensive furnace-heated air. We look for a low U-Factor to minimize the rate of non-solar heat flow. When those weights are loose or the cord is gone, you aren’t just losing a functioning window; you are losing money through every cubic foot of air leakage.
Step 1: Accessing the Weight Without the Sledgehammer
To anchor a loose weight without opening the wall, we first need to remove the operable sash. This involves carefully prying off the interior stop beads. If you are a window cleaner by trade, you know the frustration of a sash that won’t stay up or tilts dangerously. Once the stop beads are removed, you can swing the bottom sash inward. Look at the vertical stiles of the window frame. About six to ten inches from the bottom, you should see a vertical cut in the wood. This is the access pocket cover. It is often held in place by a single screw or, more commonly, decades of lead-based paint. Using a sharp utility knife, score the perimeter of this pocket cover until you can gently pry it out. This is your gateway to the weight system.
Step 2: The Fishing Expedition
If the pocket cover is missing or was never installed (which happens in some budget-built homes from the 1920s), we use the pulley hole. This is where ‘Glazing Zooming’ comes into play. We are looking at a space that is perhaps two inches wide. You will need a ‘mouse’—a small lead weight attached to a piece of string. Drop the mouse through the pulley at the top of the frame and feed it down until it appears at the bottom of the pocket. If you are working through the pulley hole, you may need a telescopic magnet or a hooked piece of coat hanger to grab the weight and pull it back to the aperture. We never use nylon rope for this. Nylon stretches under the constant tension of a fifteen-pound cast iron weight, leading to sash creep. We use #8 or #10 waxed cotton sash cord with a synthetic core, which provides the necessary tensile strength without the elasticity that ruins the balance.
“The air leakage of a window assembly shall be determined in accordance with ASTM E2112 to ensure that the building envelope remains airtight and moisture-resistant.” – ASTM E2112 Standard Practice
Step 3: Anchoring and Calibration
Once you have retrieved the weight, thread the new sash cord through the eyelet of the weight and secure it with a figure-eight knot. A simple overhand knot can slip or, worse, wedge itself into the pulley, causing the sash to seize. After the weight is tied, pull the cord through the pulley until the weight is suspended about two inches above the bottom of the pocket when the sash is in its highest position. This ensures that the weight never ‘bottoms out,’ which would cause the cord to go slack and potentially jump off the pulley track. Now, attach the other end of the cord to the sash. Most historic sashes have a bored-out hole and a groove on the side of the stile. The knot sits in the hole, and the cord lies in the groove, held in place by a glazing bead or a simple nail. Ensure the sash moves through its full range of motion without the weights hitting the top of the pocket or each other.
Thermal Management in the Weight Pocket
Since we are in a climate where heat loss is the primary enemy, simply fixing the weight isn’t enough. While the pocket is open, this is the time to address the ‘Thermal Bypass.’ I often install a thin strip of closed-cell foam or a brush-style weatherstrip along the sash channel. This doesn’t interfere with the weight’s movement but creates a barrier for air infiltration. When you replace windows, you often lose the beauty of the original muntin patterns and the character of the old-growth wood. Repairing the weights allows you to keep the aesthetic while improving the performance. If you are considering a full window repair, remember that the goal is to make the unit as airtight as possible. A loose weight is often a symptom of a larger neglect of the window’s mechanical systems.
When Repair Leads to Replacement
Sometimes, during this process, you find that the wood within the pocket is so degraded that it cannot support the pulley’s tension. This is where you must decide to replace windows rather than continue with a futile repair. If the rough opening shows signs of structural settling or if the wood is punky and soft, a pocket replacement or a full-frame replacement becomes necessary. However, for most well-maintained homes, anchoring a loose weight is a three-hour job that restores another fifty years of life to a window that was built to last centuries, not decades like the vinyl garbage sold at big-box retailers. Precision in the sash balance is what separates a professional restoration from a temporary fix. Don’t be the installer who leaves a client with a rattling weight and a drafty room. Do the math on the weights, use the right cord, and seal the pocket correctly. That is the glazier’s way.