The Engineering of a Perfect Seal: Why Screen Tension Is Not Optional
As a master glazier who has spent nearly three decades in the field, I have seen every imaginable failure in window systems. From the catastrophic rot of a poorly flashed rough opening to the subtle annoyance of a whistling sash, the details always tell the story. One of the most overlooked components in the entire window assembly is the screen spline. To the uninitiated, it is just a piece of rubber string. To a professional, it is the tensioning mechanism that maintains the structural integrity of the screen frame and ensures the window remains a functional part of the building envelope. Whether you are performing a routine window repair or preparing to replace windows entirely, understanding the physics of the spline is critical.
A homeowner called me in a panic because their new windows were ‘sweating.’ I walked in with my hygrometer and showed them the humidity was 60 percent. It was not the windows; it was their lifestyle. They were afraid to open their operable sashes because the screens were so loose that insects were bypassing the frame. Because they could not achieve proper ‘night flushing’ of the interior air, the dew point was being reached on the interior glass surface every morning. This is the Condensation Crisis in action. A simple screen adjustment could have prevented a perceived product failure. This is why I am intolerant of the ‘caulk and walk’ crowd who ignore these finishing details.
“Installation is just as critical as the window performance itself. A high-performance window installed poorly will fail.” AAMA Installation Masters Guide
The Mechanics of the Spline: Kerfs, Gauges, and Elasticity
To adjust the tension on a window screen, you must first understand what you are working with. The spline is a vinyl or EPDM cord that is pressed into a channel, or kerf, in the screen frame. This action uses friction and displacement to lock the screening material in place. If the tension is too low, the screen sags, looking unprofessional and allowing the window cleaner to accidentally push the mesh out during a routine maintenance cycle. If the tension is too high, it will bow the aluminum frame rails inward, a phenomenon known as ‘hourglassing,’ which ruins the fit against the glazing bead.
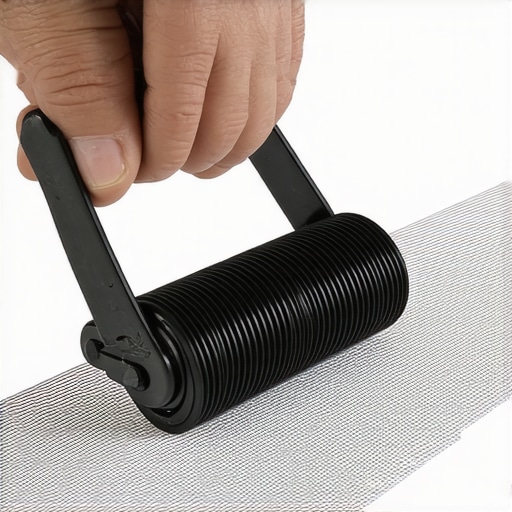
When we talk about ‘adjusting’ tension, we are usually talking about a full or partial re-screen. Unlike a guitar string, you cannot simply turn a peg. You must pull the spline and re-seat it using a spline roller. Professionals use two types of wheels: the concave wheel and the convex wheel. The convex wheel is used to pre-roll the screen into the channel, while the concave wheel is used to drive the spline home. The gauge of the spline is also paramount. Most residential screens use a .125, .140, or .160 diameter. Using a .160 spline in a channel designed for .140 will provide extreme tension but will likely snap the corners of a plastic-cornered frame.
The North/Cold Climate Logic: Why Screens Matter in the Cold
In northern climates like Chicago or Minneapolis, the primary enemy is heat loss and interior condensation. You might think screens are irrelevant in the winter, but they are essential for the shoulder seasons. When the U-Factor of your window is doing the heavy lifting to keep the heat in, you need a functional screen to allow for rapid ventilation when the outdoor temperature permits. If your screen is loose, the weep holes in the bottom of the window frame can become clogged with debris that a tight screen would have deflected. Clogged weep holes lead to water backing up over the sill pan and into the rough opening, which is where the real window repair nightmares begin.
“The fenestration system must be viewed as a holistic assembly where every component, including secondary barriers like screens, contributes to the overall durability of the wall opening.” ASTM E2112 Standard Practice
Step-by-Step: Re-Tensioning the Screen Spline
First, place the screen frame on a flat, solid surface. A professional window cleaner or repair tech never works on a hollow table. If the screen is already installed, use a small flat-head screwdriver or a glazing hook to gently lift the end of the spline at a corner. Pull the spline out of the channel. If the spline is brittle or cracked, it has reached the end of its UV-stabilized life and must be replaced. Replace windows components whenever they show signs of thermal degradation.
Second, align your mesh. If you are using fiberglass mesh, remember that it has more stretch than aluminum wire. Lay the mesh over the frame, ensuring it overlaps the edges by at least an inch. Use a set of spring clamps to hold the mesh at the top. This provides a baseline tension. Third, use your spline roller. Start at a corner and push the spline into the groove. As you move along the rail, use your non-dominant hand to apply slight outward pressure on the mesh. This is the ‘Glazing Zoom’ technique: you are not just pushing down; you are managing the lateral tension of the fibers. If you see the frame start to pull inward, you are applying too much tension. Back it off. The goal is a drum-tight surface that does not distort the sash alignment.
The Professional Finish: Trimming and Testing
Once the spline is seated around the entire perimeter, use a sharp utility knife to trim the excess mesh. The cut must be made on the outside of the spline, away from the screen area. A slip here means you start over. A professional window repair is defined by the absence of visible ‘hairs’ or frayed edges. Finally, check the muntins and the glazing bead. If the screen is part of an integrated system, ensure that the tensioned frame does not interfere with the weep holes or the weatherstripping. Water management is a science, and even a screen spline plays its part in the shingle principle of shedding water away from the structure. Don’t be a ‘caulk and walk’ installer: take the time to calibrate the tension, and your windows will perform for decades.