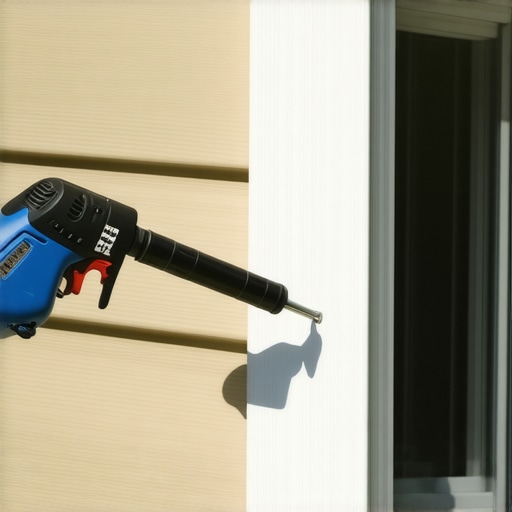
The Anatomy of a Failure: Why That Gap is More Than an Eyesore
In the world of professional glazing, a gap between a window frame and the siding is not just a cosmetic blemish: it is a flashing failure waiting to happen. I have spent over two and a half decades in the field, and if there is one thing I have learned, it is that water is a patient predator. It will find a 1/32-inch opening and exploit it until your structural headers are transformed into something resembling wet cardboard. I recall a specific job in Madison where I was called to perform a routine window repair. The homeowner complained of a slight musty smell near the baseboards. I pulled a vinyl window out of that house and the header was completely black with rot. The culprit? The previous installer had skipped the head flashing and relied entirely on the nailing fin and a thick bead of low-grade latex caulk to bridge a half-inch gap. Over three seasons of Wisconsin freeze-thaw cycles, that caulk pulled away, creating a funnel that directed every rainstorm directly into the wall cavity. This is why we don’t ‘caulk-and-walk’ in this industry. We manage water through the Shingle Principle: every layer of the building envelope must shed water to the layer below it and ultimately to the exterior.
“Installation is just as critical as the window performance itself. A high-performance window installed poorly will fail.” AAMA Installation Masters Guide
The Physics of the Building Envelope and Thermal Bridging
When we talk about fixing a gap, we must first understand the Rough Opening tolerances and the materials involved. In colder climates, the U-Factor is our primary metric for success. A gap between the window frame and the siding is a literal bypass for conditioned air. If you can see light through a gap, you are losing energy, but more importantly, you are inviting dew point issues. When warm, moist indoor air meets the cold backspan of your siding through an unsealed gap, it condenses. This interstitial condensation is the silent killer of wood framing. When you replace windows, you aren’t just putting glass in a hole; you are restoring the integrity of the air barrier. Proper window repair requires an understanding of how different materials move. A vinyl window frame has a high coefficient of thermal expansion. It will grow and shrink significantly more than fiber cement siding or wood trim. If you bridge that gap with a rigid filler, it will crack within eighteen months. You need a solution that accounts for dynamic movement.
The Technical Solution: Backer Rods and Elastomeric Sealants
To fix a significant gap correctly, you must avoid the trap of ‘three-sided adhesion.’ This is a common rookie mistake where sealant is shoved into a corner, adhering to the window frame, the siding, and the house wrap or sheathing behind them. When the window frame moves, the sealant is pulled in three directions and tears. The professional solution is the use of a closed-cell backer rod. By inserting a foam backer rod into the gap, you create a depth-to-width ratio that allows the sealant to function like a rubber band. You want the sealant to only touch the window frame and the siding. This allows it to stretch and compress as the seasons change. For the sealant itself, forget the cheap tubes at the big-box store. You need a high-performance elastomeric sealant, preferably a polyether or a high-grade silicone that meets ASTM C920 standards. This is the difference between a window cleaner being able to easily wipe down a finished joint and a homeowner having to scrape away peeling residue every two years.
“The window installation shall be designed to provide a continuous gas-tight and water-tight seal between the window and the surrounding wall construction.” ASTM E2112 Standard Practice
Managing the Drip Cap and Head Flashing
The most critical area of any window-to-siding interface is the head, or the top of the window. This is where a Drip Cap is non-negotiable. The drip cap is an L-shaped piece of flashing that sits over the top of the window frame and behind the siding above it. It ensures that water running down the siding is kicked out away from the window frame. If you have a gap at the top of your window and no drip cap, simply filling it with caulk is a recipe for disaster. Water will eventually sit on that horizontal bead of caulk, find a pinhole, and enter the wall. When we replace windows, we ensure the head flashing is integrated with the weather-resistive barrier. If you are performing a window repair on an existing unit, you may need to retroactively install a Z-flashing or a custom-bent aluminum drip cap to ensure the top of the frame is protected. This is the ‘Glazing Zooming’ perspective: we don’t just look at the gap; we look at the path of the droplet from the roofline to the ground.
The Role of the Sill Pan and Weep Holes
At the bottom of the window, the logic changes. While the sides and top should be sealed tight, the bottom must allow for drainage. Many modern windows feature Weep Holes in the Sash or the outer frame. If you or an inexperienced window cleaner clogs these holes with debris or, worse, if an installer caulks the bottom of the window frame tight against the siding, you have trapped water inside the system. Every window installation should ideally include a Sill Pan: a secondary line of defense that slants toward the exterior. If water gets past the primary seals, the sill pan catches it and directs it back out through the Rough Opening. When addressing gaps at the sill, you must ensure that your Flashing Tape is properly lapped and that you aren’t creating a dam that holds water against the wood. Understanding the Muntin and Glazing Bead structure also helps in identifying if a leak is coming from the glass-to-frame interface or the frame-to-siding gap. Precision in these details is what separates a master glazier from a handyman.
Conclusion: Precision Over Convenience
Fixing the gap between your window frame and siding is a technical exercise in material science and moisture management. It requires the right Shim placement to ensure the frame is square, the right backer rod to ensure sealant longevity, and a deep respect for the laws of gravity. Don’t settle for a temporary fix that masks a deeper structural threat. Whether you are looking to replace windows entirely or performing a critical window repair, remember that the window is only as good as the seal that integrates it into the home. Take the time to do it right, use the right trade-grade materials, and your home will remain dry and efficient for decades to come.
{“@context”: “https://schema.org”, “@type”: “HowTo”, “name”: “How to Fix a Gap Between Window Frame and Siding”, “step”: [{“@type”: “HowToStep”, “text”: “Clean the gap thoroughly of old caulk and debris.”}, {“@type”: “HowToStep”, “text”: “Insert a closed-cell backer rod into the gap to provide support for the sealant.”}, {“@type”: “HowToStep”, “text”: “Apply a high-performance elastomeric sealant over the backer rod.”}, {“@type”: “HowToStep”, “text”: “Tool the sealant to ensure a smooth, water-shedding profile.”}], “totalTime”: “PT1H”}