The High-Pressure Myth and the Missing Bead
I recently stood in a kitchen in a quiet suburb, listening to a homeowner recount a visit from a high-pressure window salesman. This ‘Tin Man’ had spent two hours trying to convince her that her entire fleet of vinyl double-hungs was structurally compromised. His proof? A single missing glazing bead on the lower sash of her north-facing window. He quoted her twenty-two thousand dollars to replace windows that were barely fifteen years old, claiming the ‘seal was blown’ and the integrity was gone. I spent five minutes looking at the frame. The Insulated Glass Unit (IGU) was fine; the primary seal of polyisobutylene was intact. The only thing missing was a sixty-cent piece of extruded vinyl that had likely become brittle from UV exposure and snapped off during a particularly aggressive session with a window cleaner. This is the reality of the industry: many will tell you to replace when a precise window repair is all that is required. Understanding the anatomy of your window is the first step in defending your wallet against unnecessary capital expenditures.
The Anatomy of the Glazing System
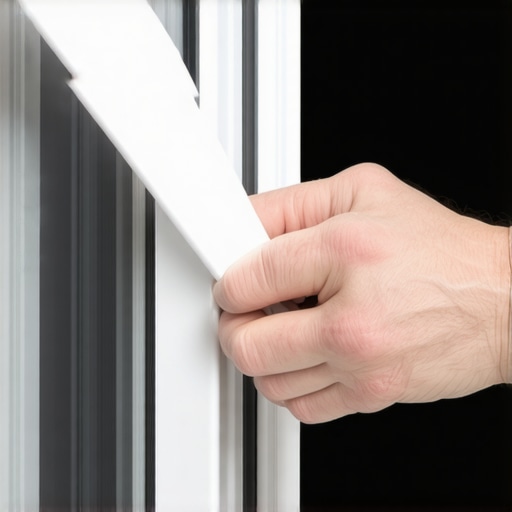
To understand why a glazing bead matters, we have to look at the physics of the sash. The glazing bead is the removable trim piece that holds the glass in place against the fixed lip of the sash frame. In the trade, we refer to this as the ‘stop.’ It is not merely decorative. It provides the lateral pressure necessary to keep the glass seated against the glazing tape or the high-performance silicone bed. When a bead is missing, the glass is no longer held under uniform compression. This creates a vulnerability where wind-loading can cause the glass to vibrate or shift. Over time, this ‘pumping’ action can stress the spacer bar and lead to a premature failure of the secondary seal. While the bead itself is not usually the primary water barrier, it is a critical component of the window’s structural assembly. As the AAMA Installation Masters Guide states:
“Installation is just as critical as the window performance itself. A high-performance window installed poorly will fail.”
This principle extends to component maintenance. A window missing its bead is an incomplete system, susceptible to air infiltration and thermal bridging.
The Enemy: Condensation and Thermal Logic
In cold northern climates, the glazing bead plays a quiet but vital role in managing the dew point at the edge of the glass. The perimeter of an IGU is its weakest point thermally because of the spacer bar. If the glazing bead is missing or cracked, cold exterior air can penetrate the glazing pocket. This drops the temperature of the interior glass edge significantly. When warm, humid indoor air hits that cold surface, you get condensation. I have seen countless cases where homeowners thought they had a ‘blown seal’ because of fogging, only to find that the air was bypassing a failed glazing bead and chilling the glass from the side. We focus on the U-Factor, which measures the rate of heat transfer. A lower U-Factor is better, but those numbers are calculated based on a fully intact unit. Once you introduce a gap in the glazing pocket, your real-world U-Factor skyrockets. You aren’t just losing heat; you are inviting moisture to sit against your sash, which, in the case of wood windows, leads to the kind of rot that destroys a rough opening. Even in vinyl windows, trapped moisture can freeze and expand, eventually cracking the mitered corners of the sash.
Identifying the Profile: The Glazier’s Challenge
The hardest part of a window repair involving beads is not the installation; it is the identification. There are thousands of glazing bead profiles in existence. Every manufacturer—from Milgard and Simonton to Jeld-Wen and Pella—has their own proprietary shape. These are often extruded PVC or aluminum with a specific ‘leg’ that snaps into a groove in the sash. To replace a missing bead, you cannot simply buy a generic strip at a big-box store. You must match the profile exactly. I tell my apprentices to use a pair of calipers to measure the height, width, and the length of the ‘snap-in’ leg. If you have a sample of the old bead, even a broken piece, keep it. You will likely need to look through catalogs from specialty suppliers like Strybuc or CRL. You are looking for a match in the ‘offset’ and the ‘reach.’ If you choose a bead that is even a millimeter too wide, you will struggle to snap it in and risk breaking the glass. If it is too narrow, it won’t provide the necessary compression, and the sash will rattle every time the wind blows.
The Step-by-Step Replacement Process
Once you have sourced the correct profile, the installation is a matter of precision. First, ensure the glazing pocket is clean. If the previous bead shattered, there may be shards of vinyl stuck in the groove. Use a stiff putty knife or a specialized glazing tool to clear the path. Do not use a screwdriver, as the concentrated pressure can easily crack the glass. Second, measure the opening. Glazing beads are typically mitered at a 45-degree angle or square-cut depending on the manufacturer. For a professional finish, a miter saw with a fine-tooth blade is preferred. When cutting, always add about 1/16th of an inch to the length. This ‘long-cutting’ ensures a tight fit at the corners, which prevents the gaps that lead to air whistles. To install, start at the corners and work toward the middle. You will hear a distinct ‘snap’ when the leg seats into the groove. I often use a nylon-headed glazing hammer to gently tap the bead into place. Never use a metal hammer. The vibration alone can cause a stress crack in tempered glass. If the bead is stubborn, a small amount of glass cleaner can act as a temporary lubricant to help the vinyl leg slide into the sash channel.
Integration with the Weep System
A critical technical detail often overlooked is the weep hole. Most modern operable windows are designed as ‘pressure-equalized’ systems. Water is expected to get into certain parts of the frame, but it must be able to get out. The glazing bead must not block the internal drainage paths of the sash. If you are performing a repair and decide to use silicone to ‘help’ hold a loose bead in place, you might accidentally seal the weep system. This is a catastrophic mistake. Trapped water will eventually find its way into the house or rot out the wood spacers.
“Water management is not about stopping water; it is about directing it. Any repair that interferes with the engineered drainage of a window is a failure in the making.”
– ASTM E2112 Standard Practice. Ensure that the glazing pocket remains clear and that the new bead allows the window to breathe as intended by the original engineers.
Repair vs. Replacement: The Real ROI
We often talk about the ROI of new windows, but the ROI of a successful window repair is almost always higher. Replacing a glazing bead might cost you twenty dollars in materials and an hour of your time. Replacing that same window could cost a thousand dollars. When you replace windows, you aren’t just paying for glass; you are paying for the labor of the tear-out, the disposal fees, the new flashing tape, the interior trim work, and the potential for a bad installer to ruin your building envelope. If your frames are square, your sashes are operable, and your IGUs are clear, there is no reason to replace. Proper maintenance, including replacing brittle beads and keeping the tracks clear for the window cleaner, can extend the life of a window by decades. Don’t let a salesman tell you that a missing piece of plastic is a death sentence for your joinery. It is simply a maintenance item, no different than changing the oil in your car. By focusing on the technical details of the glazing system, you ensure your home remains a thermally efficient, dry, and comfortable environment without the unnecessary expense of a full-scale renovation.