In my twenty five years of hanging glass in everything from coastal estates to mid rise commercial blocks, I have seen more glass ruined by a bucket and a rag than by actual structural failure. I remember walking onto a job site in South Florida where a homeowner was convinced they needed to replace windows throughout their entire sunroom. They thought the glass was pitted or the seals had blown because of a persistent, hazy film. I pulled out my hygrometer and a high intensity inspection light to show them it was not a manufacturing defect. It was five years of using a common ammonia based window cleaner that had reacted with the coastal salt air to create a calcified layer on the surface. They did not need a window repair; they needed a lesson in chemistry and the mechanics of architectural glazing.
The Physics of a Streak Free Surface
To understand how to clean architectural glass without leaving those infuriating swirl marks, you have to understand what glass actually is at a microscopic level. We think of it as a solid, flat plane, but under a lens, it is a porous landscape. In the world of high performance glazing, we also deal with the tin side versus the air side of float glass. During manufacturing, molten glass is floated on a bed of liquid tin. This leaves trace amounts of tin on one surface which can react differently to cleaning agents than the air side. When you use a low quality window cleaner, you are often just moving surfactants and suspended solids across these microscopic pores. Swirl marks are simply the visual evidence of uneven residue distribution or micro abrasions in the glass surface itself.
“The cleaning and maintenance of architectural glass are vital to its long term structural integrity and aesthetic clarity. Failure to follow specific protocols can lead to permanent surface degradation.” – AAMA Glass Maintenance Guidelines
If you are in a high heat environment like Arizona or Texas, your Solar Heat Gain Coefficient (SHGC) logic dictates that your glass is likely treated with a Low-E coating on Surface #2. However, some modern windows utilize a hard coat Low-E on Surface #1, which is the exterior face. If you take a standard abrasive pad to that surface, you are not just cleaning it; you are literally scrubbing away a microscopic layer of silver or metal oxide. This is why I tell my clients that the method of cleaning is just as critical as the initial installation in the rough opening.
Tools of the Master Glazier
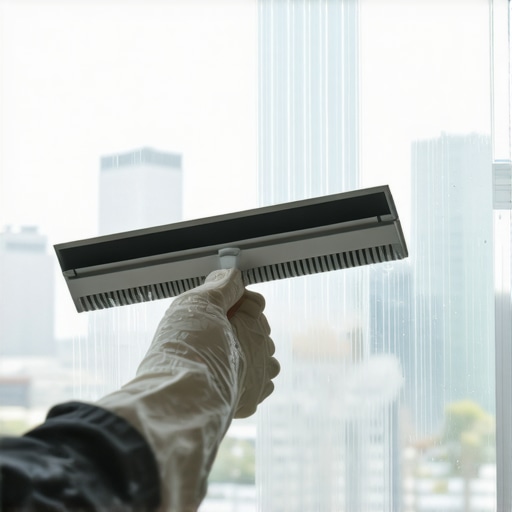
Throw away the paper towels. They are made of wood fibers that can cause micro scratches and they leave behind lint that acts as a magnet for future dust. To clean architectural glass like a professional, you need a brass or stainless steel squeegee with a fresh, high grade rubber blade. I prefer a Shore A hardness of about 60 for the rubber, which provides enough flexibility to contour to the glass while remaining firm enough to strip water away in a single pass. You also need a dedicated scrubber, often called a strip washer, and a surgical huck towel. These towels are 100 percent cotton, lint free, and have been washed enough times to remove any sizing or oils from the fabric.
When we talk about the chemistry of the solution, deionized water is the gold standard. Standard tap water contains minerals like calcium and magnesium. When the water evaporates, these minerals stay behind, creating the very spots you are trying to remove. By using deionized or distilled water mixed with a small amount of professional grade, pH neutral surfactant, you create a solution that suspends dirt without leaving a film. Avoid any product that promises a streak free shine via added waxes or silicones. Those are the primary culprits for the hazy build up that leads people to think they need to replace windows prematurely.
The Mechanical Process: The S-Stroke Technique
Most people clean in a circular motion, which is exactly how you get swirls. The light hits the circular patterns of residue from multiple angles, making them visible throughout the day. Professionals use the S-stroke or the fanning method. Start by wetting the glass with your strip washer, ensuring you get right up into the glazing bead. If the window is operable, open it slightly to ensure you are not trapping dirty water in the tracks or the sash. Once the glass is lubricated, take your squeegee and start at the top corner. Draw the blade across the top and then move in a continuous, flowing S-pattern down the pane. This keeps the dirty water moving in front of the blade rather than behind it.
“Care must be exercised to avoid scratching the glass or damaging the perimeter sealants during the cleaning process. Abrasive cleaners should never be used on high performance coatings.” – ASTM E2112 Standard Practice
Pay close attention to the weep hole at the bottom of the frame. If you are sloppy with your water, you can clog these vital drainage points with debris and cleaning solution. A clogged weep hole leads to water backing up into the sill pan, which is the fastest way to rot out your subfloor. This is a common point of failure I see during a window repair. The glass looks great, but the framing is failing because the owner was pressure washing the windows and forcing water past the gaskets.
Climate Considerations for Maintenance
In colder northern climates, you are fighting condensation and interior humidity. The U-Factor of your windows is designed to keep the interior pane warm, but if you have high indoor humidity, you will get moisture on the glass. Cleaning this requires a different approach because you are often dealing with mold or mildew at the edge of the sash. Always dry the edges thoroughly with your huck towel to prevent moisture from wicking into the spacers between the panes of glass. If you have triple pane units with argon or krypton gas fills, be extremely careful not to put excessive pressure on the center of the glass, as this can theoretically stress the seals on very large architectural units.
In the south, the enemy is the sun. Never clean architectural glass when it is in direct sunlight. The glass surface temperature can easily exceed 120 degrees. When your cleaning solution hits that hot glass, the water evaporates instantly, leaving the surfactants to bake onto the surface. This creates a chemical bond that is incredibly difficult to remove without professional grade polishing compounds. Always clean in the early morning or evening when the glass is cool to the touch. This allows the solution to do the work of breaking down pollutants and oils before you squeegee them away.
Long Term Care and Identifying Real Problems
If you have followed these steps and you still see marks, it is time to look closer. If the marks are between the panes of glass, you have a seal failure. No amount of cleaning will fix that; the desiccant in the spacer is saturated and you are seeing the result of moisture reacting with the Low-E coating inside the unit. At this point, you are looking at a glass replacement or a full window repair. Similarly, if you see permanent white staining that looks like a waterfall, that is likely stage two corrosion from minerals leaching out of surrounding precast concrete or masonry. That requires an acid wash or mechanical polishing by a specialist.
Ultimately, keeping architectural glass pristine is about respecting the material science. We use shims to level the frame and flashing tape to keep the water out, but the glass itself is the most vulnerable part of the assembly to the end user. Treat it with the same precision you would use during the installation of a complex curtain wall. Use the right tools, understand the thermal logic of your specific climate, and stop using circular motions. If you manage the water and the chemistry correctly, your windows will remain a clear portal to the world rather than a frustrating reminder of poor maintenance habits.
{“@context”:”https://schema.org/”,”@type”:”HowTo”,”name”:”How to Clean Architectural Glass Without Leaving Swirl Marks”,”description”:”A professional glazier’s guide to cleaning high-performance architectural glass using professional tools and techniques to avoid swirls and damage.”,”step”:[{“@type”:”HowToStep”,”text”:”Assemble professional tools including a brass squeegee with Shore A 60 rubber, a strip washer, and lint-free surgical huck towels.”},{“@type”:”HowToStep”,”text”:”Mix a solution of deionized water and a pH-neutral surfactant. Avoid ammonia or silicone-based cleaners.”},{“@type”:”HowToStep”,”text”:”Wait for a time of day when the glass is cool and not in direct sunlight to prevent premature evaporation.”},{“@type”:”HowToStep”,”text”:”Apply the solution using the strip washer, ensuring the glazing beads and corners are thoroughly wetted.”},{“@type”:”HowToStep”,”text”:”Use the S-stroke squeegee technique to remove the water in a single, continuous motion from top to bottom.”},{“@type”:”HowToStep”,”text”:”Detail the edges of the sash and the weep holes using a dry huck towel to remove any remaining moisture.”}]}