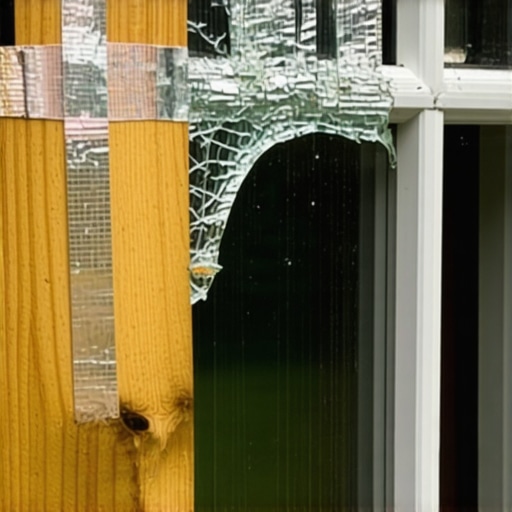
A shattered window is more than a mess; it is a critical failure in your building envelope. As a master glazier with a quarter-century in the field, I have seen every possible DIY attempt at a temporary fix, from cardboard and duct tape to trash bags held with staples. Most of these fail because they ignore the fundamental physics of the window assembly. A window is a complex system designed to manage thermal transfer, moisture ingress, and air pressure. When the glass breaks, you have a gaping hole in your thermal barrier that can lead to catastrophic damage if not addressed with technical precision.
The Critical Reality of the Breach
I once pulled a vinyl window out of a house in Chicago where a small crack had been ‘secured’ with a layer of clear packing tape for six months. When I arrived to finally perform the window repair, the header was completely black with rot. The homeowner was baffled, but the reason was simple: the previous installer relied on the nailing fin instead of proper flashing tape, and that small crack had acted as a vacuum, drawing moisture into the rough opening every time the wind blew. This is why a temporary securement must follow the shingle principle: every layer must overlap the one below it to shed water away from the structural framing.
“Installation is just as critical as the window performance itself. A high-performance window installed poorly will fail.” – AAMA Installation Masters Guide
Step 1: Stabilization and Safety Protocol
Before you even think about boarding up, you must stabilize the site. Put on heavy-duty leather gloves. Do not use thin latex; glass shards will pierce them instantly. Carefully remove loose shards from the sash. If the glass is still held in the glazing bead, use a putty knife to gently pry it out. Your goal is to clear the channel so that your temporary barrier can sit flush against the frame. If you are dealing with an Insulated Glass Unit (IGU), remember that the two panes are separated by a spacer. If only one pane is broken, do not break the second one. That remaining pane still provides a U-factor advantage, even if the argon gas has escaped.
Step 2: Managing the Rough Opening
In cold climates like Minneapolis or Chicago, heat loss is your primary enemy. A broken window causes an immediate drop in the interior dew point, which can lead to condensation on surrounding surfaces. To combat this, your temporary fix needs to be more than just a windbreak. It needs to be a thermal bridge. Use a piece of rigid foam insulation cut precisely to the dimensions of the rough opening. Unlike plywood, foam offers actual R-value, helping to maintain the thermal integrity of the room while you wait for the glass guy to replace windows.
[image placeholder]
Step 3: The Shingle Principle of Weatherproofing
Water management is a science, not a suggestion. When securing the breach, start from the bottom and work your way up. If you are using heavy-duty plastic sheeting, tuck the bottom edge over the exterior sill. This ensures that any condensation running down the plastic exits the building rather than pooling in the sill pan. Use high-quality flashing tape to seal the edges. Avoid standard duct tape; the adhesive fails when the temperature hits the freezing mark or when exposed to UV radiation. You need a butyl-based tape that can maintain a seal against the sash or the exterior casing.
“The window installation shall be designed to collect and drain any water that enters the assembly back to the exterior.” – ASTM E2112 Standard Practice
Thermal Logic: U-Factor and Surface Coatings
In Northern regions, we focus on the U-factor, which measures the rate of heat loss. When you have a broken pane, your U-factor effectively goes to infinity. A professional window cleaner or repair specialist knows that the Low-E coating on Surface #3 of a double-pane unit is designed to reflect long-wave infrared radiation back into your home. When that glass is gone, your furnace is essentially heating the neighborhood. By using a multi-layered plastic approach with an air gap in between, you can simulate a crude IGU, creating a stagnant air layer that slows down convective heat transfer.
Final Assessment: Repair vs. Full Replacement
While you wait for the specialist, evaluate the frame. Is the sash warped? Is the glazing bead brittle and cracking? Often, a broken window is the perfect time to evaluate if you should replace windows entirely. If your frames are wood and show signs of localized rot near the muntin bars, a simple glass replacement is a temporary bandage on a terminal illness. Modern fiberglass or thermally broken aluminum frames offer stability that old wood cannot match. If the rough opening is out of square or if you see daylight through the shims, a full-frame replacement is the only way to ensure long-term performance and stop the cycle of constant window repair. Do not be a victim of the ‘caulk-and-walk’ installers who just fill gaps with silicone. Demand a solution that respects the physics of the building envelope.