The Thermal Reality of Old Glazing
In my twenty five years as a master glazier, I have seen thousands of homeowners convinced that their only salvation from the winter chill is a total house of expensive replacement windows. They see the condensation, feel the draft, and assume the unit has reached its end of life. However, before you sign a contract for a full frame tear out, you must understand the physics of what is actually happening in your rough opening. A window is essentially a controlled thermal leak. When we talk about insulating on a budget, we are not just slapping plastic over glass; we are managing the movement of heat energy and the placement of the dew point within your wall assembly.
A few years ago, a homeowner called me in a panic because their newly installed double hung units were sweating so profusely that water was pooling on the sill and rotting the interior trim. I walked in with my hygrometer and showed them the humidity was hovering at sixty percent while the outside temperature was ten degrees Fahrenheit. It was not a window failure; it was a failure to understand the relationship between interior air saturation and the surface temperature of the glass. This is the first lesson in window repair and insulation: you must manage your environment as much as you manage the hardware. If the glass surface drops below the dew point, you get liquid water, regardless of how many panes of glass you have.
“Installation is just as critical as the window performance itself. A high performance window installed poorly will fail.” – AAMA Installation Masters Guide
The Anatomy of a Draft: Why Old Windows Feel Cold
To insulate effectively, you must identify if your heat loss is conductive, convective, or through air infiltration. In an old single pane sash, the glass itself has an R value of approximately one. This means heat moves through it with almost zero resistance. This is conductive loss. Convective loss happens when the air near the glass cools, becomes denser, and drops to the floor, creating a rolling current that feels like a draft even if the window is perfectly sealed. Finally, air infiltration is the actual movement of outside air through the gaps between the sash and the jamb or at the meeting rail.
When you are on a budget, the most effective window repair is often simple weatherstripping. I despise the caulk and walk approach where installers simply run a bead of silicone around everything that moves. A window must remain operable to be functional. Instead, look at the glazing bead. If the putty is cracked and falling out, air is bypassing the glass entirely. Re-puttying a sash is a lost art that costs pennies in materials but provides a massive jump in thermal performance by stopping the bypass of air at the glass edge.
The Science of the Secondary Barrier
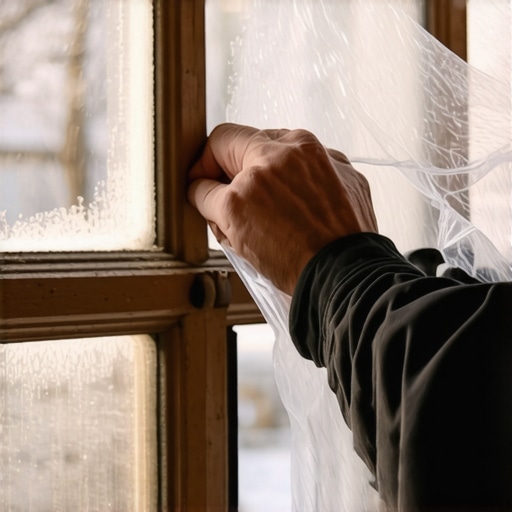
The most effective tiny budget solution is the creation of a stagnant air space. This is why heat shrink film kits are so effective. When you apply that plastic film, you are not just stopping a draft; you are creating a secondary dead air zone. In the glazing world, we know that air is a better insulator than glass. By trapping a one inch layer of air between the film and the sash, you are essentially creating a temporary insulated glass unit. This layer slows down the convective loop, keeping the interior surface of the plastic closer to the room temperature and preventing the dew point from being reached on the interior surface.
“Thermal performance ratings like the U-factor are measured under specific environmental conditions to ensure consistency across the industry.” – NFRC Certification Standards
If you have the budget for a slightly more permanent solution than film, consider internal acrylic inserts. These use a compression bulb seal to sit inside the jamb. Because they are more rigid, they provide better sound dampening and a more consistent thermal break than thin film. They address the problem without the need to replace windows entirely, which often involves disturbing the siding and interior casing, leading to much higher costs and potential moisture management issues if the flashing tape was not applied correctly in the first place.
Managing the Weep Holes and Drainage
One mistake I see budget conscious DIYers make is sealing the weep holes. Most modern vinyl windows and even some older aluminum ones are designed with a sill pan and drainage system. If you see small slots at the bottom of the exterior frame, those are weep holes. They are designed to let water out. If you caulk these shut in an attempt to insulate, you will trap moisture inside the frame. This leads to the rot repair scenarios I see all too often, where the header and sill plate are completely compromised because the water had nowhere to go but into the wood framing. Proper window cleaner habits include checking these holes for debris like spider webs or dirt to ensure the drainage system is functional.
Technical Fixes for Sash and Frame
For those with wood windows, the most common source of a draft is the sash weight pocket. In old houses, these are large hollow cavities in the wall where the counterweights live. They are essentially chimneys for cold air. While you can’t easily fill them without disabling the window, you can use a high quality V-strip weatherstripping made of bronze or plastic along the jambs. This creates a tension seal that allows the sash to slide while blocking the air bypass. Ensure your shims are still tight and that the rough opening has not shifted, which can cause the meeting rail to sit crooked, leaving a gap that no amount of window repair can fix without first squaring the unit.