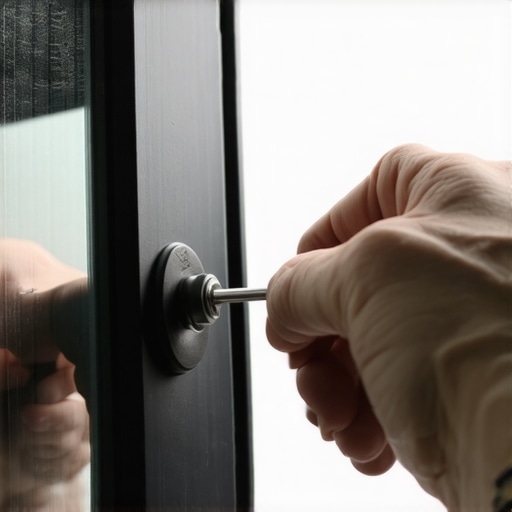
Why a Loose Window Handle is a Thermal Emergency
In the world of fenestration, a window handle is more than just a piece of hardware; it is the mechanical interface that ensures the integrity of your home’s thermal envelope. When you encounter a loose handle, you are not just dealing with a minor annoyance. You are dealing with a potential failure in the compression of the weatherstripping. As a glazier with over 25 years of experience, I have seen how a simple quarter-inch of play in a casement handle can lead to a significant increase in air infiltration, effectively nullifying the high-quality U-factor of the glazing unit itself. If the handle cannot pull the sash tight against the frame, your expensive argon-filled glass is essentially useless. This guide will move past the surface-level fixes and look into the mechanical physics of why these components fail and how to achieve a professional-grade window repair.
The Condensation Crisis: A Master Glazier’s Reality Check
Before we look into the mechanics of the fix, let me share a story that illustrates the importance of window integrity. A homeowner called me in a panic because their new windows were ‘sweating.’ Water was literally dripping off the bottom rail and onto their hardwood floors. They were convinced the seals had failed or that the windows were defective. I walked in with my hygrometer and showed them the humidity in the room was 60%. It wasn’t the windows; it was their lifestyle choices, including a massive indoor plant collection and a lack of proper ventilation. However, upon closer inspection, I found that the handles on three of the windows were loose. This looseness meant the sash was not fully compressing the bulbs of the weatherstripping. This allowed cold air to infiltrate the perimeter, dropping the interior surface temperature of the glass below the dew point. The loose handle wasn’t just a rattle; it was the catalyst for the condensation. We didn’t need to replace windows; we needed to calibrate the hardware to restore the thermal barrier.
“Installation is just as critical as the window performance itself. A high-performance window installed poorly will fail.” – AAMA Installation Masters Guide
Analyzing the Mechanical Failure of Operable Hardware
To fix a loose window handle, one must first understand the anatomy of the operator system. Most modern windows use a cam-action lock or a crank operator. These systems rely on a series of gears and mounting points that must remain perfectly aligned within the rough opening. When a handle feels loose, the issue usually stems from one of three areas: the mounting screws, the internal spindle, or the sash alignment. In cold climates like Minneapolis or Chicago, where the U-factor is king, a handle that fails to lock the sash properly can lead to ice damming on the interior of the frame. The physics are simple: moist indoor air hits the cold air entering through the uncompressed seal, and the resulting frost can actually warp the glazing bead over time. If you ignore a loose handle in a northern climate, you are inviting structural damage to the sash itself.
The Tool Kit for Professional Window Repair
Don’t reach for a generic multi-tool. A master glazier uses specific instruments to ensure the repair is permanent. You will need a set of precision screwdrivers, a hex key set (often required for the set-screws on the underside of the handle), a high-quality silicone-based lubricant, and a specialized window cleaner to prep the area. Avoid using WD-40; it attracts dust and will eventually gum up the gear housing. Instead, use a dry PTFE spray that won’t degrade the plastic components of the shim or the weatherstripping. This is the difference between a ‘caulk-and-walk’ amateur fix and a professional restoration.
Step 1: Identifying the Fastener Type and Accessing the Mounting Plate
The first step in fixing a loose handle is identifying how it is attached to the frame or sash. Most handles have a decorative cover plate that hides the mounting screws. Use a plastic pry tool to gently pop this cover off without marring the vinyl or wood finish. If you use a metal screwdriver here, you will leave a permanent scar on the window. Once the screws are exposed, inspect them for fastener withdrawal. In many cases, the screws have stripped the substrate, especially in low-density vinyl frames. This is where the concept of the ‘rough opening’ becomes relevant. If the window was not shimmed correctly during the initial install, the frame might be slightly bowed, putting constant tension on the handle and causing the screws to back out over time.
Step 2: Correcting Stripped Screw Holes in Vinyl and Wood
If the screws are spinning freely, you cannot simply tighten them. For wood windows, the old-school glazier’s trick involves using a sliver of hardwood and wood glue to fill the hole before re-driving the screw. For vinyl windows, the process is more technical. You may need to use an oversized screw or a specialized masonry-style plastic anchor that can expand within the hollow chambers of the vinyl extrusion. Ensure that you do not penetrate the outermost wall of the frame, as this will create a leak path for water to enter the wall cavity, bypassing the flashing tape and the sill pan. Water management is a science, and every hole you drill must be calculated.
Step 3: Addressing the Spindle and Internal Gear Play
Sometimes the screws are tight, but the handle still wobbles. This indicates that the internal spindle or the female receiver in the operator is worn down. This is common in windows that are frequently used or those that have been forced shut against a misaligned sash. If the spindle is rounded off, the only permanent solution is to replace the hardware. When you replace windows components, ensure you are sourcing OEM parts. A generic handle from a big-box store will rarely have the same gear ratio or throw distance, which can lead to improper locking pressure and increased air leakage.
“Standard practice for installation of exterior windows requires that all hardware be adjusted to ensure a weather-tight seal around the entire perimeter of the operable sash.” – ASTM E2112
The Role of Sash Alignment and Shimming
A handle often becomes loose because it is fighting the window. If the sash is not square within the frame, the lock will not line up with the keeper. This forces the user to apply excessive torque to the handle to get it to close. Over time, this torque destroys the mounting points. To check alignment, measure the diagonals of the sash. If they are not equal, the window is out of square. You may need to remove the interior trim and adjust the shims in the rough opening to pull the frame back into alignment. This is a complex window repair that goes beyond just tightening a screw, but it is necessary for long-term functionality.
Cleaning and Maintenance: The Final Touch
Once the handle is tight and the sash is aligned, use a professional window cleaner to remove any oils or debris from the tracks and the weep holes. Clogged weep holes are a leading cause of sill rot, as they prevent water from exiting the frame. Lubricate the hinges and the operator arms, and ensure that the muntins are not interfering with the movement of the sash. A smooth-operating window requires less force on the handle, which prevents the hardware from loosening in the future.
When to Stop Repairing and Start Replacing
There comes a point where a loose handle is a symptom of a terminal illness. If the frame is rotted, the vinyl is brittle from UV exposure, or the insulated glass unit (IGU) has a blown seal (look for fogging between the panes), it is time to replace windows rather than repair them. In northern climates, the ROI on a new, high-performance triple-pane window with a low U-factor and warm-edge spacers is significant. You will notice the difference in comfort immediately. The draft that felt like it was coming from the handle was actually the entire assembly failing. However, if the frame is sound and the glass is clear, a simple handle calibration can extend the life of your windows by another decade.
Final Thoughts from the Glazing Bench
A loose window handle is a small problem that points to a larger system. By understanding the physics of the cam lock, the importance of weatherstripping compression, and the necessity of proper alignment within the rough opening, you can maintain a high-performance home. Don’t settle for a window that almost closes. Ensure every operable sash in your house is tight, calibrated, and thermally efficient. Your energy bills and your comfort level will reflect the effort.