The Anatomy of a Failing Sash
A cracked window pane is more than a cosmetic eyesore: it is a breach in your home’s thermal envelope. When you see that spiderweb fracture across a single light of glass, you are looking at a failure of the primary barrier against the elements. Most homeowners assume window repair is a simple matter of slapping some tape on the glass or squeezing a tube of silicone into the crack. That is what I call a caulk-and-walk approach, and it is a guaranteed recipe for wood rot and structural decay. To truly fix a window, you must understand the physics of the rebate and the chemical necessity of a proper bedding bead. [IMAGE_PLACEHOLDER]
The Rot Repair: A Cautionary Tale from the Field
I once pulled a wood sash out of an 1890s Victorian house where the homeowner had tried to fix a cracked pane using basic exterior caulk. From the outside, it looked sealed. But when I got that sash on my workbench and began to strip the old material, I found the bottom rail was completely black with rot. The caulk had created a dam that trapped condensation against the wood. Because the installer didn’t understand the Shingle Principle, where every layer must shed water to the layer below it, the moisture had nowhere to go but into the grain of the wood. This is why we use traditional glazing putty and oil-based primers: they allow for the microscopic movement of the wood while maintaining a water-shedding bevel.
“Proper glazing techniques are essential to prevent water infiltration, which is the primary cause of premature window assembly failure.” – ASTM E2112 Standard Practice
The Thermal Reality of Single Pane Glass
In northern climates where the temperature differential between the interior and exterior can exceed sixty degrees, a single pane of glass is a thermal liability. We measure this through the U-Factor, which is the rate of heat loss. A standard single pane of 1/8 inch glass has a U-Factor of roughly 1.1, meaning it conducts heat with almost no resistance. When you replace a cracked pane, you aren’t just restoring the view: you are managing the Dew Point. If the glass is not bedded correctly into the sash with a continuous bead of glazing compound, warm indoor air will hit the cold glass surface at the edges, leading to interstitial condensation that eventually eats your muntins from the inside out.
Tools and Materials: Beyond the Basics
To perform a professional-grade window repair, you need more than a hammer. You need a high-quality glass cutter with a carbide wheel, a stiff glazing knife, a flexible putty knife, and a box of glazier’s points. Do not reach for the acrylic latex caulk. You need a high-quality linseed oil-based glazing compound. The chemistry of linseed oil allows the putty to remain pliable for decades, expanding and contracting with the seasonal movement of the wood sash. You also need an oil-based primer. Water-based primers will cause the wood fibers to swell, preventing a clean bond with the glazing bead.
Step 1: Safely Removing the Damaged Glass
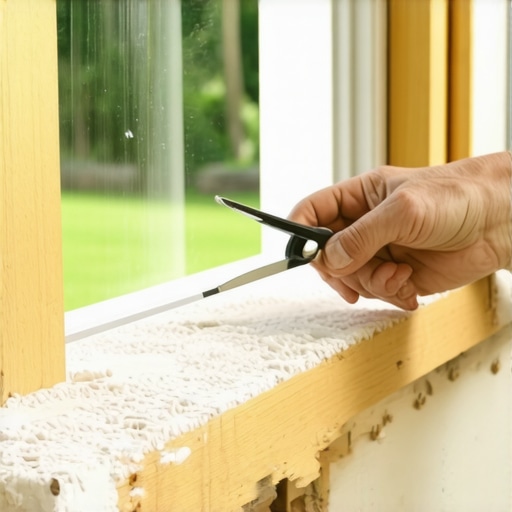
Before you even touch the glass, wear heavy leather gloves and eye protection. If the pane is still mostly intact, use a piece of duct tape to create an X across the surface to prevent shards from flying. To remove the old putty, you may need a heat gun to soften the centuries-old compound, but be extremely careful not to scorch the wood. Work your chisel or glazing knife under the old putty, popping it out in chunks. Once the putty is gone, locate the glazier’s points: the small metal triangles holding the glass in place: and pull them out with needle-nose pliers. The old glass should now lift out. If it sticks, do not force it. Run your knife around the rebate one more time to ensure no hidden points are snagging the edge.
Step 2: Preparing the Rebate
The rebate is the L-shaped groove where the glass sits. This is the most critical area for longevity. If the wood is bare, it will suck the oil right out of your new glazing putty, causing it to dry out and crack within a year. You must sand the rebate clean and apply a coat of oil-based primer. While that dries, measure your opening. A common amateur mistake is measuring the rough opening and cutting the glass to fit exactly. You need to subtract 1/8 inch from both the width and height. This allows for a 1/16 inch expansion gap on all sides. In the world of glazing, glass must never touch the wood directly; it must float in a bed of compound.
Step 3: The Bedding Bead and Setting the Glass
Take a handful of glazing compound and knead it in your hands until it is warm and the consistency of play dough. Roll it into a thin rope and press it into the L-shaped rebate. This is the bedding bead. This bead is your primary seal against air and water. Lay your new pane of glass into the sash and press it firmly until the compound squeezes out the back. You should see a continuous seal around the entire perimeter. Now, drive your glazier’s points every six inches. Use your glazing knife to slide the points flat against the glass and into the wood. They should be buried deep enough that the final putty bevel will cover them completely.
“Installation is just as critical as the window performance itself. A high-performance window installed poorly will fail.” – AAMA Installation Masters Guide
Step 4: Tooling the Finish Bevel
This is where the art of the glazier shows. Take another rope of putty and press it against the outside of the glass. Using your glazing knife at a 45-degree angle, draw it across the putty in one smooth motion. You are looking to create a crisp, clean bevel that aligns perfectly with the interior muntin or sash edge. This bevel is designed to shed water away from the glass and onto the wood, where it can run off the sill. If the putty sticks to your knife, dip the blade in a little mineral spirits. Once the bevel is complete, do not touch it. It needs to skin over for at least seven to fourteen days before you can paint it. When you do paint, ensure the paint laps onto the glass by about 1/16 of an inch to create a permanent weather seal.
Conclusion: The Value of Professional Standards
While replacing a single pane is a manageable DIY task, it requires a respect for the materials and the physics of the building envelope. If your sash is operable, check the balance system and the weep holes while you have it out. A clean window and a functional sash are the hallmarks of a well-maintained home. Remember that window repair is not just about fixing a crack; it is about preserving the structural integrity of your home against the relentless pressure of wind and rain. By following these professional steps, you ensure that your repair will last for another fifty years, rather than just until the next heavy storm.