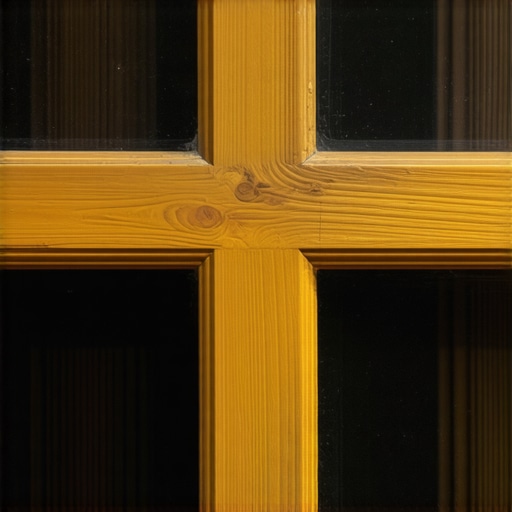
The Friction Frustration of Historic Glazing
Few things are as physically aggravating as a wooden sash that refuses to budge when you want a breeze. You tug at the lift, your knuckles whiten, and the wood groans but stays anchored. Most homeowners assume the window is beyond saving and start looking for a contractor to replace windows immediately. However, as a glazier with over two decades in the field, I can tell you that the issue is rarely a terminal mechanical failure. Instead, it is usually a battle against physics: friction, moisture, and the cumulative layers of paint. A wooden window is a living machine. It breathes, expands, and contracts based on the dew point and the ambient humidity. When the sash binds against the jamb or the parting bead, it is not a signal for a dumpster; it is a call for maintenance. This is where the old world wisdom of the beeswax trick becomes essential for anyone performing a serious window repair.
“Installation and maintenance are just as critical as the window performance itself. A high-performance window installed or maintained poorly will fail to meet its design life.” AAMA Installation Masters Guide
The Narrative Matrix: The Condensation Crisis and Swollen Sashes
I recall a call from a homeowner in a drafty Victorian who was in a state of absolute panic because her new interior storm windows were sweating so heavily that water was pooling on the sill. She was convinced the glass was defective. I walked in with my hygrometer and found the indoor relative humidity was hovering at 68 percent. It was not a window failure; it was a lifestyle conflict. The high moisture content in the air was causing the old ponderosa pine sashes to swell within their rough opening. The wood had reached a fiber saturation point where the dimensions of the sash had increased by nearly an eighth of an inch. This expansion made the windows impossible to operate. I had to explain that until she controlled the interior climate, no amount of muscle would move those sashes. Once we stabilized the humidity, we applied the beeswax trick to ensure that even with minor seasonal fluctuations, the glass would glide.
The Science of Wood Expansion and Friction
To understand why beeswax works, you have to understand the cellular structure of the wood used in a traditional sash. Wood is a hygroscopic material. It consists of cellulose, hemicellulose, and lignin. These fibers are designed to transport water, and even after a hundred years of being part of a house, they still react to vapor pressure. In cold, northern climates, the air inside is often dry in winter but the exterior wood is exposed to snow and ice. This creates a pressure gradient. The wood cells on the exterior can swell while the interior stays stable, causing the sash to twist or ‘cup’ within the tracks. When a window cleaner comes to service these units, they often find that the friction between the sash stiles and the jamb is too high for the counterweight system to overcome.
The beeswax trick addresses this by providing a hydrophobic lubricant that does not attract grit. Unlike petroleum-based oils or sprays that can penetrate the wood and cause it to rot or attract dust that acts like sandpaper, beeswax sits on the surface. It fills the microscopic pores of the grain and creates a low-friction interface. When you apply it to the parting bead and the blind stop, you are essentially creating a non-stick surface that ignores the presence of moisture. This is vital because a sash that is stuck often leads to broken sash cords or damaged muntins as people try to pry them open with screwdrivers.
How to Perform the Beeswax Trick
Before you begin, you must ensure the window is clean. If you hire a window cleaner, ask them to focus on the tracks. You cannot lubricate over dirt. Once the tracks are clear of debris, follow these steps. First, raise the lower sash as high as it will go. You need to expose the lower half of the jamb and the parting bead. The parting bead is the thin strip of wood that separates the upper and lower sashes. This is a high-friction zone. Take a block of 100 percent natural beeswax. Avoid candles that contain paraffin or dyes, as these can be sticky or leave stains. Rub the wax vigorously into the wood. You want to generate enough heat through friction that the wax softens and leaves a visible, thin coating. Repeat this process for the upper sash by pulling it down and waxing the top portion of the tracks. This simple window repair can reduce the force required to move a window by over 50 percent.
“The primary purpose of a window is to provide light and ventilation while maintaining the integrity of the thermal envelope through proper operation.” ASTM E2112 Standard Practice
Thermal Dynamics: Why Operation Matters for Energy
In colder regions like the Northeast or Midwest, the ability to close and lock a window is the difference between a comfortable home and a massive heating bill. A window that does not slide properly often does not close fully. Even a gap of a sixteenth of an inch at the meeting rail allows significant heat loss. This occurs via convection where warm interior air escapes and cold exterior air is sucked in. By using beeswax to ensure the sash moves freely, you allow the locks to pull the sashes together tightly. This compresses the weatherstripping and seals the thermal envelope. If you have single-pane glass, you are already fighting a losing battle with the U-factor, but if the window is operable and well-maintained, you can supplement it with a storm window to create an insulating dead-air space. This is often more cost-effective than a full tear-out to replace windows, especially in historic districts where the original wood is of a quality you cannot find today.
The Glazier’s Warning: When Beeswax Isn’t Enough
While the beeswax trick is a miracle for sticking windows, it cannot fix structural rot. If you inspect the sill pan and find the wood is soft enough to press a thumb into, you are looking at a localized failure of the flashing system. Water management is a science. If the original installer failed to provide a proper drip cap or if the flashing tape was never applied to the rough opening, water will migrate behind the trim. This leads to the decay of the header and the jack studs. In these cases, a window repair is just a temporary bandage. You must assess if the integrity of the sash is still there. If the glazing bead is falling out and the muntins are crumbling, it may be time to consult a professional to replace windows with modern fiberglass or thermally broken aluminum units that mimic the aesthetic of the original wood while offering vastly superior SHGC (Solar Heat Gain Coefficient) ratings.
Final Maintenance Protocol
Regular maintenance is the only way to avoid the high cost of replacement. Every spring and fall, inspect the sash cords. Check the pulleys for rust. Use the beeswax on the tracks. If you see paint beginning to crack on the exterior of the sash, sand it and repaint it before moisture can penetrate the wood grain. A well-maintained wooden window can last 150 years. A modern vinyl unit will lucky to see 20. Do not be seduced by the high-pressure sales pitch of the ‘replacement window’ industry. Start with a block of wax and a little elbow grease. You might find that your ‘broken’ windows are just thirsty for a little care and a smooth path to glide on. The goal is a window that stays shut when it is cold and opens with a finger’s touch when the first blossoms of spring appear.