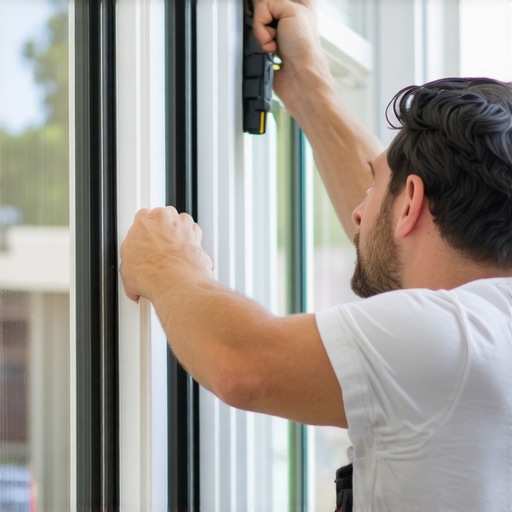
The sound usually starts around 2:00 AM when the wind shifts from the northwest. It is a rhythmic, hollow tapping—the sound of a window sash vibrating against its stops. Most homeowners hear that noise and immediately assume they need to replace windows entirely, fearing that the structural integrity of their home is compromised. But as someone who has spent over two decades in the glazing trade, I can tell you that a rattle is rarely a sign of a terminal failure. It is a sign of a mechanical clearance issue. You do not always need a new unit; you need a fundamental understanding of how an operable sash interacts with its frame.
A few years ago, I was called to a drafty Victorian in the dead of winter. The homeowner was in a panic because their new windows were ‘sweating’ and shaking so loudly in the wind that they couldn’t sleep. I walked in with my hygrometer and showed them the humidity was 60%, which was part of the condensation issue, but the rattle was the real culprit. The cold air was shrinking the wood fibers of the sash, creating a gap that allowed the wind to play the window like a reed. They thought they were looking at a five-figure window repair bill. Instead, I fixed it with a hammer, a block of wood, and twenty minutes of labor. This is the reality of window maintenance that the ‘caulk-and-walk’ installers won’t tell you.
The Physics of the Rattle: Why Windows Vibrate
Before you reach for your wallet, you must understand the Rough Opening dynamics. A window is not a static object; it is a machine designed to manage air pressure. In cold climates like Chicago or Minneapolis, the U-Factor is king. When the temperature drops, the materials in your window—whether wood, vinyl, or aluminum—undergo thermal contraction. This creates a minute gap between the sash and the stop bead. When wind hits the exterior of the glass, it creates a high-pressure zone. As the wind moves around the building, it creates a low-pressure zone on the leeward side. This pressure differential causes the glass to move back and forth within the frame. This is the Bernoulli Effect in action on your bedroom window.
“Installation is just as critical as the window performance itself. A high-performance window installed poorly will fail.” – AAMA Installation Masters Guide
If your sash has more than 1/16th of an inch of play, it is going to rattle. This gap also acts as a thermal bridge, allowing your expensive heated air to escape while inviting cold drafts to settle on your floor. This isn’t just an acoustic annoyance; it is a direct hit to your energy efficiency. To fix this without buying new hardware, we have to address the mechanical fit of the operable components.
Step 1: The Forensic Cleaning
The first step in any window repair is often overlooked: cleaning. Many rattles are caused by a sash that cannot close fully because of debris in the weep hole or the sill pan. Use a high-quality window cleaner to strip away years of built-up grit and oxidized paint from the tracks. When dirt builds up in the bottom of the channel, the sash can’t seat firmly against the weatherstripping. This leaves the window slightly ‘up,’ preventing the sash lock from pulling the meeting rails together tightly. A clean window is a quiet window. Ensure the glazing bead is also free of debris, as loose beads can cause the glass itself to vibrate within the sash frame.
Step 2: Adjusting the Interior Stops
In most double-hung wood windows, the sash is held in place by an interior stop bead—the strip of wood that runs vertically on the left and right sides of the interior frame. Over time, as the house settles or as multiple layers of paint are applied, these stops can move. To fix the rattle, you need to move the stop bead closer to the sash. Do not pull the stop off completely. Instead, take a scrap block of wood and a hammer. Place the block against the stop and gently tap it toward the sash. You want to eliminate the gap without creating so much friction that the window becomes difficult to open. This is a precision shim-like adjustment without the actual shim. Once the stop is tight against the sash, the vibration will cease because the wind no longer has the room to move the material.
Step 3: The Meeting Rail Realignment
If the rattle is coming from the center of the window, the issue is likely at the meeting rail—where the top and bottom sash overlap. Often, the lock is not pulling these two rails together because the upper sash has slipped down a fraction of an inch. Without buying a new lock, you can often solve this by ensuring the upper sash is fully seated in the head of the frame. Check the sash weights or balances. If they are loose, the sash won’t stay up. A temporary fix that requires no hardware is to use a small piece of adhesive-backed felt or even a folded piece of heavy paper placed in the track at the very top. This forces the upper sash to stay in the ‘full up’ position, allowing the lock to engage correctly and pull the rails into a tight, airtight seal.
“Standard Practice for Installation of Exterior Windows, Doors and Skylights requires that the fenestration product be shimmed to maintain level, square, and plumb.” – ASTM E2112
Step 4: Managing the Thermal Environment
In northern climates, the U-Factor determines how much heat your window loses. A rattling window is a sign that your warm-edge spacers are being bypassed by air infiltration. By tightening the sash fit, you are effectively improving the thermal performance of the unit. If you find that the rattle persists in only one season, it is likely a humidity issue. In the winter, wood shrinks. If you can maintain a consistent indoor humidity level (between 30% and 40%), you can prevent the wood from contracting to the point of rattling. This is climate logic applied to home maintenance.
When a Rattle Means It’s Time to Replace Windows
While most rattles can be fixed with these manual adjustments, there are times when the window repair is no longer viable. If you see daylight through the corners of the sash, or if the muntins are rotting away from the glass, the structural integrity is gone. In these cases, you are better off looking into a full-frame replacement rather than a pocket insert. A pocket replacement often leaves the old, rattling frame in place, which defeats the purpose of upgrading. A master glazier knows that the Rough Opening must be cleared and a new sill pan and flashing tape system installed to truly protect the home from the elements.
Summary of the Professional Approach
Fixing a rattling window is about restoring the original tolerances of the machine. It requires a keen eye for how the sash sits in the frame and a willingness to perform the manual adjustments that modern installers often ignore. Before you spend thousands to replace windows, try the ‘tap-and-clean’ method. Most of the time, the solution isn’t found in a catalog; it is found in the careful manipulation of the existing materials to ensure they meet the AAMA standards for air tightness and operational ease.