The Invisible Failure: Why Your Window Seals Are Costing You Money
Most homeowners don’t notice a window seal failure until the curtains start fluttering on a windless day or the drywall beneath the sill begins to soften. As a glazier with over 25 years in the field, I can tell you that a window is essentially a controlled leak. We create a hole in the thermal envelope of your building and then try to plug it with glass and chemicals. When those chemicals—specifically your exterior caulking—reach the end of their lifecycle, they transform from a flexible barrier into a brittle, shrinking liability. This is the moment where most people fail: they try to ‘caulk over’ the old mess. That is a recipe for trapped moisture and accelerated rot. Real window repair starts with total removal.
The Anatomy of a Failed Seal: A Case Study in Rot
I recall a project in a high-wind suburb where I was asked to look at a simple draft. I pulled back a section of sun-bleached, cracked vinyl-to-brick sealant, and the Rough Opening header was essentially mulch. The previous installer had relied on a ‘caulk-and-walk’ methodology, skipping the Flashing Tape and failing to use a Sill Pan. They had essentially used the caulk as a structural component rather than a sacrificial weather barrier. Because the old, failed bead wasn’t removed before the new layer was applied, moisture was wicked behind the sealant via capillary action and held against the wood framing. It didn’t just leak; it fermented.
“Installation is just as critical as the window performance itself. A high-performance window installed poorly will fail.” – AAMA Installation Masters Guide
The Science of Thermal Expansion and Sealant Failure
In cold climates, the U-Factor of your window is your primary defense against heat loss, but even a triple-pane unit with a warm-edge spacer is useless if the perimeter seal is compromised. Windows are dynamic. The Sash and frame expand and contract at different rates than the surrounding masonry or siding. This ‘thermal dance’ puts immense stress on the sealant bead. Eventually, the bond experiences cohesive or adhesive failure. If you live in a region where January temperatures plummet, the air infiltration through a 1/16th-inch gap can negate the entire R-value of your wall insulation. This is why we don’t just ‘clean’ windows; we maintain the integrity of the aperture.
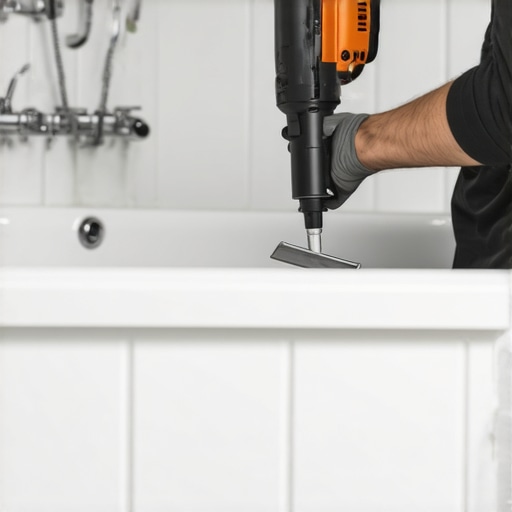
The Professional Protocol: Using Heat and Steel
To replace windows is expensive; to repair them correctly is an investment. Removing old, petrified caulking requires more than a screwdriver and a prayer. You need a variable-temperature heat gun and a high-carbon steel scraper. The goal is to reach the ‘glass transition temperature’ of the old sealant without hitting the melting point of your vinyl Glazing Bead or the ignition point of your wood Muntin.
First, set your heat gun to a medium-low setting. You are not trying to liquefy the material; you are trying to break its molecular grip on the substrate. Move the gun in a slow, rhythmic motion along the joint. As the material softens, use a 45-degree angled scraper to lift the bead. A professional glazier looks for the ‘clean peel’ where the sealant releases from the Rough Opening without leaving a residue. If you encounter silicone, you must be even more diligent. New silicone will not stick to old silicone, no matter how much window cleaner you use. You must strip it down to the bare substrate to ensure the new chemical bond is air-tight.
“Proper surface preparation is the single most important factor in sealant adhesion and the longevity of the building envelope.” – ASTM E2112 Standard Practice
Managing the Rough Opening: Beyond the Scraper
Once the old material is removed, you must inspect the Shim locations. Are they compressed? Is the window still plumb and level? This is the time to check the Weep Hole functionality. If you’ve been experiencing condensation between panes, removing the exterior caulk might reveal that the frame’s drainage system is clogged with years of debris. A clear drainage path is essential for preventing water from backing up into the Sill Pan and eventually your flooring.
Why Heat is Superior to Chemical Strippers
Many ‘handymen’ suggest chemical caulk removers. I advise against them for professional-grade window repair. These chemicals can migrate into the Operable parts of the window, degrading the weatherstripping or reacting poorly with the Flashing Tape. Controlled heat is predictable. It allows you to see exactly how the material is responding. Once the bead is out, a final wipe with denatured alcohol ensures a pristine surface for the new high-movement polyurethane or hybrid sealant. This technical approach is what separates a long-term solution from a temporary patch. Water management is a science, not a hobby. By removing the old failure entirely, you ensure that your home’s thermal envelope remains intact for another decade of seasons. “