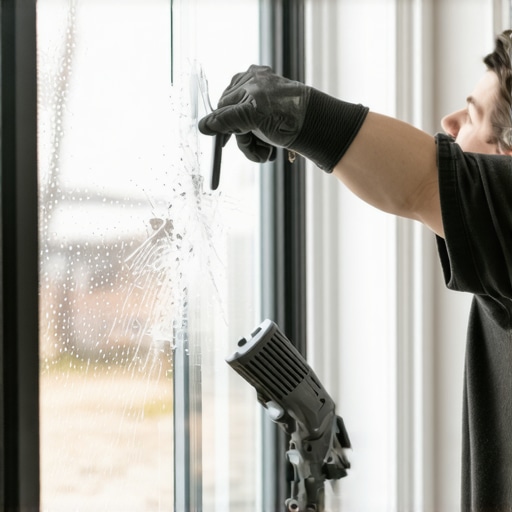
The Reality of a Fractured Sash: Why Glass Matters
A broken window is not just an aesthetic failure; it is a breach in your home thermal envelope. For over twenty-five years, I have walked onto job sites where a simple crack was treated with a piece of duct tape and a shrug. That shrug usually costs the homeowner a few thousand dollars in structural rot three years later. When you see a spiderweb fracture in your sash, you are looking at an invitation for moisture migration and a total collapse of your local R-value. Many people think they can just scrape out the old glass and slap in a new piece from the hardware store, but if you do not understand the physics of the dew point and the mechanical necessity of a proper bedding, you are just performing a temporary fix that will fail during the first deep freeze of January.
The Condensation Crisis: A Narrative Warning
A homeowner once called me in a panic because their brand-new DIY glass replacement was ‘sweating’ so profusely that it was puddling on the hardwood floor. They were convinced the glass was defective. I walked in with my hygrometer and a thermal imaging camera. I had to show them that the interior humidity was spiking at 60 percent while the surface temperature of the glass was dropping below the dew point because they had failed to use a proper warm-edge spacer. It was not the window that failed; it was their failure to understand that a window is a managed hole in a building. They had ignored the air-tightness required to prevent warm, moist interior air from hitting the cold exterior pane. This is the difference between a window repair and a window restoration.
“Installation is just as critical as the window performance itself. A high-performance window installed poorly will fail.” AAMA Installation Masters Guide
The Anatomy of the Window: Beyond the Glass
Before you touch a single shard, you must understand what you are looking at. We are not just dealing with glass; we are dealing with a Sash, the frame that holds the glass. In older homes, this might be wood held together by Muntins. In modern homes, it is likely a vinyl or fiberglass profile. You must measure the Rough Opening if you are replacing the whole unit, but for a pane replacement, your focus is the glass pocket. If your home is in a northern climate like Chicago or Minneapolis, the U-Factor is your primary metric. You want a low U-factor to keep the heat inside. This is achieved through Low-E coatings usually applied to Surface 3 of the glass, which reflects long-wave infrared radiation back into the room. If you are replacing a single pane in a double-pane Insulated Glass Unit (IGU), stop now. You cannot DIY the desiccant and Argon gas fill. You must order a factory-sealed IGU. However, if you are dealing with a single-pane wood sash, the process is a test of patience and precision.
Step 1: The Surgical Extraction
Remove the sash from the frame if it is an Operable window. Laying it flat is the only way to ensure a level bed. Wear Kevlar-lined gloves. Use a stiff putty knife to remove the old Glazing Bead or the hardened glazing putty. If the putty is original, it may be as hard as concrete. A heat gun can soften it, but be careful not to char the wood. Once the beads are removed, carefully lift out the shards. This is where you inspect the Sill Pan or the bottom rail of the sash for any signs of water infiltration. If the wood is soft, you are not ready for glass; you are ready for wood epoxy.
Step 2: Cleaning the Glass Pocket
The pocket must be pristine. Any leftover old putty or debris will create high spots that cause stress concentrations in the new glass. This leads to what we call a thermal stress crack. Sand the wood lightly and apply a coat of linseed oil or a wood sealer. This prevents the dry wood from sucking the oils out of your new glazing compound, which would cause the putty to crack and fail prematurely. Precision is key. Measure the opening and subtract one-eighth of an inch from both the width and height. This allows for the expansion and contraction of the frame without crushing the glass.
“The method of installation must account for the thermal expansion of materials to prevent structural failure of the glazing system.” ASTM E2112 Standard Practice
Step 3: Bedding and Setting
Apply a thin bead of high-quality glazing compound or a specialized silicone sealant into the pocket. This is called ‘back-bedding.’ It creates a water-tight seal between the glass and the frame. Place the glass into the pocket and press firmly but evenly. If you are working on a larger pane, use Setting Blocks at the bottom. These small rubber spacers ensure the glass does not sit directly on the frame, allowing for drainage through Weep Holes and preventing the glass from shifting. For wood windows, use 1/2-inch diamond points driven every six inches into the sash to hold the glass in place before the final glazing is applied.
Step 4: The Final Seal
Apply the final layer of glazing compound. Use a professional-grade putty knife and a single, continuous motion to create a smooth, beveled edge. This ‘fillet’ of putty must shed water away from the glass and onto the frame. If you leave any gaps or ridges, water will sit there, freeze, and pop the seal by spring. Do not paint the putty immediately; most oil-based compounds need a week to form a ‘skin.’ When you do paint, ensure the paint laps onto the glass by about a sixteenth of an inch to create a final weather seal. This is the mark of a master; the paint is actually part of the glazing system.
Why Most DIY Window Repairs Fail
Most homeowners act like a window cleaner when they should act like a structural engineer. They worry about the clarity of the glass but ignore the Flashing Tape or the integrity of the Shim. If the sash is not square within the frame, the glass will eventually crack again. If you are in a cold climate, the lack of a proper seal will cause the interior surface of the glass to drop so low that ice forms on the inside of your home. This is why we talk about the Solar Heat Gain Coefficient (SHGC) and U-factor. In the North, we want that sun to help heat the house in the winter, but we cannot afford to lose that heat through a poorly bedded pane. If your window is old and drafty, sometimes the best window repair is to replace windows entirely with modern fiberglass units that offer superior thermal stability and won’t expand and contract like vinyl.
Conclusion: The Master’s Perspective
Replacing a window pane is a fundamental skill, but it requires an obsession with detail. You are fighting a constant battle against air pressure and liquid water. If you follow these steps, you are not just fixing a hole; you are restoring the integrity of your home. Don’t be the person who uses a ‘caulk-and-walk’ method. Take the time to bed the glass, secure it with points, and create a perfect putty bevel. Your energy bill and your house frame will thank you.