Decoding the Anatomy of Old Glass
When you walk into a Victorian or a Craftsman-style home, the windows are often the first thing that tells a story. You see the slight waviness in the pane, the thin muntins holding small lights of glass, and the heavy wood sash that has been painted shut for decades. As a master glazier, I don’t just see a window; I see a thermal liability. The primary challenge with these historic units is determining exactly what you are looking at without shattering the glass. This is where the penny test becomes an essential tool in your diagnostic kit for window repair and assessment.
“The National Fenestration Rating Council provides consistent ratings on window, door, and skylight energy performance to help consumers compare products.” – NFRC Performance Manual
The Condensation Crisis: A Master Glazier Perspective
A homeowner called me in a panic because their new windows were ‘sweating’ profusely every morning. I walked in with my hygrometer and showed them the humidity was 60 percent. It was not a failure of the window units; it was their lifestyle and the lack of mechanical ventilation in a tightened building envelope. However, in older homes, that same sweating often occurs because the glass is so thin that the interior surface temperature drops below the dew point almost instantly. I had to explain that their single-pane glass, which I identified using a simple penny, was radiating cold directly into the room, causing the moisture in the air to phase-change into liquid on the glass surface. This is a classic case where understanding the glass thickness helps us decide whether to pursue a simple window repair or a full-scale effort to replace windows.
The Physics of the Penny Test
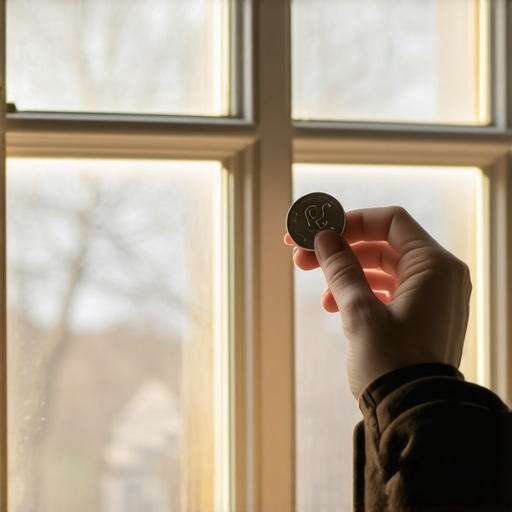
The penny test is a trick of optical physics used to identify if a window is single-pane, double-pane, or even triple-pane, and to estimate the thickness of the glass. Here is the technical breakdown: when you hold a penny against the exterior surface of the glass, you are looking at the reflection of that penny. In a single-pane window, the reflection will appear to touch the actual penny because there is only one surface of glass and a thin layer of silvering or simple transparency. If there is a gap between the penny and its reflection, you are looking at the thickness of the glass itself.
In an Insulated Glass Unit (IGU), you will see multiple reflections. The distance between these reflections indicates the thickness of the glass panes and the width of the airspace or gas fill between them. In older homes, we often find ‘double-strength’ glass which is approximately 1/8 inch thick, versus ‘single-strength’ which is a mere 3/32 inch. While that 1/32nd of an inch sounds negligible, it significantly impacts the structural integrity and the frequency of vibration, which affects how much street noise enters the home. A window cleaner will often be the first to notice these differences, as the ‘flex’ of a single-strength pane during cleaning is much more pronounced and carries a higher risk of breakage under pressure.
U-Factor and Thermal Performance in Cold Climates
In northern climates like Chicago or Minneapolis, the U-Factor is the most critical metric. The U-Factor measures the rate of non-solar heat loss. The lower the number, the better the window is at keeping heat inside. Single-pane glass has a U-Factor of roughly 1.1. When we move to a double-pane IGU with a half-inch airspace, that number drops to about 0.48. If we add a Low-E coating on surface number three and fill the cavity with Argon gas, we can get that U-Factor down to 0.30 or lower. This is why identifying the glass type is the first step in any energy audit. If your penny test reveals a single reflection, you are essentially living with a hole in your wall that is only protected by a few millimeters of silica. The radiant heat loss is immense. You can feel the ‘draft’ even if the window is perfectly sealed because the air near the glass cools rapidly, becomes dense, and sinks, creating a convective loop that feels like a breeze.
Beyond the Penny: Understanding Frame and Sash Integration
Identifying the glass is only half the battle. You must also examine the rough opening and the condition of the sill pan. Often, people want to replace windows because they are drafty, but the glass isn’t the only culprit. If the original installer failed to use proper flashing tape or didn’t shim the unit correctly, the entire frame can rack, leading to air bypass around the operable sash. In older wood windows, the glazing bead or the putty (glazing compound) often dries out and cracks. This allows water to infiltrate the sash rail, leading to rot that can remain hidden until the wood is soft enough to poke a finger through. When performing a window repair, we often have to scrape out this old putty, prime the wood, and apply new compound to ensure the glass is bedded correctly. This is a meticulous process that ‘caulk-and-walk’ contractors will avoid, but it is the only way to preserve the original character of the home while improving performance.
“Installation is just as critical as the window performance itself. A high-performance window installed poorly will fail.” – AAMA Installation Masters Guide
The Science of Low-E and Gas Fills
If your penny test suggests a double-pane unit, the next step is identifying if it has a Low-Emissivity (Low-E) coating. Low-E is a microscopically thin, transparent layer of metal or metallic oxide deposited directly on the glass. In cold climates, we want this coating on surface number three—the outward-facing side of the inner pane. This reflects long-wave infrared radiation (heat) back into the room. To check for this, we use a specialized detector or the ‘match test.’ If you hold a flame up to the window, the color of one of the reflections will be different (usually greenish or purple) if a Low-E coating is present. Combined with Argon gas, which is denser than air and reduces convective currents within the IGU, these technologies transform the window from a thermal leak into a functional part of the home’s insulation strategy.
How to Perform the Penny Test for Glass Identification
Step-by-Step Glass Diagnostic
- Clean the glass surface thoroughly. A window cleaner or simple vinegar solution ensures no debris interferes with the reflection.
- Hold a copper penny flat against the glass pane.
- Observe the reflection of the penny in the glass from a slight angle.
- Count the reflections. One reflection that touches the penny indicates a single pane. Two distinct reflections with a small gap indicate the first and second surfaces of a single pane of glass. Four reflections indicate a double-pane IGU.
- Measure the gap. A larger gap between the second and third reflection indicates the width of the airspace, typically ranging from 1/4 inch to 5/8 inch.