The Condensation Crisis: A Master Glazier’s Diagnostic
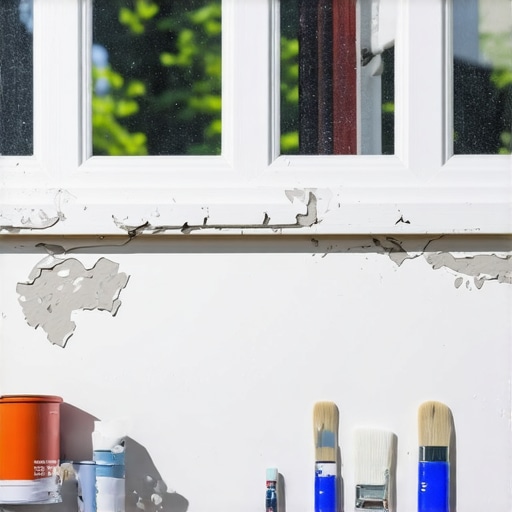
A homeowner called me in a panic last February because their relatively new double-hung windows were ‘sweating’ so profusely that the paint on the interior sills was literally lifting off in sheets. I walked in with my hygrometer and showed them that their indoor humidity was hovering at 60 percent while it was 10 degrees outside. It wasn’t a failure of the window frame itself; it was a failure to manage the dew point within the home. The moisture was migrating to the coldest surface—the glass—running down the sash, and pooling on the wooden stool and sill. This is a classic case where the homeowner assumes they need to replace windows when what they actually need is a lesson in psychrometrics and a proper window repair protocol. When paint peels on a window sill, it is rarely a cosmetic issue. It is a forensic indicator of moisture mismanagement, either from the exterior via failed flashing tape or from the interior via condensation.
“Installation is just as critical as the window performance itself. A high-performance window installed poorly will fail.” – AAMA Installation Masters Guide
The Physics of the Sill: Why Paint Fails
To understand why your paint is bubbling, you have to understand the anatomy of the rough opening. The window sill is the most abused part of the building envelope. It takes the brunt of UV radiation and bears the weight of every drop of water that runs down the glazing. If you look at the glazing bead, you will often find small gaps. Water enters these gaps through capillary action, travels behind the sash, and settles into the wood fibers of the sill. Wood is hygroscopic; it wants to reach equilibrium with the surrounding moisture. As the wood swells and contracts, it creates mechanical stress that a rigid paint film simply cannot handle. Most ‘caulk-and-walk’ installers will just slap a new layer of latex over a damp sill. That is a recipe for rot. You are essentially trapping moisture inside the wood, which will eventually lead to the degradation of the lignin, the glue that holds wood fibers together. Once that happens, no amount of paint will save you; you are looking at a full-frame window repair or total replacement.
Thermal Logic in the Cold North
In colder climates like Chicago or Minneapolis, the primary enemy is the U-Factor. A window with a poor U-Factor allows the interior glass surface to drop below the dew point. When that happens, you get condensation. I tell my clients that if they see water on their sills every morning, they are effectively watering their house like a plant. To prevent this, you need windows with warm-edge spacers that keep the edges of the glass unit from becoming thermal bridges. If you are at the point where you must replace windows, look for a NFRC label that specifies a high Condensation Resistance (CR) rating. A low CR rating means you will be repainting those sills every three years. If you are sticking with your current windows, a professional window cleaner can often be your first line of defense by identifying failed seals in the Insulated Glass Unit (IGU) before the moisture does permanent damage to the wood.
“The NFRC provides energy performance ratings in several areas: U-factor, Solar Heat Gain Coefficient (SHGC), and Visible Transmittance (VT).” – NFRC Homeowner Guide
The Anatomy of a Professional Repaint
If the wood is still structurally sound, you don’t need to replace windows yet. But you must follow a glazier’s protocol for repainting. First, you must strip the old coating back to bare wood. I don’t care if it takes three types of scrapers. You need to see the grain. If you find gray, weathered wood, that is UV damage. You must sand that away until you reach fresh, bright fibers. Second, check the weep hole. If your window has an exterior storm or is a sliding unit, ensure the weep hole is not clogged with paint or debris. A clogged weep hole forces water backward into the rough opening and under the sill. Third, use a high-quality oil-based primer. While latex is great for siding, an oil-based primer penetrates the wood fibers and creates a moisture-resistant barrier that latex cannot match. Finally, when applying your topcoat, ensure you ‘lap’ the paint slightly onto the glass—about a sixteenth of an inch. This creates a miniature ‘shingle’ that prevents water from getting behind the glazing bead.
When Repair is Not Enough
There comes a point where window repair is just throwing good money after bad. If I can take a screwdriver and push it more than a quarter-inch into the sill, the structural integrity is gone. At that point, you aren’t just repainting; you are dealing with a potential mold colony inside your wall cavity. When you replace windows, ensure the new unit includes a sill pan. A sill pan is a flashing component that sits under the window and directs any leaked water back to the exterior. Most builders skip this because it costs twenty dollars and takes ten minutes, but it is the difference between a window that lasts fifty years and one that rots out in ten. Always demand that your installer uses flashing tape integrated with the house wrap in a weather-lapped fashion. If they pull out a tube of caulk and say ‘this is all we need,’ kick them off the job site. Real glazing is about gravity and drainage, not chemicals and adhesives.
The Role of Maintenance and the Window Cleaner
Maintenance is not just about aesthetics. A professional window cleaner sees things the homeowner ignores. They notice when the muntin is loose or when the glazing bead is starting to crack. They can see if the operable sash is rubbing against the frame, which strips the paint and invites moisture. Regular cleaning removes acidic pollutants and salts that can break down paint films prematurely. If you want to avoid the high cost to replace windows, you should be inspecting your sills every spring and fall. Look for ‘alligatoring’ in the paint—those small cracks that look like reptile skin. That is the first sign that the paint is losing its elasticity. Catch it then with a light sand and a touch-up, and you will save yourself thousands of dollars in window repair costs down the road.