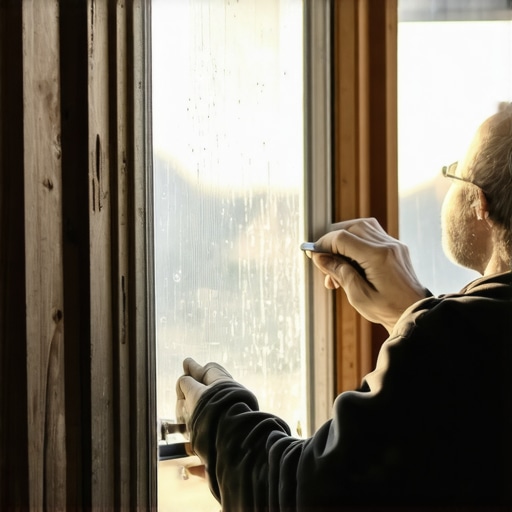
In the world of fenestration, an old wood sash is a living piece of history, but to the untrained eye, it is often seen as a liability. After twenty-five years of handling everything from structural silicone glazing to delicate restoration work, I have seen too many homeowners convinced by high-pressure sales tactics to rip out perfectly restorable timber for mediocre vinyl inserts. A window is a complex thermal boundary, and in an old wood frame, that boundary is maintained by a precise marriage of wood, glass, and glazing compound. When a pane cracks or the seal fails, you aren’t just looking at a cosmetic issue; you are looking at a compromise in your building envelope.
“Installation is just as critical as the window performance itself. A high-performance window installed poorly will fail.” AAMA Installation Masters Guide
A homeowner called me in a panic because their windows were ‘sweating’ and the wood was starting to show signs of surface mold. I walked in with my hygrometer and showed them the humidity was 60 percent. It wasn’t the windows that were failing; it was their indoor climate management. However, that moisture on a single pane of glass is the catalyst for rot. When you replace a window pane in an old wood frame, you are performing surgery on a system designed to breathe. The goal is to restore the thermal break and ensure that water shedding follows the shingle principle, where every layer overlaps the one below it to direct moisture away from the interior.
The Anatomy of the Wood Sash
Before you even touch a glass cutter, you must understand the components of the assembly. The vertical and horizontal members of the sash are the stiles and rails. The smaller strips that hold the individual panes are the muntins. These are not merely decorative; they provide the structural grid that keeps the sash square. In older homes, these muntins are often profiled with a specific Ogee or putty run that must be respected. When we talk about window repair, we are talking about maintaining the integrity of these wood fibers. Wood is a natural insulator with a low thermal conductivity, unlike modern uninsulated aluminum. This makes the wood frame itself quite efficient, but the single pane of glass is the weak point. In cold Northern climates like Chicago or Boston, the U-Factor of a single pane is roughly 1.0, which is abysmal for heat retention. Our goal during repair is to ensure the new glass is bedded so tightly that air infiltration, which accounts for more heat loss than the glass itself, is eliminated.
Phase 1: Extraction and Substrate Preparation
You cannot perform a high-quality window repair with the sash in the opening. It must be removed. This involves carefully taking off the stop beads without snapping the aged timber. Once the sash is on the bench, the real work begins. The old glazing compound, likely a mix of whiting and linseed oil that has turned to stone over the decades, must be removed. I use a steam box or a heat gun with a focused nozzle to soften the putty. You have to be careful here; too much heat and you will stress the surrounding panes, causing them to crack. Once the putty is removed, you will find the glazing points. These are small metal triangles driven into the wood to hold the glass in place. Pull them with needle-nose pliers. Now, here is the secret that the ‘caulk-and-walk’ installers miss: the rabbit, or the L-shaped groove where the glass sits, must be primed. If you put fresh putty against dry, old wood, the wood will instantly suck the oil out of the putty, causing it to shrink, crack, and fail within a year. Use a high-quality oil-based primer or even a coat of boiled linseed oil to seal the wood fibers first.
“Proper flashing and sealing are the primary defenses against water infiltration, which is the leading cause of window-related structural damage.” ASTM E2112 Standard Practice
Phase 2: The Bedding and Pointing Process
Window glass is not just ‘put in’ the frame. It must be bedded. I apply a thin bead of glazing compound in the rabbit before the glass is laid down. This creates a gasket-like seal that prevents air from whistling through. When the glass is pressed in, the ‘squeeze-out’ confirms you have a continuous seal. Next comes the glazing points. Space them every four to six inches. Do not just push them in; they should be driven firmly enough to hold the glass against the bedding but not so tight that they create a pressure point that will crack the pane during the next deep freeze. This is where the physics of the North comes into play. In regions where temperatures drop below zero, the wood and glass expand and contract at different rates. The glazing compound must remain semi-flexible to accommodate this movement. This is why I avoid modern silicone for this specific task; silicone is too difficult to remove the next time a pane breaks, and it doesn’t always bond perfectly to the oily residues of historic wood.
Phase 3: The Putty Run
The final aesthetic and functional layer is the putty run. This is the angled bead of compound that sheds water away from the glass. Achieving a crisp, professional line requires a steady hand and a clean glazing knife. The angle must be steep enough to prevent water from pooling but shallow enough that it doesn’t show from the interior side of the window. This is the ‘shingle principle’ in action at a microscopic level. Once the putty is applied, it needs time to skin over. This can take anywhere from a few days to two weeks depending on the temperature and humidity. Do not rush to paint. If you paint too early, the oils in the putty will bubble through. If you wait too long, the putty will dry out and crack. You are looking for a firm skin that can withstand a light touch without deforming. As a window cleaner will tell you, a clean putty line makes the difference between a window that looks maintained and one that looks neglected.
Climate Logic: Why Wood Still Wins
In hot Southern climates, the focus is on the Solar Heat Gain Coefficient (SHGC). While wood is great, the glass in these old frames often lacks the Low-E coatings found in modern units. If you are in a heat-dominant climate, you might consider replacing the single pane with a laminated glass or a glass that has a hard-coat Low-E surface on the interior to reflect radiant heat. However, in the North, we want that solar gain in the winter. The wood frame acts as a thermal break, preventing the cold from bridging through to the interior. If you see condensation on the bottom of your wood sash, it’s a sign that the dew point has been reached on that cold surface. The solution isn’t always to replace windows; often, it’s to add a high-quality storm window. A storm window creates a dead air space that significantly lowers the U-Factor, bringing the performance of an old wood window close to that of a modern double-pane unit without the waste of a full-frame replacement.
The Reality of Maintenance
Let’s talk about the ROI. A high-pressure salesman will tell you that new windows will pay for themselves in energy savings in five years. That is a lie. The math simply doesn’t support it when you factor in the cost of high-end replacement units. The real value in window repair and restoration is the preservation of the building’s character and the longevity of the materials. A well-maintained wood window can last 100 years. A vinyl window has a life expectancy of 15 to 20 years before the seals fail or the frame warps due to UV exposure. By learning to replace a window pane yourself, you are opting out of the disposable culture of modern construction. You are ensuring that the rough opening of your home remains protected by a material that is proven to stand the test of time. Keep your weeps clear, your putty fresh, and your glass clean, and these windows will outlast us all. { “@context”: “https://schema.org”, “@type”: “HowTo”, “name”: “How to Replace a Window Pane in an Old Wood Frame”, “description”: “A professional guide to restoring a single-pane wood window sash through proper glazing techniques.”, “step”: [ { “@type”: “HowToStep”, “text”: “Remove the wood sash from the frame and place it on a flat work surface.” }, { “@type”: “HowToStep”, “text”: “Remove old, hardened glazing putty using a heat tool and a chisel, taking care not to damage the wood.” }, { “@type”: “HowToStep”, “text”: “Clean the wood rabbit and prime with an oil-based primer to prevent the wood from absorbing oils from the new putty.” }, { “@type”: “HowToStep”, “text”: “Apply a thin bead of bedding compound in the groove and press the new glass pane firmly into place.” }, { “@type”: “HowToStep”, “text”: “Secure the glass with metal glazing points driven into the wood every six inches.” }, { “@type”: “HowToStep”, “text”: “Apply a final bead of glazing compound at an angle to create a water-shedding surface and allow to cure before painting.” } ] }