The Reality of Glass Failure and the Messy Road to Recovery
As a master glazier with a quarter-century in the field, I have seen every possible failure of the building envelope. Most homeowners look at a window and see a view; I see a complex thermal barrier where the dew point is constantly fighting to migrate through the assembly. When a pane breaks or a seal fails, the immediate reaction is panic regarding the cost and the inevitable shards of glass that will haunt your carpets for years. The traditional approach to window repair involves a hammer, a chisel, and a prayer. However, there is a better way to handle a replace windows project that minimizes debris and ensures the structural integrity of the sash remains intact. Before we get into the technical specifics of the cardboard trick, we need to talk about why these failures happen in the first place and the physics of the glass we are dealing with.
A homeowner called me in a panic because their new windows were sweating. I walked in with my hygrometer and showed them the humidity was 60 percent. It was not the windows; it was their lifestyle. They were boiling pasta and running a humidifier in a sealed house without proper air exchange. When that moist air hits the cold surface of the glass, the temperature drops below the dew point, and liquid water forms. Over time, this moisture sits against the glazing bead and the secondary seal of the Insulated Glass Unit (IGU). If the weep holes in the frame are clogged by debris or poor window cleaner habits, that water has nowhere to go. It sits, it rots wood, it corrodes spacers, and eventually, the seal fails. Once the desiccant in the spacer bar is saturated, you get that permanent fogging. That is when you are no longer looking at a simple cleaning; you are looking at a full pane replacement.
The Anatomy of the Cardboard Trick
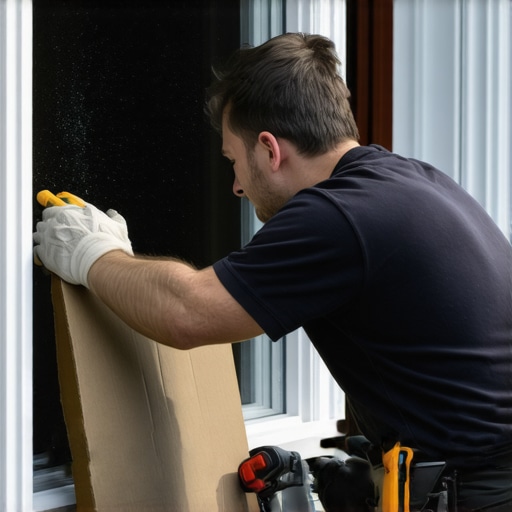
When you are performing a window repair on an operable sash, the goal is to contain the failure. The cardboard trick is a professional secret used to prevent the spread of glass shards and to protect the delicate profile of the muntins and the sash frame. You start by measuring the interior dimensions of the glazing pocket. You cut a piece of heavy-duty corrugated cardboard exactly to those dimensions. By wedging this cardboard against the glass on the side you are working from, you create a tension shield. If the glass is already shattered, you use high-tack tape to secure the glass fragments to the cardboard before you even touch the glazing bead. This turns a thousand dangerous shards into a single, manageable unit that can be lifted out once the stops are removed.
“Installation is just as critical as the window performance itself. A high-performance window installed poorly will fail.” AAMA Installation Masters Guide
The technical beauty of this method lies in the protection of the rough opening and the frame. When you are prying out the glazing bead, the cardboard acts as a sacrificial surface for your pry bar or stiff putty knife. In the North, where we deal with extreme temperature swings, the vinyl or wood of the sash can become brittle. A direct lever action against the frame often results in a hairline fracture that ruins the entire unit. By leveraging against the cardboard, you distribute the load across a wider surface area, preserving the integrity of the frame for the new glass. This is critical because a window is only as good as its seal. If you mar the glazing pocket, you create a path for air infiltration that no amount of caulk can truly fix.
Thermal Dynamics and Why the Glass Matters
In our northern climate, the enemy is heat loss. When we replace windows, we are not just swapping glass; we are upgrading a thermal filter. A standard double-pane IGU works by trapping a gas fill—usually Argon—between two sheets of glass. Argon is denser than air and slows down the convection currents within the space. However, the glass itself must be treated with a Low-E (Low-Emissivity) coating. For cold climates, we want that coating on Surface number 3 (the inward-facing surface of the inner pane). This reflects long-wave infrared radiation—the heat from your furnace—back into the room, while still allowing the sun’s short-wave radiation to provide passive solar gain.
The U-Factor is the metric that governs our world. It measures the rate of heat transfer. A lower U-Factor means the window is a better insulator. When you are performing a window repair, simply putting in a piece of clear float glass is a disservice to the home. You are creating a thermal bridge. The area around that repair will always be colder, increasing the likelihood of localized condensation and mold growth. As a professional, I insist on matching the original NFRC ratings of the unit. This often involves using warm-edge spacers made of structural foam or thermoplastic, which conduct less heat than the old-fashioned aluminum spacers that used to be the industry standard.
The Installation Autopsy: Beyond the Glass
Often, a broken pane is a symptom of a larger structural issue. When I pull a sash for a replace windows job, I perform what I call an installation autopsy. I look at the shims and the flashing tape. If the window was not installed plumb and square in the rough opening, the sash will bind. This binding puts uneven pressure on the glass, leading to stress cracks that look like they happened for no reason. A window should float in its opening, supported by shims but never squeezed. We must adhere to strict standards to ensure longevity.
“The window shall be installed in a manner that allows for the management of water and air. Failure to provide a continuous drainage plane will lead to premature failure of the wall assembly.” ASTM E2112 Standard Practice
If you find that your window cleaner is noticing water pooling in the bottom track, your weep holes are likely blocked. These small outlets are designed to allow water that bypasses the exterior seals to exit the frame. In many cheap vinyl installs, the installer fails to use a proper sill pan, relying instead on a bead of sealant. Over time, as the house settles, that sealant bond breaks. Water then migrates into the subfloor and the jack studs. By the time you see the rot, the damage is in the thousands. This is why the technical precision of the glazing bead and the secondary seal is so vital; they are the first line of defense in a multi-layered water management system.
Precision in the Glazing Pocket
Once you have used the cardboard trick to safely remove the failed glass, the real work begins in the glazing pocket. You must remove every trace of the old glazing tape or silicone. Any residual material will create a high spot, leading to uneven pressure on the new IGU. This is where many DIY repairs fail. They leave a bit of old butyl behind, and the new glass cracks the moment the temperature drops and the frame contracts. I use a specialized solvent to strip the surface down to the raw substrate, whether it is vinyl, fiberglass, or wood. Then, I apply a new primary seal of high-performance silicone or a pre-compressed foam tape. The new glass unit is then carefully set on setting blocks. These small plastic blocks are essential; they keep the glass centered and prevent it from touching the frame, which allows for the different rates of thermal expansion between the glass and the sash material. Only after the glass is perfectly centered do we snap the glazing bead back into place, ensuring a tight, weather-proof seal that will last for another twenty years.