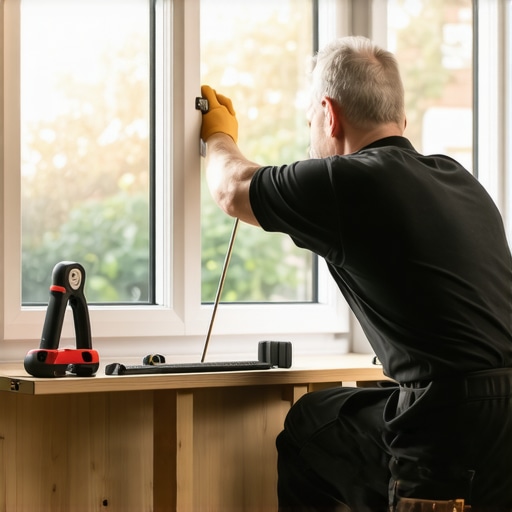
The Anatomy of Gravity: Restoring the Mechanical Soul of Your Windows
A window is not merely a static pane of glass; in the context of a historic home, it is a sophisticated mechanical system of pulleys, counterweights, and friction. When that system fails, usually through the snapping of a sash cord, the window becomes a heavy, dangerous guillotine or a jammed, drafty nuisance. Many homeowners are told they need to replace windows entirely when a cord snaps, but that is a fundamental misunderstanding of fenestration longevity. I once inspected a 1910 Craftsman where the owner thought the rattling inside the walls was a structural defect or a ghost. In reality, a previous ‘caulk-and-walk’ contractor had used cheap nylon clothesline to ‘repair’ the windows. The nylon stretched, the weights hit the bottom of the pocket, and eventually, the line frayed and snapped within six months, leaving the cast-iron weights to clatter against the studs every time the wind blew. This is why we use braided cotton sash cord with a synthetic core: it provides the tensile strength to hold a fifteen-pound lead weight while remaining flexible enough to navigate the pulley radius for fifty years.
“Installation is just as critical as the window performance itself. A high-performance window installed poorly will fail.” – AAMA Installation Masters Guide
The Thermal Logic of the Weighted Sash
In northern climates where heat loss is the primary enemy, the weight pocket of a traditional double-hung window is often criticized as a massive thermal bridge. It is essentially a hollow cavity that allows cold air to circulate right next to your interior casing. However, a well-maintained wood sash combined with a high-quality storm window can achieve a U-Factor that rivals modern double-pane units. The key is managing the Rough Opening. When we perform a window repair of this nature, we aren’t just fixing a rope; we are restoring the seal of the meeting rail and ensuring the operable parts of the window close tightly enough to minimize air infiltration, which is measured in cubic feet per minute per square foot (CFM/sq ft). If your sash does not sit level because the cords are uneven, the weatherstripping cannot engage, and your R-value effectively drops to zero.
Step 1: Surgical Removal of the Stop Bead
The first mistake amateurs make is attacking the window with a hammer. You must use a sharp utility knife to score the paint line where the stop bead (the vertical trim holding the lower sash in place) meets the window jamb. Failure to do this will result in large chunks of wood or paint tearing off the casing. Once scored, use a thin-profile flat bar to gently pry the stop bead away. Start at the center and work toward the ends to avoid snapping the thin wood. This reveals the lower sash, which can now be tilted inward. Do not let it hang by the one remaining cord; support it or disconnect the second cord immediately. This is the time a window cleaner would find easiest to reach the exterior glass, but our focus is mechanical.
Step 2: Accessing the Weight Pocket
Every true weighted window has a ‘pocket door’ or access panel located in the lower half of the side jamb. This is often painted over and nearly invisible. You must locate the single screw, usually a slotted head, and remove the wood panel. Inside, you will find the weights: heavy cylinders of cast iron or lead. If the cord has snapped, the weight will be sitting at the bottom of the Rough Opening. Reach in and extract it. Take note of the weight’s mass; the upper sash and lower sash often require different weights to balance the Sash perfectly. If you mix them up, the window will either drift upward on its own or be impossible to keep open.
Step 3: The ‘Mouse’ and the New Cord
You cannot simply push a cotton cord through a pulley. You need a ‘mouse’—a small piece of lead weight or a few nuts tied to a thin string or fishing line. Drop the mouse over the pulley and watch it travel down the interior of the jamb until it appears at the pocket door. Once you have the string, tie it to your new #8 or #10 braided sash cord and pull it through. This is where the physics of the pulley come into play. A squeaky pulley increases the force required to move the window, putting unnecessary strain on the cord. A drop of 3-in-1 oil on the pulley axle is a professional touch that separates a master glazier from a handyman.
“ASTM E2112 emphasizes that the window must be considered as part of the total wall system, not an isolated component.” – ASTM Standards
Step 4: The Figure-Eight Knot and Balancing
Pull the new cord through until the weight is hanging just a few inches above the bottom of the pocket when the sash is in the fully closed position. If the weight hits the bottom, the cord will go slack and the window won’t stay up. If the cord is too short, the weight will hit the pulley before the window is fully closed. Use a figure-eight knot to secure the cord into the bored hole on the side of the Sash. Ensure the knot sits flush within the Glazing Bead channel so it does not rub against the jamb. This rubbing creates friction that will eventually fray the cord, leading to another failure.
Step 5: Re-Installing the Parting Bead
If you need to fix the upper sash, you must remove the parting bead, the thin strip of wood that separates the two sashes. These are notoriously fragile and often stuck with decades of paint. If it breaks, do not panic; they are easily replaced with standard stock from a lumber yard. Once the upper sash is re-corded, ensure the Muntin bars align perfectly when both sashes are closed. This alignment is critical for the lock to engage, which pulls the two sashes together to create a seasonal air seal. A window that doesn’t lock is a window that leaks air.
The Final Seal: Beyond the Cord
While the pocket is open, check for a Sill Pan or any signs of water intrusion. If you see black staining on the Rough Opening studs, your exterior Flashing Tape or drip cap has failed. No amount of cord replacement will fix a rotting header. Once the sashes are back in place and the stop beads are re-nailed with small finish nails, test the movement. The operable sash should glide with the touch of a finger. This is the ‘Dew Point’ of home maintenance: when you realize that preserving original materials is often superior to the waste of modern replacements. You have now bypassed the high-pressure sales pitch of the window industry and maintained the architectural integrity of your home. Clear the Weep Hole if your storm windows have them, and enjoy a window that functions as it did a century ago.