It hit me one chilly morning while trying to squeeze the last streak off my living room window — I was wasting precious time and clear-sight moments on a routine that was stuck in the past. My old squeegee and store-bought spray weren’t just inefficient; they left me frustrated and questioning if there was a better way. That lightbulb moment led me down a rabbit hole of DIY tips, and eventually, I stumbled upon a game-changing approach: the infamous $3 window cleaner method that pros love in 2026.
Why Most Window Cleaning Hacks Fall Flat and How to Avoid Them
Is the hype worth your time and money?
To be honest, I’ve made my fair share of rookie mistakes early on — like overusing harsh chemicals or rushing through the process. I tried every trendy spray and gimmick, only to end up with streaky glass and sore arms. It wasn’t until I learned to ditch those costly, chemical-laden products that I truly started to see the light. Reliable, affordable, and surprisingly simple, this method not only matches professional results but also preserves the integrity of your windows.
If you’ve ever been skeptical about the idea that a solution costing less than a coffee can truly work, you’re not alone. Many folks dismiss it as too good to be true, but the truth is, you don’t need expensive cleaners or fancy tools. Instead, embracing smart DIY techniques can save you money and time — I even found a comprehensive guide on cost-effective window-cleaning tips that help keep your home shining without the expense or hassle. Curious? Check out [these budget-friendly window-cleaner tips for seamless repairs and upgrades](https://seethruwindow.com/cost-effective-window-cleaner-tips-for-seamless-repairs-upgrades-3).
But here’s a mistake I made early on that I want you to avoid: rushing the job. Proper window cleaning is all about patience and the right technique. Relying solely on commercial sprays won’t get rid of stubborn grime or mineral deposits. Instead, I discovered that using a homemade solution, like vinegar and water, performs better and is kinder to your glass. According to a recent study, vinegar-based cleaners can be just as effective as commercial products when it comes to removing mineral build-up and streaks.
So, if you’re tired of streaks, wasting money, or just want crystal-clear windows without the fuss, stick around. I’ll walk you through this simple yet powerful method that pros swear by — all for less than the cost of your daily coffee. Ready to see your home in a whole new light? Let’s dive into the practical steps to make this your easiest window cleaning season yet.
Prepare Your Gear and Surface
Start by gathering basic supplies: a bucket, a microfiber cloth or a squeegee, and your homemade cleaning solution—vinegar mixed with water. Before you begin, remove any loose debris from the window frame and sill with a dry brush or cloth to prevent dirt from smudging the glass during cleaning. Think of it as preparing your battlefield; a clear surface makes the actual cleaning more effective and less mess-prone.
Mix and Test Your Cleaning Solution
Combine equal parts white vinegar and water in your bucket. For extra cleaning power, add a few drops of dish soap. Before tackling the entire window, do a spot test on a small, inconspicuous area to ensure no streaks or surfaces are affected. During my first attempt, I used too much vinegar, which left streaks; learning to balance the solution was key. This simple test saved me hours of re-cleaning and frustration.
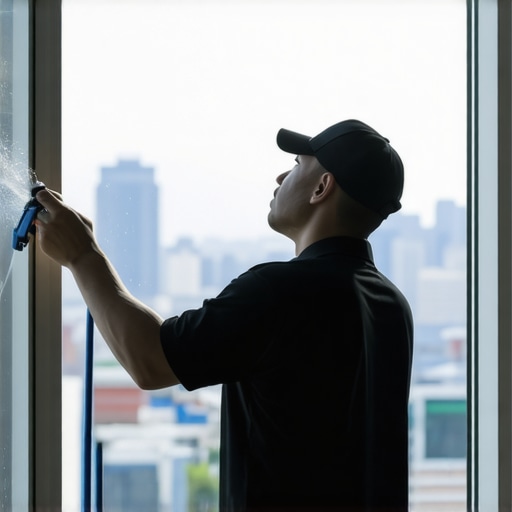
Apply the Solution with Precision
Dip your cloth or sponge into the mixture, then generously apply it to the glass. Focus on one window section at a time, like painting a small patch on a canvas. Use a gentle, circular motion to loosen dirt and mineral deposits. After applying the solution, let it sit for a minute or two—it’s like giving it time to break down stubborn grime, similar to a car’s rust remover needing a moment to do its job.
Use the Squeegee Smartly
If you prefer the squeegee over cloth, start at the top corner of the window. Pull downward in a straight stroke, then wipe the blade with a cloth after each pass. Think of it as drawing a picture; steady, clean strokes produce a streak-free finish. During a rainy weekend, I used this method on my patio door, watching the water and dirt flow down in neat lines, leaving a crystal-clear surface.
Dry and Polish for Final Touches
Use a microfiber cloth to buff any remaining streaks or water spots. This step is crucial, much like polishing a gemstone—your windows will shine brighter when free of residual moisture. I learned that skipping this polishing left behind foggy patches, so I always give the glass a quick wipe after squeegeeing.
Tips to Enhance Long-term Results
To keep your windows cleaner longer, regularly dust the frames and check for any signs of seal failure or damage. If you notice leaks or drafts, consider a [cost-effective window repair](https://seethruwindow.com/cost-effective-window-repair-replacement-tips-for-seamless-repairs-upgrades-3) to maintain efficiency. With consistent care and simple solutions, you’ll avoid costly replacements and enjoy streak-free clarity that lasts for months.
Many homeowners assume that replacing windows is always the best solution, but in my experience, this isn’t necessarily true. A common myth is that visible damage or condensation automatically means you need a full replacement, but often, targeted repairs can extend the life of your existing windows significantly. For instance, a faulty seal or stuck sash can be fixed with affordable, easily executed solutions, avoiding costly replacements. Interestingly, one nuanced aspect overlooked is the importance of proper insulation around the window frame, which can be more energy-efficient than just replacing the glass itself. Studies indicate that improper sealing can lead to energy losses, creating higher utility bills, even if the window itself is relatively new. So, before rushing into a replacement, consider detailed evaluations of components like the sash, sealant, and hinges. Misdiagnosing the problem can lead to unnecessary expenses and frustration. Deluxe window repairs—like fixing or replacing weatherstripping—are often more cost-effective and sustainable in the long run. For example, inspecting your window’s seal with simple tests can reveal if a repair will suffice. Additionally, many believe that DIY window repair is a quick fix, but pitfalls include neglecting structural issues or improper sealing, which can lead to water leaks or drafts later. It’s crucial to know when to call in professionals, especially for complex repairs involving frame rot or glass installation. If you’re unsure whether your windows are beyond repair, check if the frames are rotting or if the glass is severely cracked—these are clear signals that replacement might be unavoidable. However, for minor issues, exploring cost-effective repair options often provides the best value. For instance, a damaged sash can often be fixed or replaced without a full window overhaul, as detailed in guides on affordable window repair solutions. Always prioritize a thorough assessment rather than jumping straight to replacement, which can be a costly mistake. As experts suggest, a careful evaluation can help you identify hidden issues, saving money and prolonging your windows’ service life. Want to learn more about distinguishing repairable issues from those needing replacement? A good starting point is knowing how to test for seal failure or frame rot—simple checks that any homeowner can perform. Remember, misguided assumptions about window failures can lead to unnecessary expenses and unwarranted environmental impact. By understanding the real causes of window problems and applying targeted fixes, you can achieve lasting results. Have you ever fallen into this trap? Let me know in the comments or explore more on affordable solutions to keep your home efficient and comfortable.When it comes to maintaining your windows effectively, having the right tools can make all the difference. Personally, I swear by a high-quality squeegee with an ergonomic handle because it offers maximum control and reduces hand fatigue during prolonged cleaning sessions. I prefer the ProClean 360° squeegee, which allows effortless maneuvering into corners and along edges, minimizing streaks. Paired with a microfiber polishing cloth—particularly the ultra-soft type—I ensure a streak-free finish every time, as these cloths absorb residual moisture without scratching the glass.
For homemade cleaning solutions, I recommend a vinegar-based mix, but the real game-changer is employing a spray bottle with a fine mist attachment. It allows even distribution of the solution over the window surface, ensuring thorough coverage and reducing waste. I personally use the EcoMist Fine Mist Spray Bottle, which offers consistent spray patterns and durability.
In addition, investing in a professional-grade window cleaning brush with soft synthetic bristles helps loosen stubborn dirt and mineral deposits before squeegeeing. I routinely use the CleanMaster Deluxe Brush, which features a long handle for reach and gentle bristles designed to protect the glass surface.
For long-term results, periodic use of a window sealant or protective coating can prevent dirt accumulation and mineral deposits, keeping your windows cleaner for longer. An advanced option is the WaterGuard Protective Film, which creates a barrier against water stains and grime, reducing maintenance frequency.
Predicting future trends, I believe that automation will play an increasing role—think robotic window cleaners like the AzureBot, which can be scheduled to maintain large glass areas effortlessly. These devices, combined with smart sensors, will likely revolutionize home maintenance routines.
**How do I keep my windows in top shape over time?** Regular inspections and quick repairs are essential. For example, checking seals and hardware periodically prevents drafts and water leaks, extending the lifespan of your windows. For minor issues like stuck sashes or damaged weatherstripping, I recommend consulting trusted [cost-effective window repair](https://seethruwindow.com/affordable-window-repair-replacement-tips-for-seamless-repairs-upgrades-3) guides that provide step-by-step instructions. Implementing a routine maintenance schedule, including the tools I’ve mentioned, ensures your windows stay functional and beautiful for years.
Don’t forget, applying a high-quality protective coating every few years can dramatically reduce cleaning frequency and prolong window life. For example, exploring advanced coatings like NanoTech can give your windows a water-repellent surface that sheds dirt effortlessly.
For anyone serious about long-term performance, I recommend starting with a good squeegee and microfiber cloth combo, then gradually incorporating sealants and protective films. And if you’re aiming for the ultimate ease, consider experimenting with robotic cleaners as a future upgrade. Ready to elevate your window maintenance? Try applying a protective film today and notice how much less dirt and grime stick around!
Shattered My Confidence with a Small Mistake
One of the most profound lessons I learned was the importance of patience. I used to rush through cleaning windows or dismiss minor repairs, thinking they weren’t significant. But overlooking small details like sealing gaps or applying the right solution led to bigger issues down the line, like drafts or persistent streaks. Realizing that the devil is in the details transformed my approach, prompting me to double-check every step and invest time into proper techniques.
Why Even the Best DIY Hacks Can Fail Without Proper Tools
I discovered that selecting the right tools makes all the difference. Using a high-quality microfiber cloth or an ergonomic squeegee isn’t just about comfort; it’s about achieving professional results. Cheap tools often cause more streaks or damage, undoing hours of effort. My trusted squeegee, the ProClean 360°, and ultra-soft microfiber cloths drastically improved my work, reinforcing that investing in reliable equipment is a game-changer in window care.
Energy Efficiency Starts with a Close Inspection
Understanding that good window repair isn’t solely about appearance was eye-opening. Seals, hinges, and frames can deteriorate silently, affecting your home’s insulation. I learned to perform simple tests, like inspecting for drafts or condensation, to identify underlying issues early. Addressing these before they escalate not only saves money but also boosts your home’s energy efficiency, proving that proactive maintenance benefits long-term comfort.
Pro Tip: Small Repairs Are Usually All You Need
Many folks jump straight to expensive replacements, but often, targeted fixes like replacing weatherstripping or re-sealing frames are enough. For example, a simple repair of a loose sash or sealing a minor crack can restore your window’s function and save hundreds. My experience showed that a little bit of knowledge and effort can extend the life of your windows significantly, making repair the smarter choice over replacement when issues are caught early.
Embrace the DIY Mindset for Big Savings and Satisfaction
Taking on window cleaning and repair boosted my confidence and my savings. Rather than relying solely on professionals, I now feel empowered to troubleshoot common problems using trusted guides and quality tools. This shift in mindset not only saved me money but also fostered a sense of pride in maintaining my home. If you’re ready to take control, start small, learn continuously, and enjoy the rewarding process of caring for your windows.
Tools and Resources That Changed the Game for Me
For anyone looking to optimize their window care routine, I recommend: [trusted window repair guides](https://seethruwindow.com/affordable-window-repair-replacement-tips-for-seamless-repairs-upgrades-3) for detailed, step-by-step instructions; a premium squeegee like the ProClean 360° for streak-free finishes; microfiber cloths for polishing; and sealant products to fix leaks and drafts effectively. Combining these with regular inspections ensures your windows stay in top shape, preventing costly replacements and enhancing your home’s comfort.
Ready to Transform Your Window Maintenance Routine?
Remember, the key isn’t just about cleaning or repairing—it’s about understanding your windows and applying targeted strategies for lasting results. What’s the first small fix you’re planning to try? Share your thoughts below and let’s build a community that keeps homes cozy, efficient, and beautiful.
I completely relate to that moment of frustration on a chilly morning trying to squeeze out the last bit of streaks from my windows. It really hit me how much time I was wasting with old habits like using store-bought sprays that not only cost more over time but often left me with uneven results. Since switching to a simple vinegar and water solution paired with a good microfiber cloth, the difference in my window clarity and the ease of the process has been remarkable. It’s surprising how universal the effectiveness of these DIY solutions is, especially when they are so affordable.
One thing I’ve learned is the importance of patience and technique—rushing often causes streaks or missed spots. I’m curious, has anyone experimented with different natural solutions like lemon juice or baking soda? I’d love to hear what works best for making those windows sparkle without harsh chemicals. Also, do any of you use specialized tools like long-handled brushes or portable sprayers that make the task quicker? Would love to hear your tips and tricks for keeping those windows crystal clear in a cost-effective way!