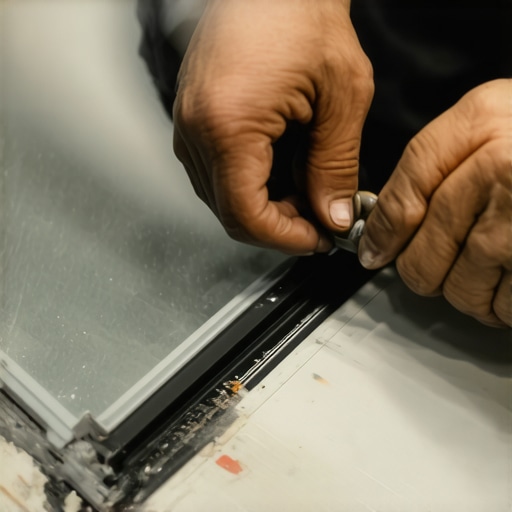
The Silent Failure of the Storefront System
In my 25 years in the glazing trade, I have seen far too many property managers ignore the most critical component of their building envelope: the glazing gasket. Most people see a storefront window and think of it as a permanent fixture, but the reality is that the EPDM or silicone seals holding that heavy 1/4-inch or 1-inch insulated glass unit (IGU) in place are subject to extreme thermal cycling and UV degradation. When these gaskets shrink or dry rot, the window repair is no longer just cosmetic. It becomes a matter of structural and thermal integrity. I once walked onto a job site where the property owner complained of a draft so severe it was whistling. I pulled a hygrometer from my kit and showed them that the relative humidity inside the glass pocket was matching the exterior dew point. The gaskets had shrunk so much at the corners that the thermal break was completely bypassed. It was not a window cleaner issue; it was a total seal failure.
“Installation is just as critical as the window performance itself. A high-performance window installed poorly will fail.” – AAMA Installation Masters Guide
The Physics of the Glazing Pocket
To understand why you need to replace windows gaskets rather than just slapping caulk over the gaps, you must understand the glazing pocket. In a standard aluminum storefront system, the glass sits on setting blocks within an aluminum channel. The gaskets provide the compression necessary to keep the glass from rattling and to prevent water from bypassing the glazing bead. In hot southern climates, like Texas or Florida, the solar heat gain coefficient (SHGC) is the primary enemy. When the sun beats down on that aluminum frame, the metal expands at a different rate than the glass. This movement, repeated over a decade, stretches and eventually shears the gasket material. If your Low-E coating is on Surface #2, as it should be in these climates to reflect heat outward, the heat build-up within the frame itself can reach temperatures that literally bake the elasticity out of inferior seals.
Identifying the Gasket Profile
Before you start the window repair, you must identify the specific profile of the gasket. Storefront systems are not universal. You might be dealing with a ‘wedge’ gasket that is driven into a gap after the glass is set, or a ‘bulb’ gasket that is part of the glazing bead itself. Use a small pry bar or a stiff putty knife to pull a two-inch sample of the existing material. You need to measure the ‘reach’ and the ‘thickness’ of the gasket when it is not compressed. If you order a gasket that is even 1/32 of an inch too thin, you will not achieve the necessary ‘rattle-free’ compression. If it is too thick, you risk breaking the glazing bead or, worse, putting excessive edge pressure on the glass which can lead to spontaneous breakage through thermal stress.
The Anatomy of the Replacement Process
The first step in a professional gasket replacement is the removal of the glazing bead. This is the removable strip of aluminum that holds the glass in place. Once the bead is removed, you will likely see years of accumulated dirt and debris. A professional window cleaner would tell you that this is the most neglected part of the building. You must clean the aluminum channel thoroughly. Any grit left behind will prevent the new gasket from seating properly against the glass surface. Check the weep hole at the bottom of the frame. If the gaskets have been leaking, these holes are often clogged with silt or old sealant. If water cannot exit the sill pan, it will back up into the rough opening and begin rotting the subfloor or the wall assembly.
“Water penetration resistance is dependent upon the integrity of the sealant and gasket interface at the glazing pocket.” – ASTM E2112 Standard Practice
Advanced Installation Techniques: The ‘Crowding’ Method
When you are ready to install the new EPDM gasket, do not just cut it to the length of the opening. EPDM has a memory and a tendency to shrink over time. I always use the ‘crowding’ technique. This involves cutting the gasket roughly 1 percent longer than the actual length of the track. You start by seating the gasket at the corners and then working the excess material into the center of the run. This creates a constant lateral pressure that prevents the corners from pulling back and creating gaps as the material ages. If you are working on an operable transom or a storefront door, this is even more critical because the vibration of the unit opening and closing will accelerate gasket migration.
The Thermal Break and Energy Efficiency
Many owners think they need to replace windows entirely when they feel a draft. In reality, the aluminum frame is often still perfectly viable. The issue is usually that the thermal break, the plastic or resin separator between the interior and exterior aluminum, has been compromised by water or that the gaskets are no longer providing an airtight seal. By replacing the gaskets and ensuring the setting blocks are properly positioned to maintain the glass’s centered position in the frame, you can restore much of the original thermal performance. In southern climates, ensuring that the glass is properly seated allows the Low-E coatings to work as designed, preventing the frame from becoming a radiator that pumps heat into the building.
The Role of the Glazing Bead and Shim
During the re-installation of the glazing bead, ensure that each piece ‘snaps’ firmly into place. If it feels loose, the internal leg of the bead may be bent, and it won’t provide the compression needed for the gasket. In some cases, you may need to add a small plastic shim behind the gasket to take up slack in an aging system where the metal has slightly bowed. This is the difference between a ‘caulk-and-walk’ amateur and a master glazier. We don’t rely on silicone to hide our mistakes; we use the mechanical properties of the storefront system to manage the environment. Proper window repair is an exercise in precision. When the job is done, the glass should be immobile, the gaskets should have clean, tight mitered corners, and the weep system should be free-flowing. This ensures the longevity of the IGU and the comfort of the occupants for another twenty years.