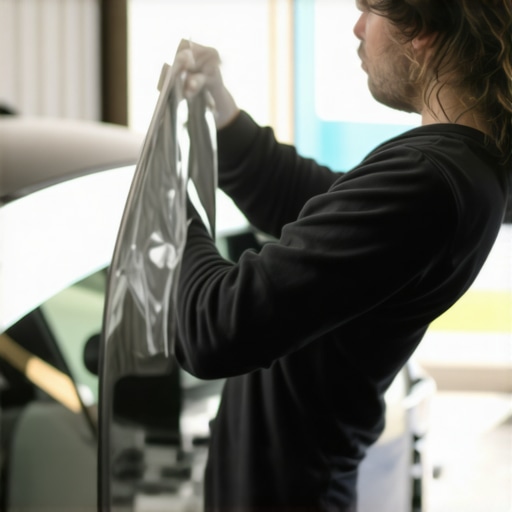
In my twenty-five years of working as a professional glazier, I have seen thousands of homeowners attempt to solve their thermal comfort issues with aftermarket window films. They see the bubbling, purple sheets at the local hardware store and think it is a simple fix for a room that feels like an oven in July. What they do not realize is that they are applying a complex polyester laminate with a high-tack pressure-sensitive adhesive (PSA) to a surface that is never meant to be a permanent bond site. Eventually, that film fails. It delaminates, it bubbles due to outgassing, and it becomes an eyesore that obscures the view through the sash. Removing it is not just a matter of peeling; it is a technical operation that requires an understanding of glass chemistry and adhesive properties. If you do it wrong, you end up with a microscopic mess of glue that attracts every piece of dust in the house, eventually requiring a professional window cleaner or even a full glass replacement if the surface becomes etched.
The Condensation Crisis: A Master Glazier Narrative
A homeowner called me in a panic because their new windows were ‘sweating’ and the aftermarket film they had applied was starting to flake off in sticky chunks. I walked into the residence with my hygrometer and a thermal imaging camera. I had to show them that the humidity in the room was over 60 percent and that by applying a dark, heat-absorbing film to the interior of a double-pane insulated glass unit (IGU), they were actually shifting the dew point. The film was trapping heat in the glass, causing the seals to expand and contract at rates they were never designed to handle. It was not a window defect; it was a physics problem caused by improper aftermarket modification. They were lucky they hadn’t shattered the glass from thermal shock. We had to remove every square inch of that film and the underlying adhesive to restore the optical clarity of the glazing and prevent further damage to the window repair needs of the home.
“Installation is just as critical as the window performance itself. A high-performance window installed poorly will fail.” AAMA Installation Masters Guide
The Science of Solar Heat Gain and Window Film
To understand why you are removing this film, you must understand why it was there. In hot southern climates, the primary enemy of the glazier is the Solar Heat Gain Coefficient (SHGC). This number represents the fraction of solar radiation admitted through a window. Standard clear glass has a high SHGC, allowing the sun to bake the interior. Professional windows use Low-E coatings on Surface #2 (the inner face of the outer pane) to reflect this heat before it ever enters the building envelope. Aftermarket films try to replicate this on Surface #4 (the interior face), but they often do so by absorbing the heat instead of reflecting it. This creates immense stress on the glazing bead and the spacer system. When the film degrades, the adhesive undergoes a process called cross-linking, where the chemical bonds become stronger over time due to UV exposure. This is why that sticky residue is so difficult to remove without the right technical approach.
The Professional Removal Protocol: Step-By-Step
The biggest mistake people make is reaching for a heat gun. While heat softens adhesive, excessive concentrated heat on a localized area of the glass can cause a stress crack, leading to an expensive need to replace windows. Instead, we use the steam method. Steam provides a consistent, controlled temperature that stays below the threshold of glass failure while hydrating the adhesive. Start at a top corner of the sash and slowly direct the steam between the film and the glass. As the bond weakens, pull the film at a forty-five-degree angle. This reduces the amount of adhesive left behind on the surface.
The Battle Against the Sticky Residue
Even with the best steam technique, you will likely find a layer of tacky glue. This is where the chemistry of a window cleaner must be specialized. You are looking for a solvent that can break the polymer chains of the PSA without damaging the sash material or the weep hole covers. Isopropyl alcohol at 90 percent concentration is often effective for light residue, but for heavy, sun-baked glue, you may need a citrus-based solvent or a specialized adhesive remover. Apply the solvent to a microfiber cloth and let it dwell on the glass for several minutes. Do not let it run down into the glazing bead, as it can degrade the vinyl or rubber gaskets that hold the glass in place.
“The selection of cleaning agents must be compatible with the glazing materials and the surrounding window frame to prevent long-term structural degradation.” ASTM E2112 Standard Practice
The Mechanical Edge: Using the Right Tools
Once the adhesive is softened, you must use a scraper. But not just any scraper. You need a five-inch stainless steel broad-blade scraper. Never use carbon steel blades, as they rust and can leave microscopic metal deposits that lead to scratches. Ensure the blade is brand new. A dull blade is a dangerous blade. Keep the glass lubricated with a mixture of water and a surfactant (like a mild dish soap) to allow the blade to glide. Keep the angle of the blade below thirty degrees at all times. If you feel any resistance or hear a ‘gritty’ sound, stop immediately. You might be hitting a piece of debris that could gouge the glass, turning a simple cleaning job into a major window repair project.
Maintenance Beyond the Glass
While you are focused on the film, this is the time to inspect the entire rough opening and frame assembly. Check the sill pan for any signs of water intrusion. Ensure that the shims are still supporting the frame squarely and that the flashing tape hasn’t delaminated from the exterior. If you notice that the operable parts of the window are sticking, it may be time to lubricate the tracks with a dry silicone spray. A window is a system, and the glass is just one component. If the film was applied to hide a deeper problem like seal failure (evidenced by permanent fogging between the panes), no amount of cleaning will fix it. In that case, you must prepare to replace windows entirely to maintain the thermal integrity of your home.
Thermal Logic: Why You Shouldn’t Re-apply Film
In a southern climate, your focus must be on SHGC. Instead of applying another layer of polyester film that will eventually fail, consider upgrading to a glass package with a permanent Low-E coating. Modern coatings on Surface #2 are designed to block infrared and ultraviolet light while maintaining high visible transmittance. This means you get the view without the heat. Unlike film, these coatings are metallic layers sputtered onto the glass in a vacuum chamber, meaning they will never bubble, peel, or leave a sticky residue. They are a permanent part of the glazing system. When you calculate the ROI, factor in the cost of professional window cleaner services, the time spent on removal, and the risk of glass breakage. Investing in high-quality glazing is always more cost-effective than temporary film solutions.
Final Inspection and Polish
After the adhesive is completely gone, perform a final wash. Use a professional-grade squeegee and a soap solution with high lubricity. Inspect the glass from different angles under natural light to ensure no ghosting of the adhesive remains. If the glass appears clear, you have successfully avoided the need for a costly window repair. Remember, the goal of a window is to provide a clear, unobstructed transition between the interior and exterior environments. By removing old film and maintaining the glass properly, you are preserving the architectural intent of the building and ensuring the longevity of the window assembly.
{“@context”:”https://schema.org”,”@type”:”HowTo”,”name”:”How to Remove Tinted Window Film”,”step”:[{“@type”:”HowToStep”,”text”:”Use a handheld steamer to heat the corner of the film until the adhesive softens.”},{“@type”:”HowToStep”,”text”:”Slowly peel the film away from the glass at a 45-degree angle while continuing to apply steam.”},{“@type”:”HowToStep”,”text”:”Apply an adhesive solvent to the remaining glue residue and let it dwell for 3-5 minutes.”},{“@type”:”HowToStep”,”text”:”Use a stainless steel scraper blade at a low angle to gently lift the softened glue from the glass surface.”},{“@type”:”HowToStep”,”text”:”Clean the window with a professional squeegee and soap solution to remove all chemical traces.”}]}