The Condensation Crisis and the Privacy Dilemma
A homeowner called me in a panic because their new windows were ‘sweating.’ I walked in with my hygrometer and showed them the humidity was 60%. It wasn’t the windows; it was their lifestyle. They were taking twenty-minute steam showers without running the ventilation fan, and then they were complaining that the moisture was ‘ruining the glass.’ This is a classic case where the intersection of physics and daily habits causes a perceived failure in window performance. In many of these cases, the homeowner also wants privacy but doesn’t want to replace windows that are otherwise structurally sound. They turn to DIY privacy film. As a glazier with over 25 years in the field, I have seen these films applied so poorly that they actually contribute to thermal stress cracks. Applying film to a bathroom window isn’t just about aesthetics; it’s about managing the surface tension of the glass and understanding the thermal dynamics of your glazing unit.
Understanding the Surface: Why Window Cleaner Choice Matters
Before you even touch a roll of frosted or tinted film, you must understand the substrate. Glass is not as smooth as it looks under a microscope. It has peaks and valleys that trap microscopic debris. Most people grab a generic window cleaner from the grocery store, spray it on, and wipe it with a paper towel. This is a recipe for disaster. Professional window cleaner solutions used by glaziers are often deionized water mixed with a specific slip agent that does not leave a silicone or wax residue. If you leave behind any surfactants, the adhesive on the privacy film will fail to bond, leading to those unsightly silver bubbles that appear weeks after installation. When we talk about a window repair, we often start by stripping the glass with a stainless steel razor blade to remove ‘tin side’ contaminants or mineral deposits. This ensures the film sits on the actual silica, not a layer of bathroom hairspray and hard water minerals.
“Installation is just as critical as the window performance itself. A high-performance window installed poorly will fail.” — AAMA Installation Masters Guide
The Physics of the Bubble: Surface Tension and Plowing
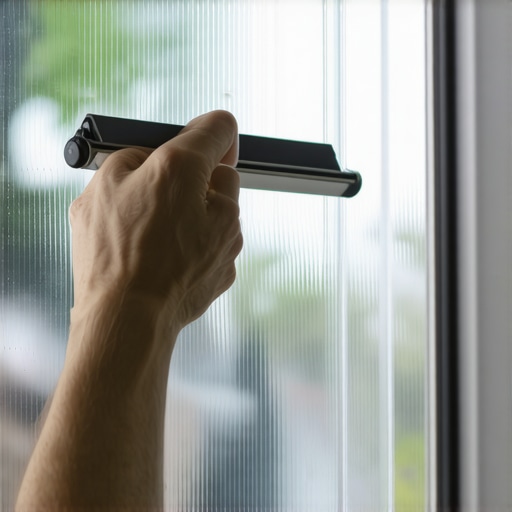
The primary reason DIY projects fail is a lack of ‘plowing’ force. When you apply film, you are using a mounting solution to allow the film to float so you can align it with the glazing bead. Bubbles are either trapped air or trapped mounting solution. If it is air, you didn’t use enough solution. If it is water, you didn’t use enough pressure with your squeegee. A glazier uses a squeegee with a specific Shore A hardness rating to ensure that the water is evacuated from the center toward the edges. In a bathroom, where the rough opening might be slightly out of square, you have to be incredibly precise with your relief cuts. If the film overlaps the glazing bead or the sash frame even by a millimeter, it will lift. This creates a capillary path for bathroom moisture to enter, leading to total delamination within months.
Thermal Stress and the Glass Class
We need to talk about the ‘Glass Class’ of your bathroom. Is it a single pane or an Insulated Glass Unit (IGU)? If you have a double-pane window, applying a dark privacy film can be dangerous. The film absorbs solar radiation, increasing the temperature of the glass. In a cold climate like Chicago or Minneapolis, the center of the glass gets hot while the edges, tucked into the shim space and the cold rough opening, stay freezing. This temperature differential creates thermal stress. If the stress exceeds the edge strength of the glass, it will crack. This is why we look at the Solar Heat Gain Coefficient (SHGC). In a bathroom, you are already dealing with high internal temperatures. Adding a film that reflects heat back into the room can shift the dew point toward the interior of the wall cavity if your flashing tape and sill pan are not properly integrated to handle moisture migration.
The Anatomy of an Installation: Tools and Technique
To achieve a professional finish, you must treat the window like a surgical site. First, check the integrity of the sash. If there is rot in the corners, the film won’t save you; you need a window repair or a full frame replacement. Once the glass is verified as structurally sound, you must clean the frame as well as the glass. Dust from the top of the muntins or the head of the window will fall onto the wet glass the second you spray your mounting solution. This is the ‘Glazing Zooming’ perspective: every detail matters. Use a 5-way tool to tuck the film edges. Ensure the weep holes in the window frame are clear so that any water used during the installation can escape the sill pan. If you trap water behind the glazing bead, you are inviting mold to grow in the very place you are trying to keep clean.
“The selection of a glazing system must consider the environmental loads, the type of framing, and the specific performance requirements of the building envelope.” — ASTM E2112 Standard Practice
When to Stop Cleaning and Start Replacing
Sometimes, a privacy film is a bandage on a bullet wound. If your windows are drafty, the film won’t stop the air infiltration. You might be better off looking to replace windows with factory-obscured ‘acid-etched’ glass. This glass provides permanent privacy without the risk of bubbling or peeling. However, if your budget dictates a film application, you must follow the ‘Shingle Principle.’ Work from the top down. Ensure your cuts are 1/16th of an inch short of the frame to allow for thermal expansion. Glass expands and contracts with the seasons. If the film is tight against the frame, the expansion will cause it to bunch up and create bubbles. By leaving that tiny gap, you allow the glass to breathe while maintaining a seamless look from a distance. This is the difference between a ‘caulk-and-walk’ amateur and a master glazier. Precision in the micro-measurements leads to longevity in the macro-environment of your home.