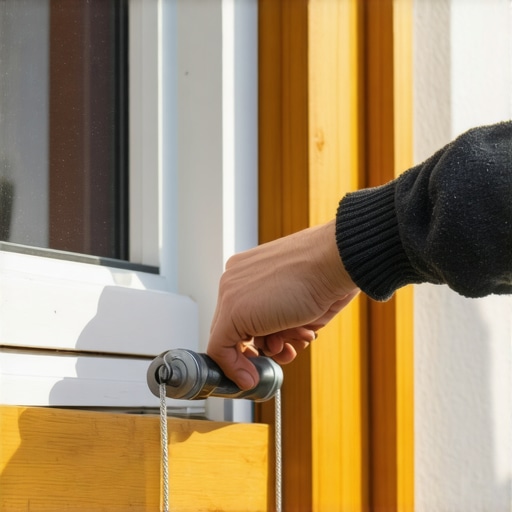
Understanding the Physics of the Counterweight System
In the world of professional glazing, a sash window is not just a piece of wood and glass; it is a mechanical assembly governed by the laws of gravity and friction. When a sash window becomes stuck, the average homeowner reaches for a can of window cleaner, hoping a little lubrication will solve the problem. As someone who has spent over two decades in the trenches of window repair, I can tell you that the issue is rarely about surface tension. It is almost always a failure of the internal balance system, specifically the weights housed within the window frame. These cast-iron or lead cylinders are the heartbeat of a traditional double-hung window, and when they stop moving, the entire unit becomes a glorified wall.
I remember pulling a wood sash out of a 1910 Victorian in Boston where the lower sash refused to budge. The homeowner thought the paint was just stuck. I got in there, removed the stop beads, and found that a previous ‘handyman’ had used a nailing fin from a modern vinyl unit to try and ‘stabilize’ a rot-compromised sill. The header was black with rot because he had bypassed proper flashing tape, and the resulting moisture had caused the sash weights to oxidize and swell, wedging them firmly against the interior of the weight pocket. That is the reality of ‘caulk-and-walk’ installations; they ignore the fundamental biology of the building envelope.
“Installation is just as critical as the window performance itself. A high-performance window installed poorly will fail.” – AAMA Installation Masters Guide
Before we touch the weights, we must understand the Rough Opening and how the sash sits within it. A sash window operates on a pulley and cord system. The weight of the glass and wood (the sash) must be perfectly offset by the weight in the pocket. If your window is stuck, we need to determine if the friction is external (paint or swollen wood) or internal (the weight system). This requires a technical autopsy of the frame. In northern climates where we deal with significant U-Factor concerns, these weight pockets are often a major source of air infiltration. A stuck weight often means the cord has jumped the pulley or the weight itself has caught on a piece of loose insulation or debris within the cavity.
The Anatomy of the Weight Pocket
To access the weights, you must first remove the stop beads. These are the vertical strips of wood that keep the sash in its track. Be precise here; use a sharp utility knife to score the paint line so you do not splinter the historic wood. Once the stops are out, you can swing the sash inward. This reveals the sash cord. If the cord is slack, the weight is sitting at the bottom of the pocket. If the cord is taut but the window won’t move, the weight is jammed.
Most historic windows have an access panel, also known as a ‘pocket cover,’ located near the bottom of the side jamb. This is held in by a single screw or sometimes just the pressure of the surrounding wood. Removing this cover allows you to see the ‘Muntin’ bars of the frame’s internal structure and the weights themselves. If you find lead weights, handle them with care. If they are cast iron, check for significant rust. Rust expands, and in a tight pocket, even a few millimeters of oxidation can cause a weight to seize against the studs.
Correcting a Jumped Pulley or Tangled Cord
The pulley at the top of the jamb is a simple machine, but it requires a clean groove to function. Over decades, dust, old paint, and even excessive window cleaner residue can gum up the axle. If the pulley doesn’t spin freely, the sash weight becomes a dead load, putting immense strain on the cord. Inspect the pulley for ‘flat spots.’ If the pulley has been seized for years while the cord dragged over it, the metal may be worn down, requiring a full replacement of the hardware. To fix a stuck weight caused by a cord jam, you must often ‘fish’ the weight back up. Tie a piece of mason’s twine to a small nut, drop it over the pulley, and use it to pull the new sash cord through. We prefer high-quality braided cotton cord with a synthetic core to prevent stretching, as stretching changes the effective ‘throw’ of the weight.
Thermal Dynamics and the Weight Pocket Dilemma
When you are inside that weight pocket, you are looking at one of the biggest thermal bridges in a historic home. In cold climates, these pockets are essentially chimneys for heat loss. While your goal is to fix a stuck weight, a professional glazier looks at the ‘Dew Point.’ If warm, moist indoor air enters that cold weight pocket, it will condense on the cast iron weights and the back of the wood casing. This is how rot starts from the inside out. When you finish your repair, consider how to mitigate this air flow without obstructing the movement of the weights. Thin, rigid foam baffles can sometimes be retrofitted, but you must ensure the weight has a clear, vertical path of travel. Do not use spray foam; it will expand, grab the weight, and ensure the window never moves again.
“A window is a complex system designed to manage thermal transfer. The interaction between the glazing bead, the sash, and the frame determines the overall U-factor of the opening.” – NFRC Performance Standards
If the wood of the sash has swollen due to humidity, the weights might be fine, but the ‘Rough Opening’ tolerances have disappeared. In this case, you are not adjusting weights; you are ‘shaving’ the sash. This is a delicate operation. You want to maintain the integrity of the glazing bead while removing just enough material to allow for a 1/16th-inch gap. After planning the wood, it must be sealed immediately. Raw wood is a sponge for atmospheric moisture, and if you don’t seal it, the window will be stuck again by the next rainy season.
When Repair Becomes Replacement
There is a point where window repair is no longer economically or structurally viable. If the pulleys are shattered, the pockets are filled with rotted structural headers, and the wood sashes are ‘punky’ (soft to the touch), it is time to replace windows. But don’t just buy whatever is on sale at the big-box store. A replacement should be a technical upgrade. If you are in a cold climate, you want a unit where the Low-E coating is on Surface #3 to keep radiant heat inside. If you are replacing a historic sash, look for fiberglass replacements that mimic the thin profiles of wood but offer the thermal stability that vinyl lacks. Vinyl expands and contracts at a rate much higher than wood or glass, which often leads to seal failure in the Insulated Glass Units (IGUs).
The Role of the Sill Pan and Flashing
If you do decide to replace windows rather than continue struggling with a stuck weight, the installation is where the battle is won or lost. I have seen million-dollar homes destroyed by a missing Sill Pan. The sill pan is a flashing element that sits under the window and directs any water that bypasses the primary seals back to the exterior. Even the best operable sash will eventually leak a few drops of water in a wind-driven rain event. A professional installation assumes the window will leak and provides a managed path for that water to exit via Weep Holes or the sill slope. This is the ‘Shingle Principle’ of water management: always lap the upper material over the lower material.
Technical Maintenance for Long-Term Operation
Once you have adjusted the weights and the sash moves with a single finger’s pressure, maintenance is key. Stop using heavy oils on the pulleys; they attract grit which acts like sandpaper. A dry Teflon or silicone spray is superior. Keep the tracks clean. A vacuum is a better tool for a window than a rag and window cleaner, as it removes the abrasive particulates that wear down the wood’s finish. Check the sash cords every three years for fraying. If a cord snaps, the weight falls to the bottom of the pocket with enough force to crack the interior plaster or dent the wood. Proactive replacement of cords is a hallmark of a well-maintained home.
How to Adjust a Sash Window Weight That Is Stuck
Adjusting and Unsticking a Traditional Sash Weight
Remove Stop Beads
Carefully score the paint with a utility knife and pry the vertical stop beads away from the frame to release the sash.
Access the Weight Pocket
Locate the access panel on the lower side jamb. Remove the screw and take off the cover to reveal the sash weights.
Inspect the Cord and Pulley
Check if the cord is snapped or jumped from the pulley. Clean the pulley axle of debris and ensure it rotates freely.
Re-balance and Clear Obstructions
Clear any debris, old insulation, or rust from the pocket. If the weight is too light for the sash, add ‘slugs’ or replace with a heavier lead weight to ensure perfect counter-balance.
Reassemble and Seal
Replace the pocket cover and re-install the stop beads. Ensure the sash moves smoothly before final painting.