The Friction of History: Why Your Sash Windows Are Seized
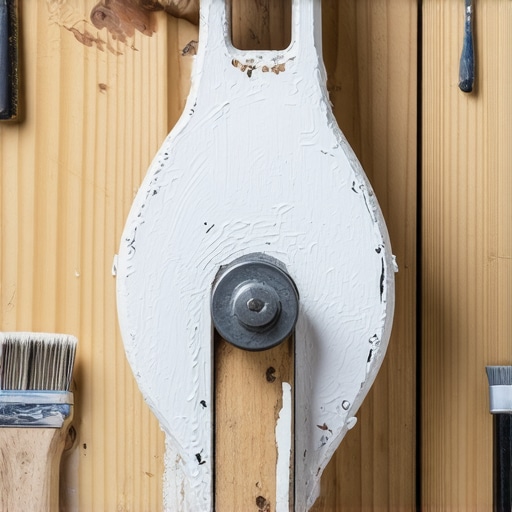
There is a specific kind of silence that exists in a house built in 1910, and it is usually because the windows have been painted shut for forty years. When a homeowner asks me about a window repair, they often assume the weights are broken or the wood is rotten. Most of the time, the culprit is simply layers of cheap latex and lead-based paint clogging the throat of the pulley. I recently sat across from a high-pressure salesman who was trying to convince a family in a drafty Victorian that their original windows were junk. He wanted to sell them vinyl inserts with a twenty-year lifespan. I had to explain to the homeowner that their old-growth pine sashes, once restored, would outlive that salesman. The first step in that restoration is reclaiming the hardware. A pulley is a simple machine, but when it is choked with paint, it becomes a friction-filled nightmare that destroys window cords and makes an operable sash impossible to move.
“Installation and maintenance of the fenestration system are just as critical as the initial glass performance. A high-performance window installed poorly or maintained improperly will fail to meet its thermal expectations.” – AAMA Installation Masters Guide
The Mechanical Anatomy of a Sash Pulley
To understand why you must strip these components, you have to understand the rough opening tolerances. A standard cast-iron pulley sits inside a mortise in the side jamb. Its job is to provide a low-friction path for the sash cord or bronze chain to travel from the weight inside the pocket to the sash itself. When paint accumulates on the faceplate and the wheel, it creates a jagged surface. This surface acts like a saw, slowly fraying the cord every time you lift the window. If you are planning to replace windows because they are hard to open, stop. Often, a thorough cleaning of the pulley wheel is all that is required. The goal is to return the wheel to a state where it spins freely on its axle without the resistance of decades of ‘slop’ from previous paint jobs. This isn’t just about aesthetics; it is about the physics of the window’s operation.
Step 1: Removal Without Destruction
You cannot effectively clean a pulley while it is still in the jamb. You need to remove the screws holding the faceplate. However, those screw heads are likely buried under six layers of paint. Do not reach for a standard screwdriver yet. You need to identify the perimeter of the faceplate using a sharp utility knife. Score the paint deeply to break the bond between the metal and the wood. If you skip this, you will pull chunks of the wood jamb out with the pulley. Once the perimeter is clear, use a heat gun or a small amount of chemical stripper to reveal the screw slots. If they are flat-head screws, use a pick to scrape the slots clean. This ensures the screwdriver seats fully, preventing you from stripping the head. Remember, these are often brass or high-carbon steel screws that have been there for a century; treat them with respect.
Step 2: The Boiling Method vs. Chemical Strippers
Once the pulleys are out, you are faced with a choice: chemistry or heat. For cast iron pulleys, I prefer the ‘crock-pot method.’ It sounds like a kitchen hack, but it is a professional standard in historic restoration. Place the pulleys in a slow cooker with water and a drop of dish soap. Leave them on low overnight. The heat causes the metal to expand at a different rate than the paint, and the water softens the layers. By morning, the paint will often peel off in large, rubbery sheets. For stubborn areas or if the pulley is made of a more delicate alloy, a citrus-based stripper is safer than harsh methylene chloride. You must ensure the stripper reaches the axle. If the wheel doesn’t spin, the pulley is a decorative paperweight, not a functional component of a window repair.
“The integrity of the building envelope depends on the functional performance of every moving part within the rough opening. Failure of a single component like a pulley can lead to air infiltration and energy loss.” – ASTM E2112 Standard Practice
Step 3: Addressing the Axle and the Throat
After the bulk of the paint is gone, focus on the ‘throat’ of the pulley. This is the interior area where the wheel resides. Use a wire brush or a specialized metal pick to remove any remaining flecks of paint. If the wheel is still stuck, it is likely that paint has migrated into the axle housing. This is where a penetrating oil becomes your best friend. Spray a small amount and let it sit. Slowly work the wheel back and forth. You are looking for a smooth, silent rotation. If you hear a grinding noise, there is still debris inside. In a cold climate like Chicago or Minneapolis, a seized pulley leads to people forcing the window open, which breaks the seal and allows massive heat loss. A functional pulley allows the sash to sit squarely in the sill, which is essential for the U-factor of the window to remain effective. Without that tight closure, your triple-pane glass becomes irrelevant because the air is just leaking around the frame.
The Role of the Window Cleaner in Longevity
Once the pulleys are reinstalled and the window is functional, maintenance becomes the priority. Most people think a window cleaner only deals with glass, but a professional should also wipe down the tracks and the faceplates of the hardware. Dust and grime can mix with moisture to create a paste that eventually hardens, starting the cycle of friction all over again. When I train installers, I tell them that the glazing bead and the pulley are equally important to the homeowner’s comfort. If the sash doesn’t move easily, the homeowner won’t lock it. If they don’t lock it, the weatherstripping isn’t compressed, and the ‘Dew Point’ moves into the interior of the house, causing condensation on the glass.
Final Finishing and Lubrication
Do not paint the pulley wheels after cleaning them. This is the mistake that started the problem in the first place. If you want to protect the metal, use a clear coat of lacquer or a light rub of paste wax. For the axle, a dry graphite lubricant is superior to oil because it won’t attract dust. When you reinstall the pulleys, check the alignment with the sash weights. The cord should hang perfectly plumb. If it is rubbing against the side of the pulley housing, you need to adjust the position in the mortise. This precision is what separates a master glazier from someone who just throws parts at a hole in the wall. You are managing the movement of the sash to ensure it serves as a barrier against the elements while still providing the ventilation it was designed for a hundred years ago.