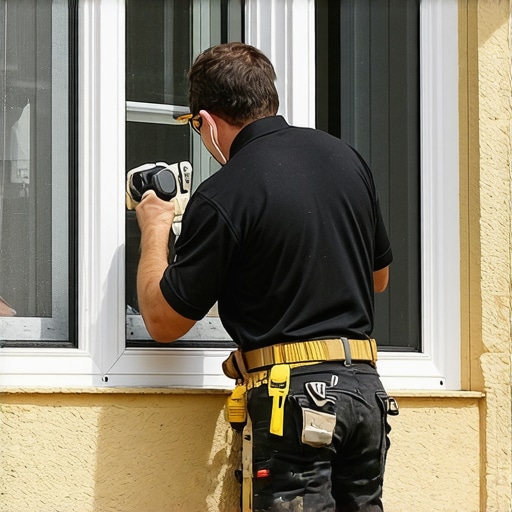
How to Spot a Bad Window Installation Before You Pay the Contractor
I have spent over twenty-five years in the glazing industry, starting with the heavy lifting of curtain walls in commercial skyscrapers and moving into the meticulous world of residential historic restoration. In that time, I have seen it all—the good, the bad, and the truly negligent. A window is far more than just a piece of glass held in a frame; it is a complex thermal barrier and a critical component of your home’s water management system. If you treat a window replacement as a simple ‘plug and play’ task, you are inviting rot, mold, and astronomical energy bills into your living space. Most homeowners don’t realize that the highest-quality window on the market will perform worse than a cheap builder-grade unit if the installation is botched. Before you sign that final check and let the crew pack up their truck, you need to conduct a forensic-level inspection of the work performed.
A few years ago, I was called to a beautiful home in the suburbs of Chicago during a particularly brutal February. The owners had just replaced every window in the house with high-end wood-clad units, yet they were seeing frost forming on the interior sills. They thought they had been sold defective glass. I walked in with my thermal imaging camera and a hygrometer, and within ten minutes, the truth was clear. It wasn’t the windows that were failing; it was the interface between the window frame and the rough opening. The installers had skipped the backer rod and used a cheap, non-expanding caulk that had pulled away from the substrate as the house shifted in the cold. The frost wasn’t a manufacturing defect; it was a symptom of massive air infiltration that was moving the dew point directly onto the interior wood sash. This is the reality of poor installation—it turns a significant investment into a liability.
“Installation is just as critical as the window performance itself. A high-performance window installed poorly will fail.” – AAMA Installation Masters Guide
The Physics of the Rough Opening
The first place a bad installation hides is within the rough opening. When your old windows are removed, the contractor is left with a hole in the wall that is rarely perfectly square or level. A master glazier understands that the window must be centered and supported by shims to ensure it operates correctly for the next thirty years. Shims should be placed at every anchor point, typically every 12 to 16 inches, and specifically under the sill to prevent sagging. If you see an installer ‘toenailing’ a window into the frame without using shims to bridge the gap, you are looking at a future failure. Without proper shimming, the frame can rack or bow, which puts undue stress on the insulated glass unit (IGU). This stress can eventually lead to a seal failure, where the argon gas escapes and is replaced by moisture-laden air, resulting in that permanent fogging between the panes that no window cleaner can ever reach.
Water Management and the Shingle Principle
The most dangerous threat to your home isn’t the cold; it is water. A window installation must adhere to the ‘shingle principle,’ which dictates that every layer of flashing must overlap the one below it so that gravity pulls water away from the structure. This starts with the sill pan. A sill pan is a flashing component that sits at the bottom of the rough opening, sloped toward the exterior. If water ever gets past the primary seals of the window, the sill pan catches it and directs it back outside through weep holes. I have seen countless ‘pro’ installers skip the sill pan entirely, relying instead on a bead of caulk. Caulk is a secondary defense, not a primary water barrier. If your contractor didn’t install a sloped sill pan or at least a high-quality flexible flashing tape integrated with the house wrap, your headers and studs are at risk of rot. Look for the presence of a drip cap at the head of the window—this is a small L-shaped piece of metal that prevents water from running down the wall and getting trapped behind the top of the window frame.
Thermal Performance in Cold Climates
In northern regions where the winter wind can be relentless, the U-Factor of your window is the most important metric on the NFRC label. The U-Factor measures the rate of heat loss; the lower the number, the better the window is at keeping heat inside. However, even a window with a U-Factor of 0.20 is useless if the air infiltration rate is high. Air infiltration is measured in cubic feet per minute per square foot of window area. A bad installation often leaves gaps around the perimeter that are ‘stuffed’ with fiberglass batts. This is a major red flag. Fiberglass does not stop air; it acts as a filter. To properly seal a window, the installer should use a low-expansion spray foam specifically formulated for windows and doors. This creates an airtight seal that prevents the thermal bridge between the exterior and interior of the home. If you can feel a draft around the trim on a windy day, the air barrier has been compromised. In these cold climates, we also prioritize placing the Low-E coating on Surface #3—the interior-facing side of the double-pane glass—to reflect radiant heat back into the room.
“Standard practice for installation of exterior windows, doors and skylights requires a continuous air barrier and integrated flashing to prevent moisture intrusion.” – ASTM E2112
Hardware, Sash Alignment, and Operation
Once the window is in the hole, you must test the mechanics. An operable window—whether it is a double-hung, casement, or awning style—should move with minimal effort. If you have to fight the sash to get it to lock, the frame is likely racked. This means the window is not plumb, level, and square. Open the window halfway and let go; it should stay in place. If it slides down or swings open on its own, it is out of level. Check the reveal—the gap between the sash and the frame when the window is cracked open slightly. That gap should be uniform from top to bottom and side to side. If it is wider at the top than the bottom, the window is sitting crooked in the rough opening. Furthermore, inspect the glazing bead—the strip that holds the glass in the frame. It should be tight and consistent. If you see gaps in the corners of the glazing bead, it is a sign of poor manufacturing or rough handling during window repair or installation.
The Caulk-and-Walk Trap
The final sign of a bad job is the quality of the sealants. A sloppy caulk joint is often used to hide a poorly measured window that is too small for the opening. While a window needs room for expansion and contraction, a gap larger than 3/8 of an inch is a sign that the measurement was botched. If the installer uses thick, globby beads of caulk to bridge a massive gap, it will eventually fail. The sealant should be smooth, consistent, and tooled into the joint. We look for high-performance polymers or silicones that remain flexible over time. If the contractor is using cheap latex caulk on an exterior application, it will crack within two seasons. A proper installation is a symphony of technical details: the rough opening preparation, the shimming, the flashing tape integration, the foam insulation, and finally, the exterior sealant. If any one of these steps is skipped, the entire system is at risk. Before you pay, walk around with a critical eye. Look for the drip cap, ask about the sill pan, and test every operable sash. You are not just paying for glass; you are paying for the integrity of your home’s envelope.